
Read this article in: German
This article introduces the Course Management page. Here, you will learn how to create new E-Learning courses as well as how to manage, edit, or duplicate existing courses.
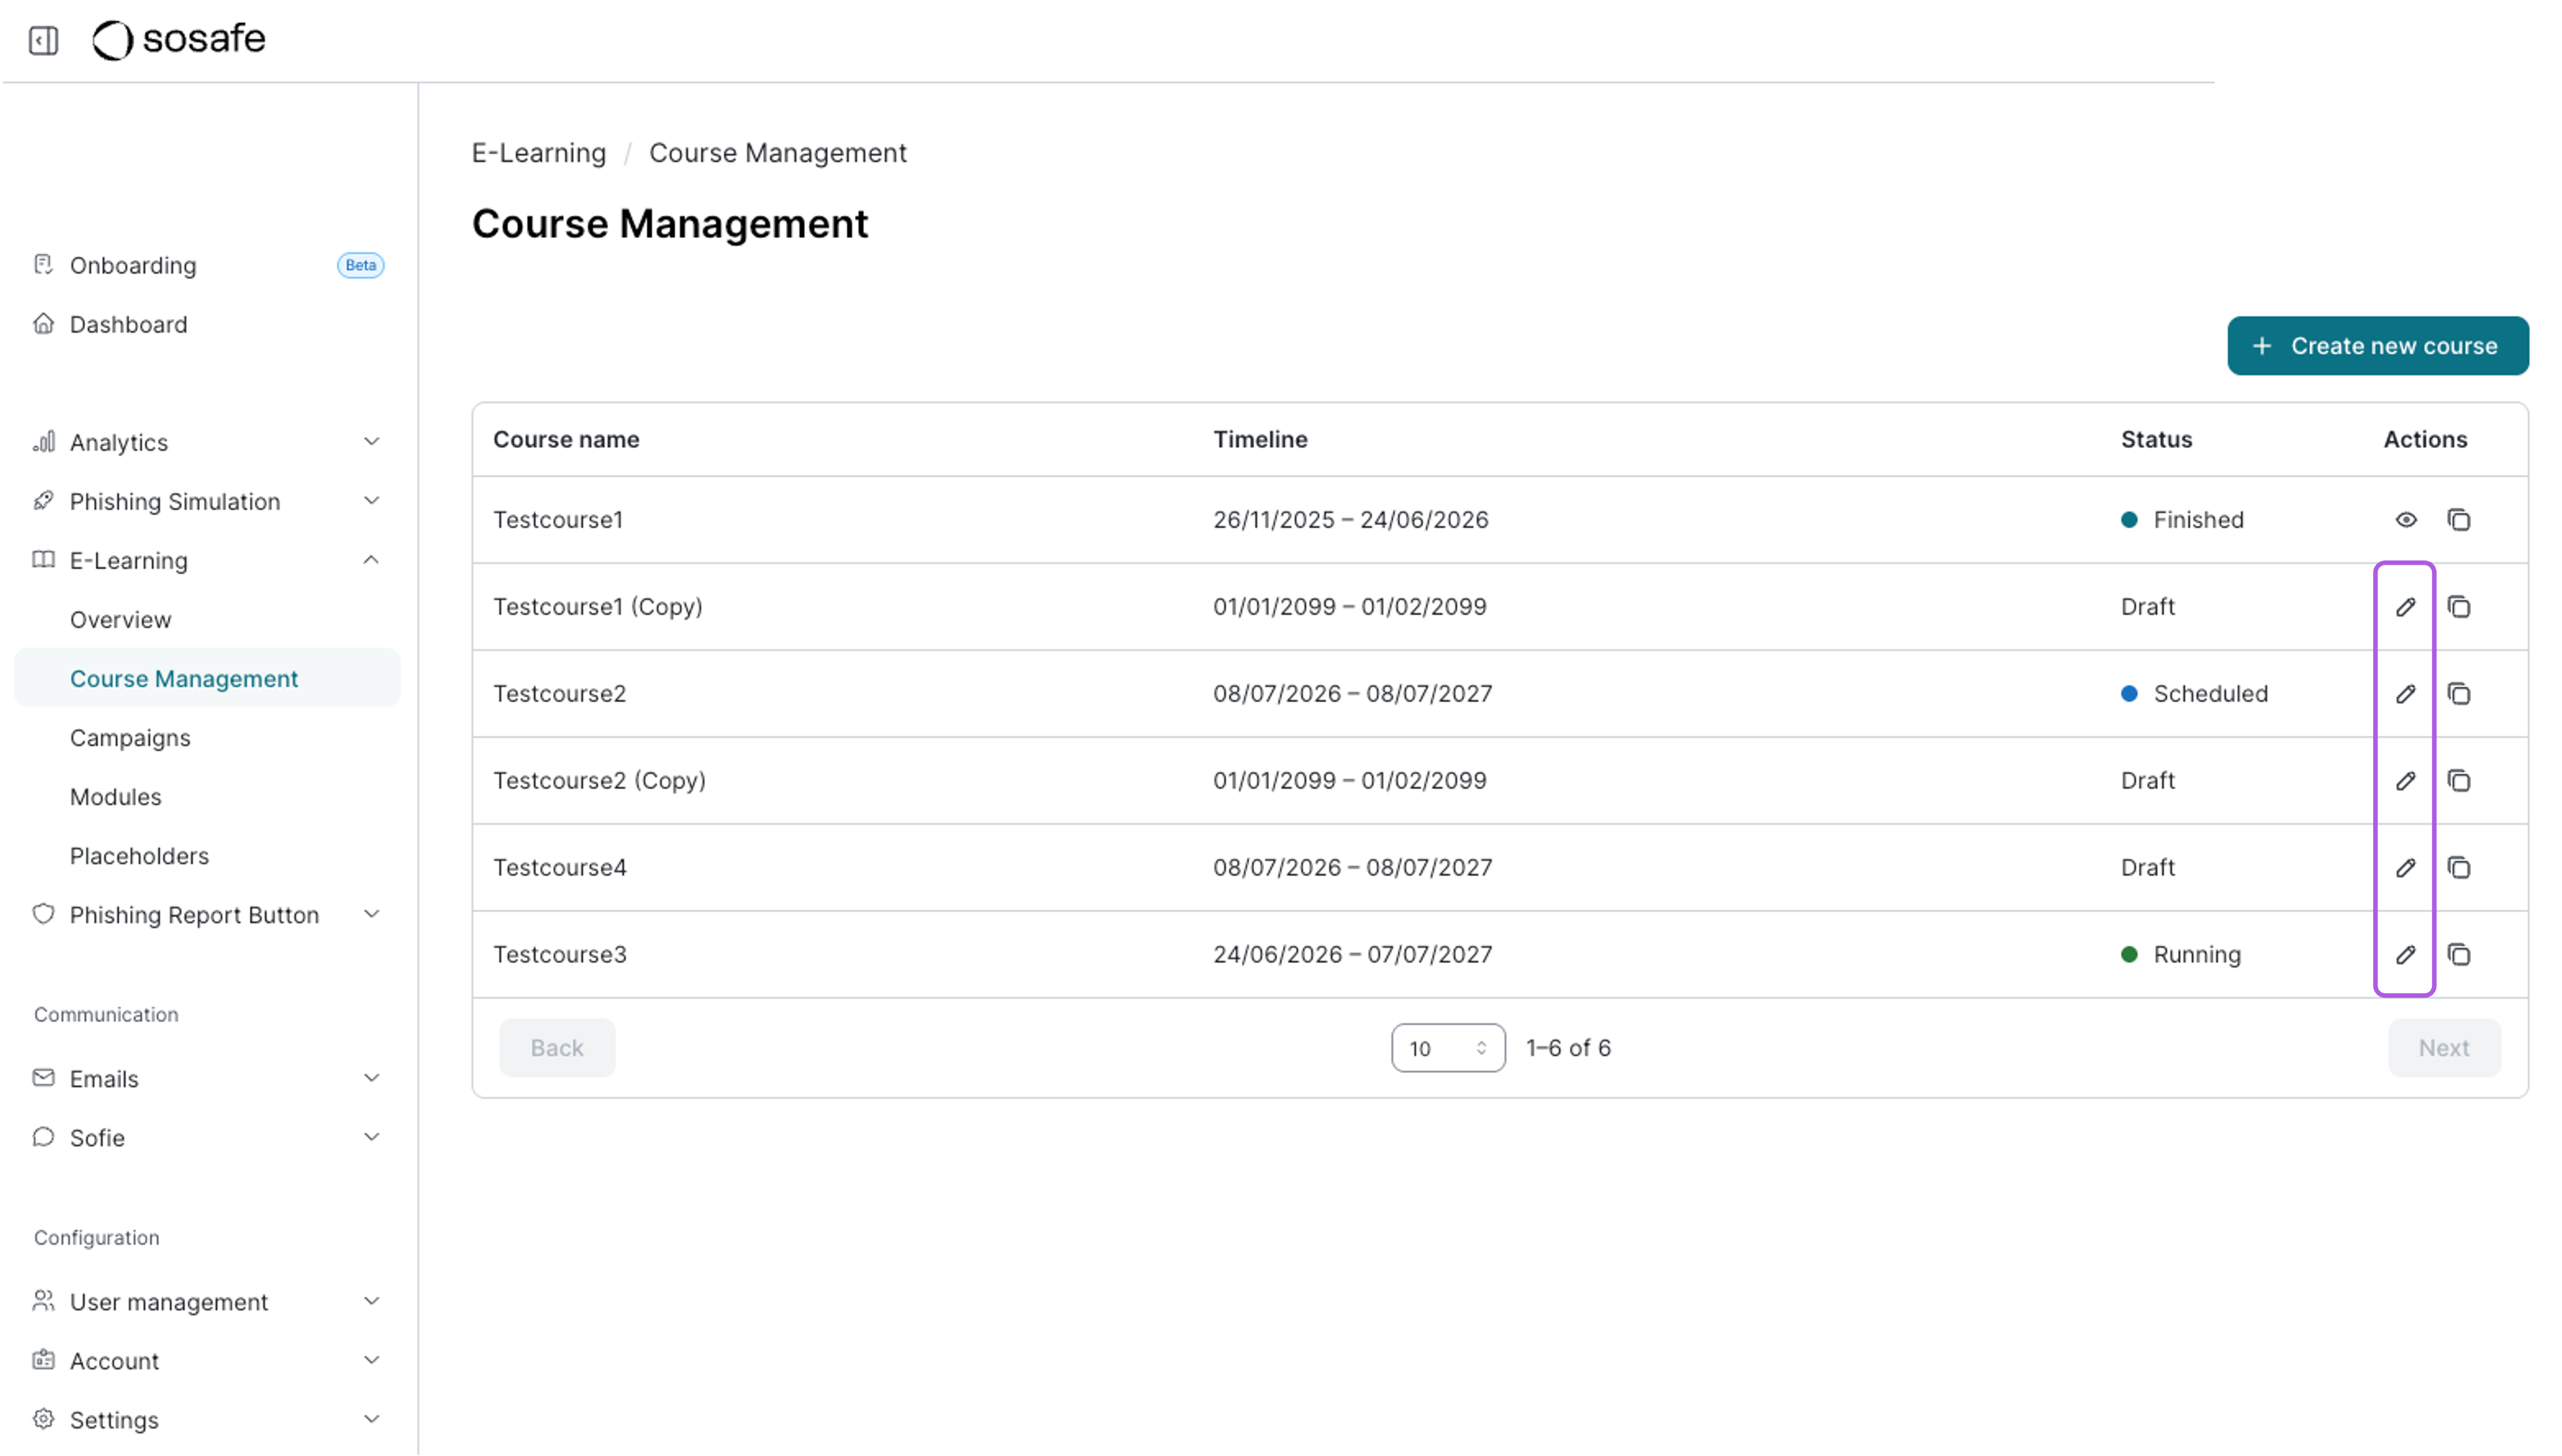
The Course Management page provides a clear overview of all your created E-Learning courses and their settings. Let’s take a look at the various functions in detail.
Overview
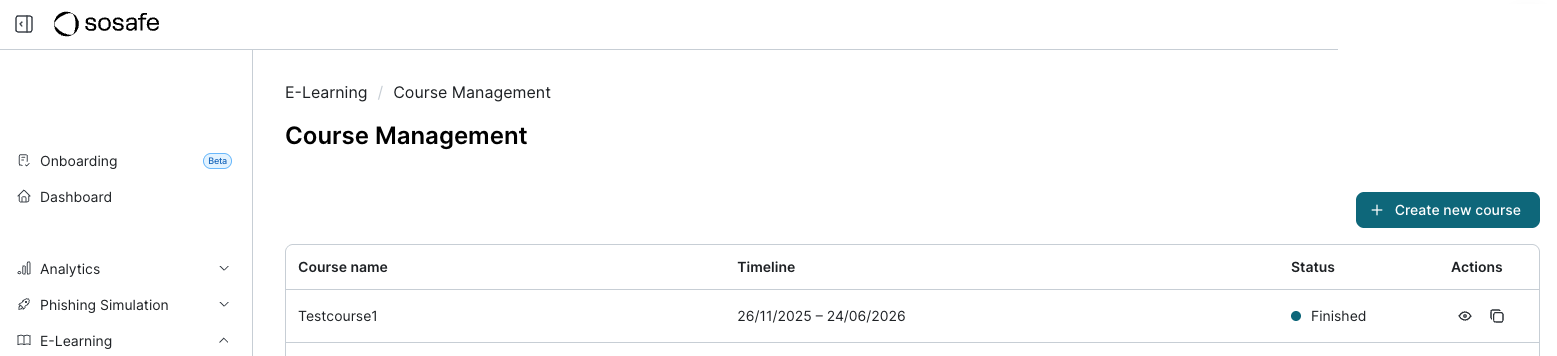
In the SoSafe Manager, navigate to E-Learning / Course Management. There, you will find the overview of your created courses.

Creating new E-Learning courses
Select + Create new course to begin. This opens the guided 6-step process for creating a course. Complete these steps one after the other.
For a detailed step-by-step guide with further information, please refer to this support article.
Managing and editing created E-Learning courses
Course Management also allows you to review and edit created E-Learning courses. The available editing options and processes depend on the current status of the E-Learning course.
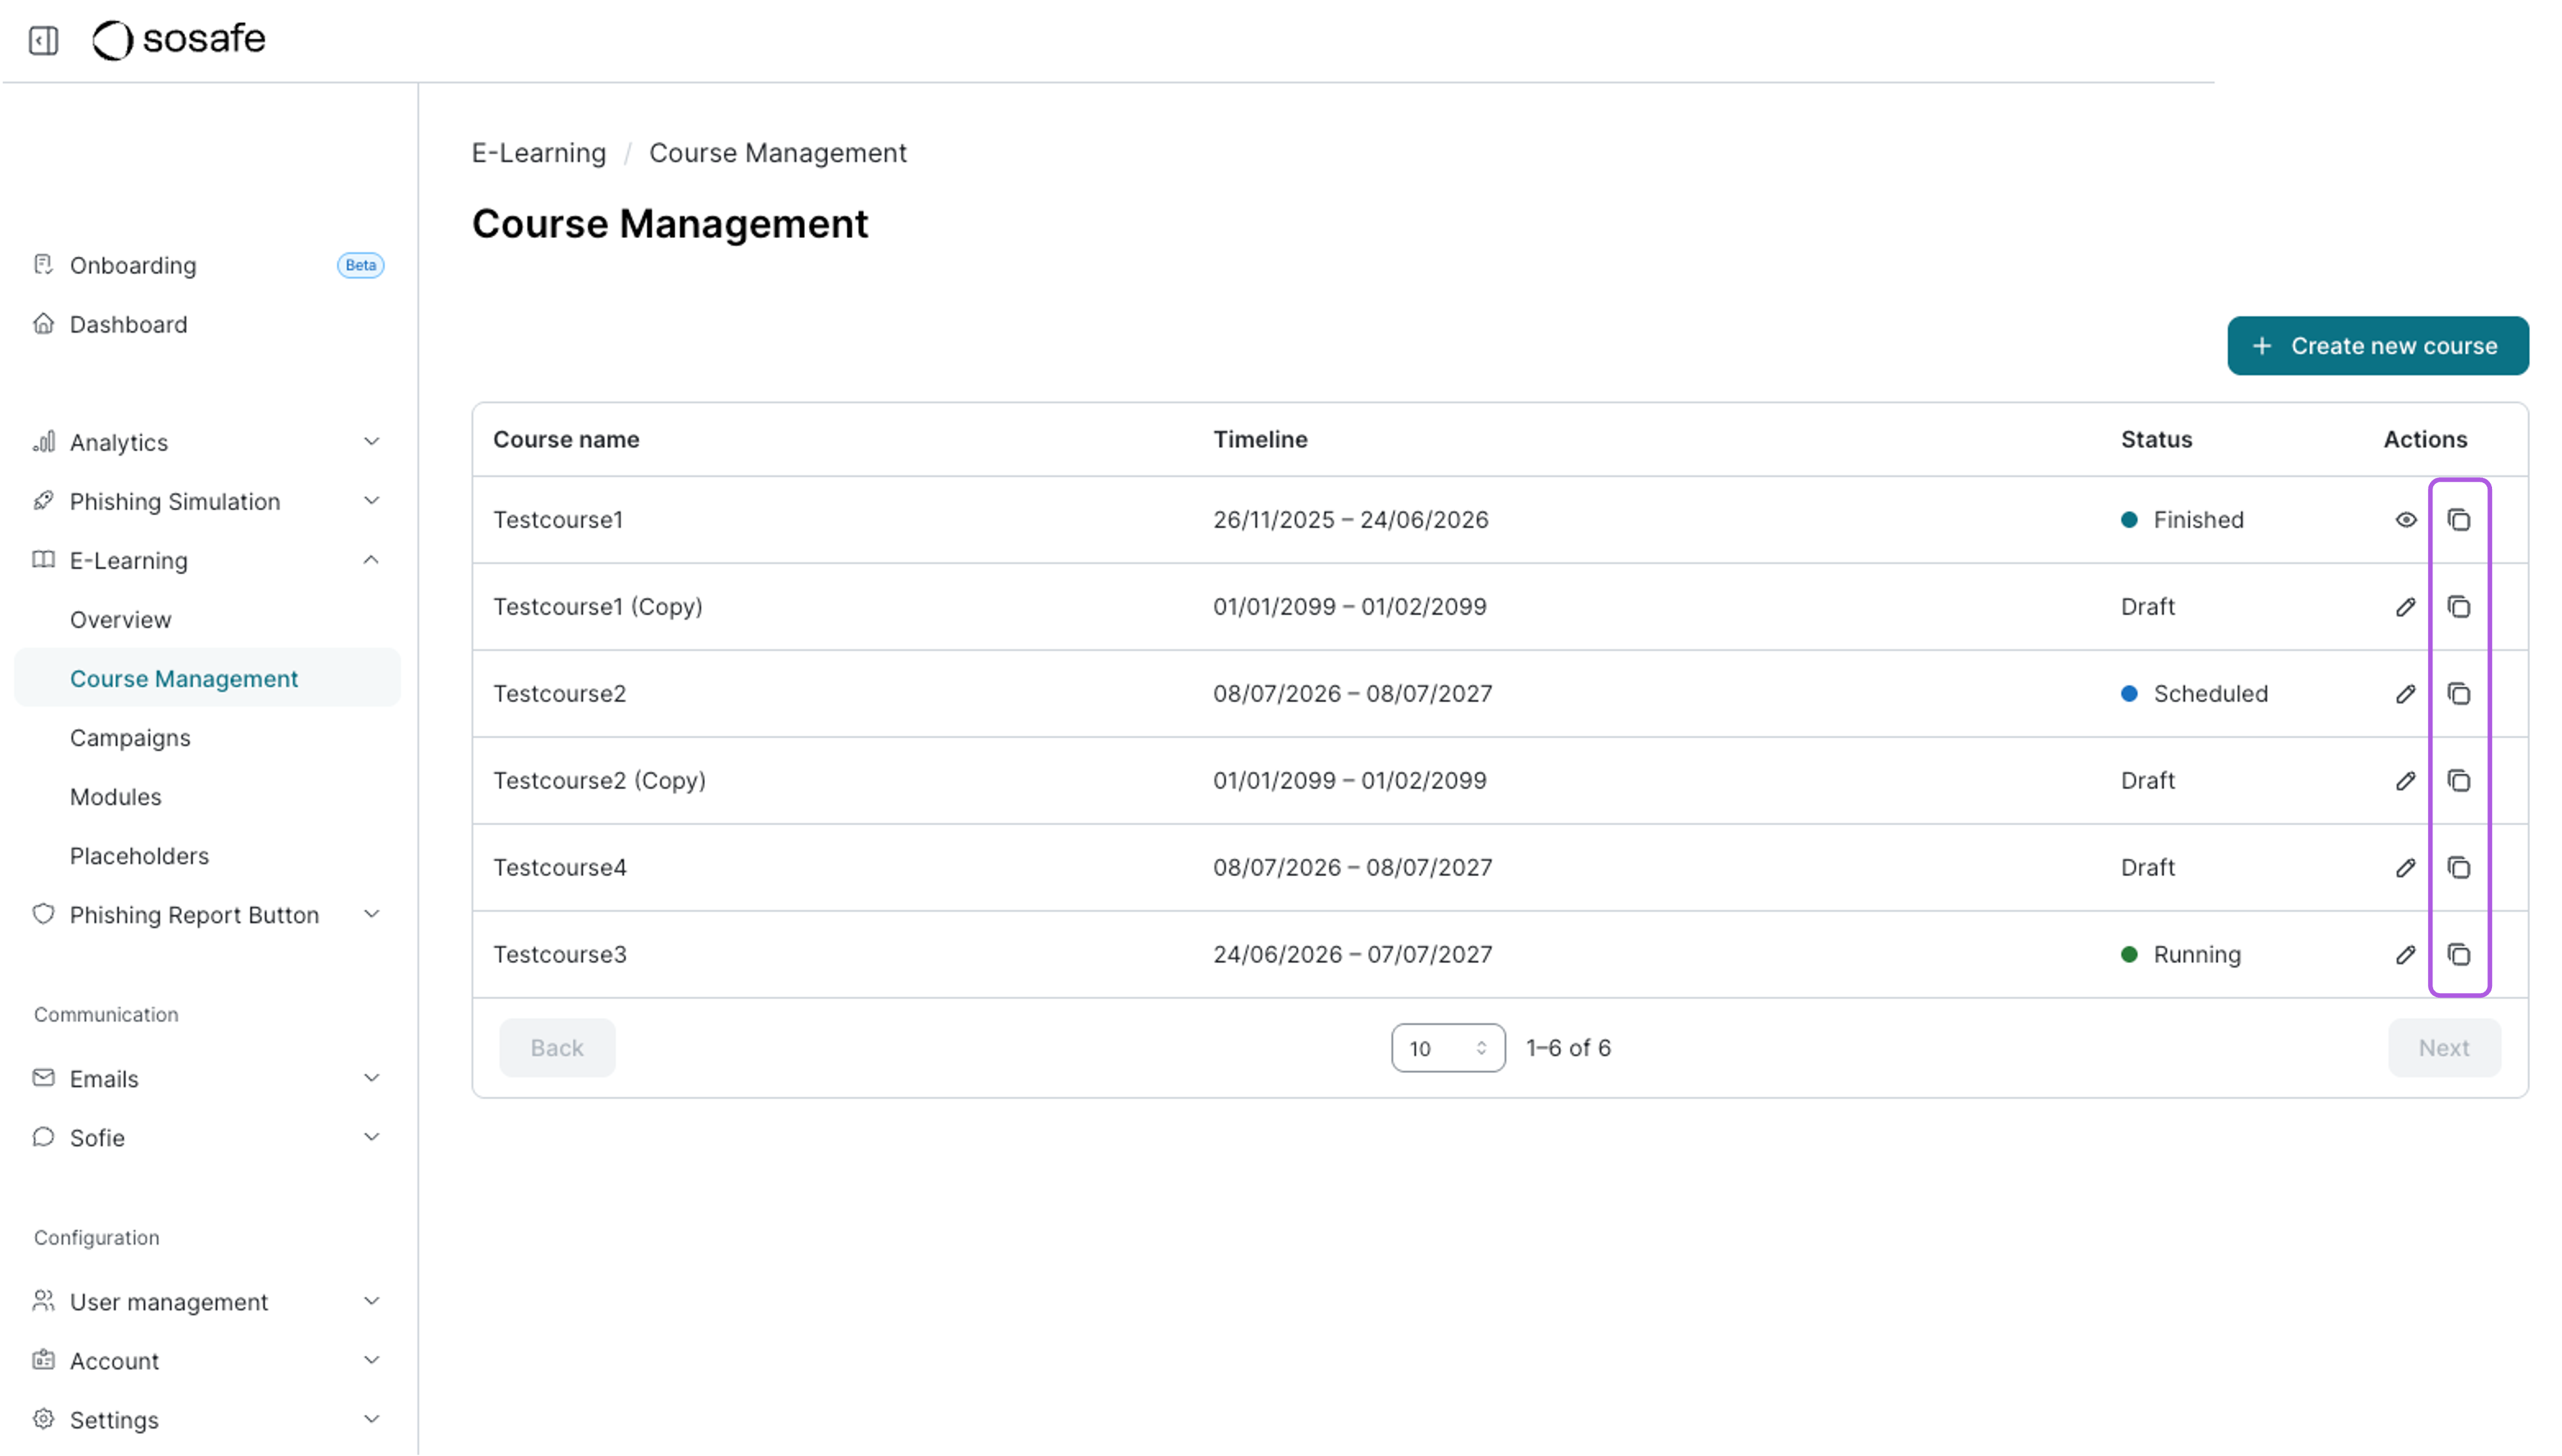
Here is an overview of the E-Learning course statuses:
-
Running = running E-Learning course
-
Scheduled = the 6-step course creation process is complete and the course has been scheduled to launch at a future date
-
Draft = the creation of a new E-Learning course has begun, but it is incomplete or has not been confirmed yet
-
Finished = a finished and inactive course
To view or edit the settings of a course, select the pencil icon in the Actions column. Depending on the current status of your course, different options will be available to you.
The following sections show you which adjustments you can make in each case:
a) Editing a course in "Draft" status
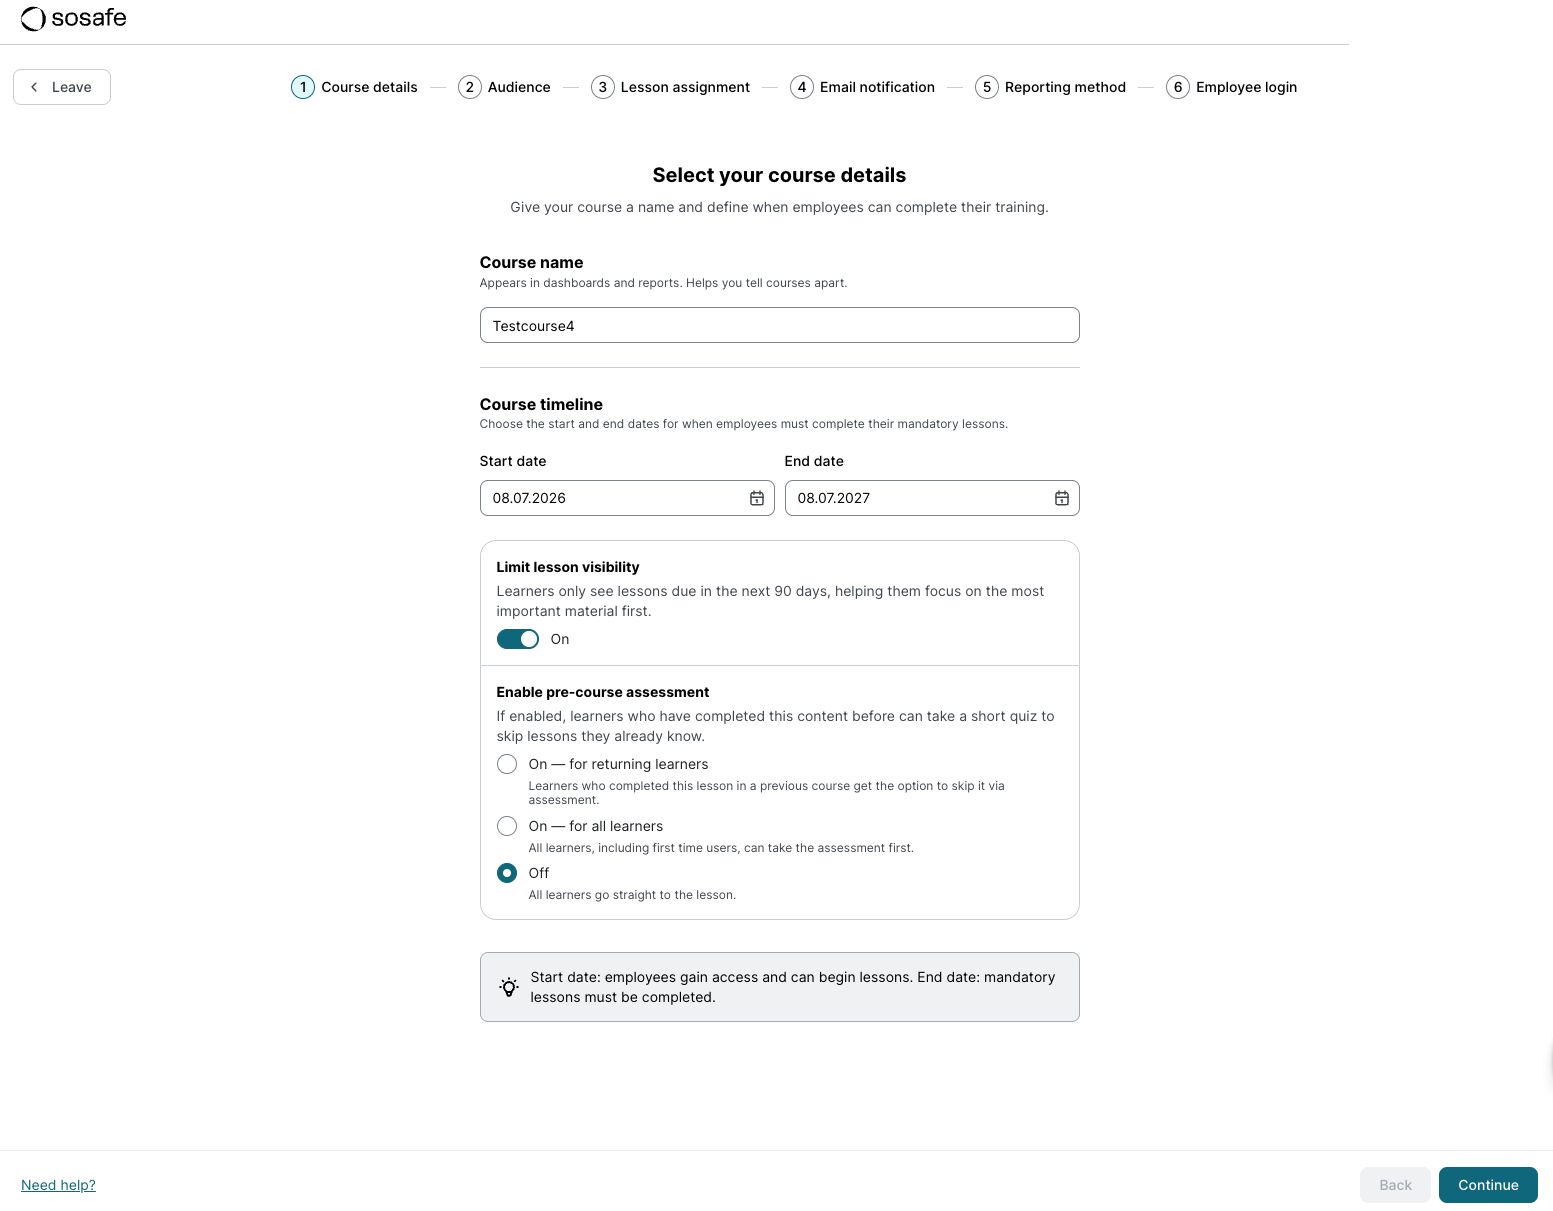
After selecting the pencil icon, you will land on the first page of the guided 6-step process.
-
Make your adjustments in the desired steps.
-
Select Continue to move through the subsequent steps until you reach the course overview.
-
Select Launch course to save your changes and officially activate the E-Learning.
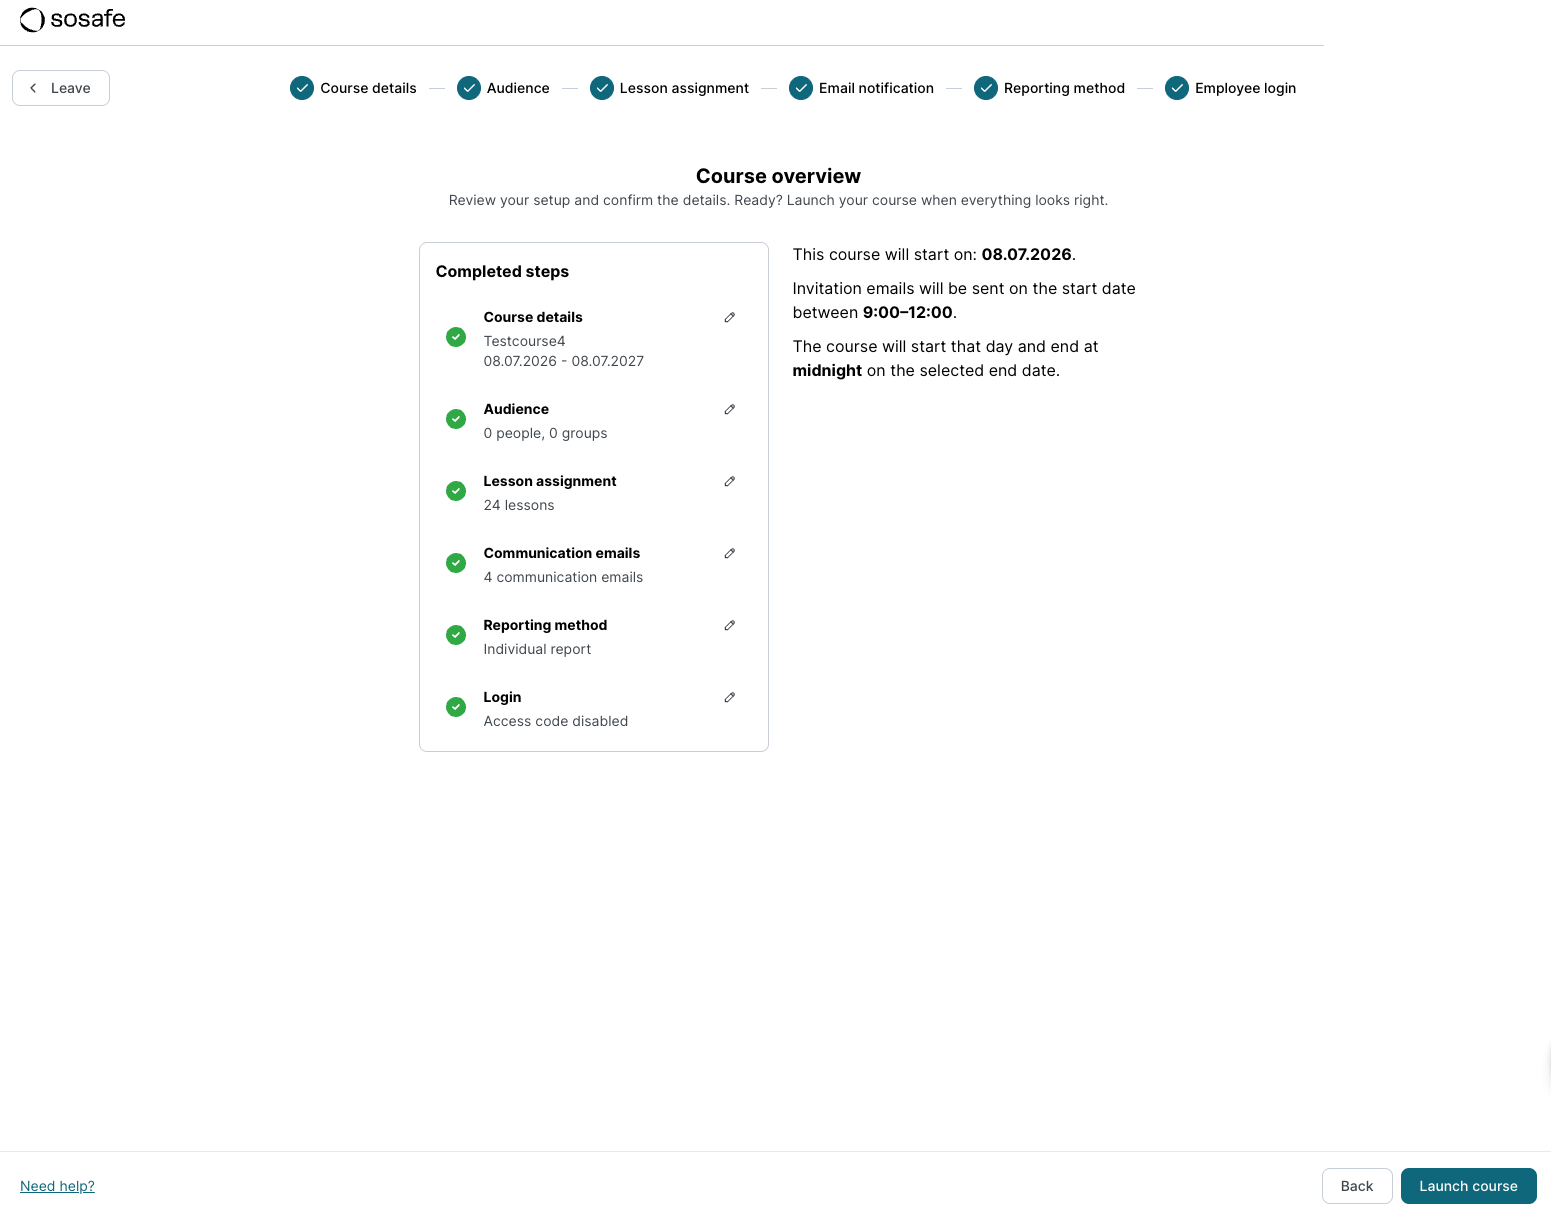
Note: The status of the course will now change from Draft to Scheduled. If you wish to make further changes to this course at a later time, you can do so at any time. The procedure for this can be found in the following section.
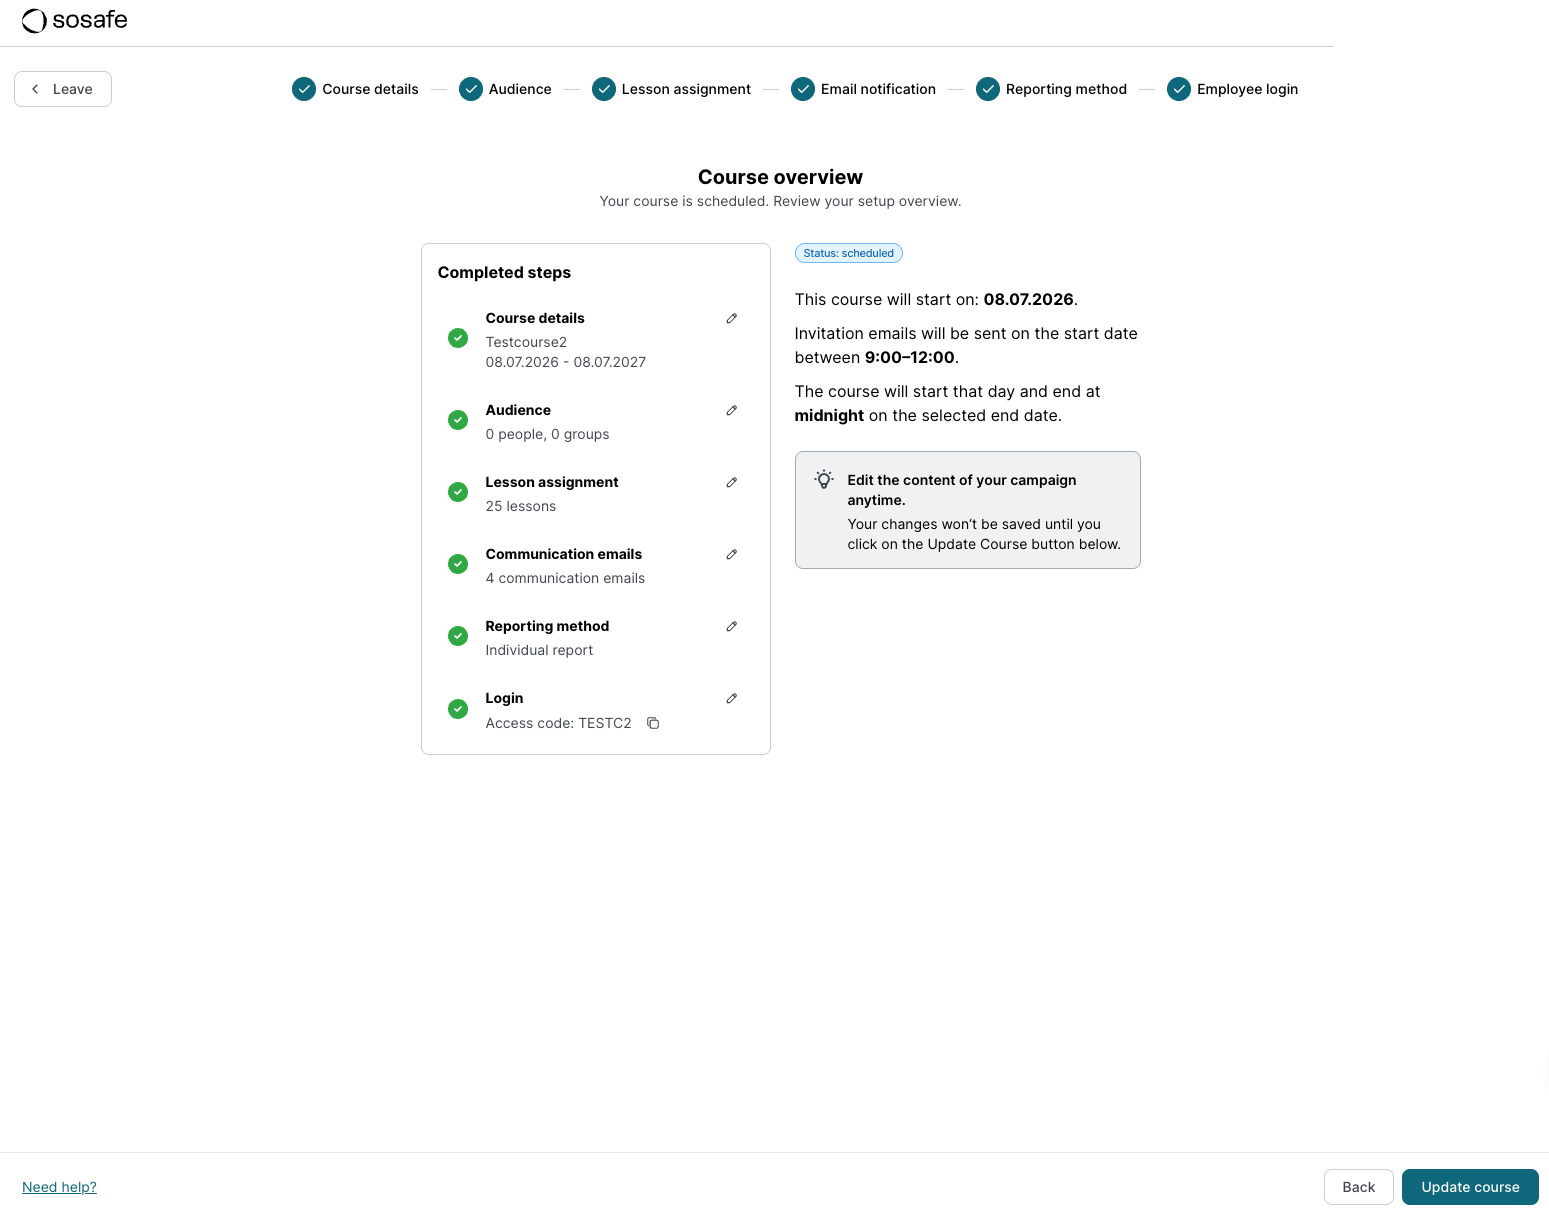
b) Editing a course in "Scheduled" status
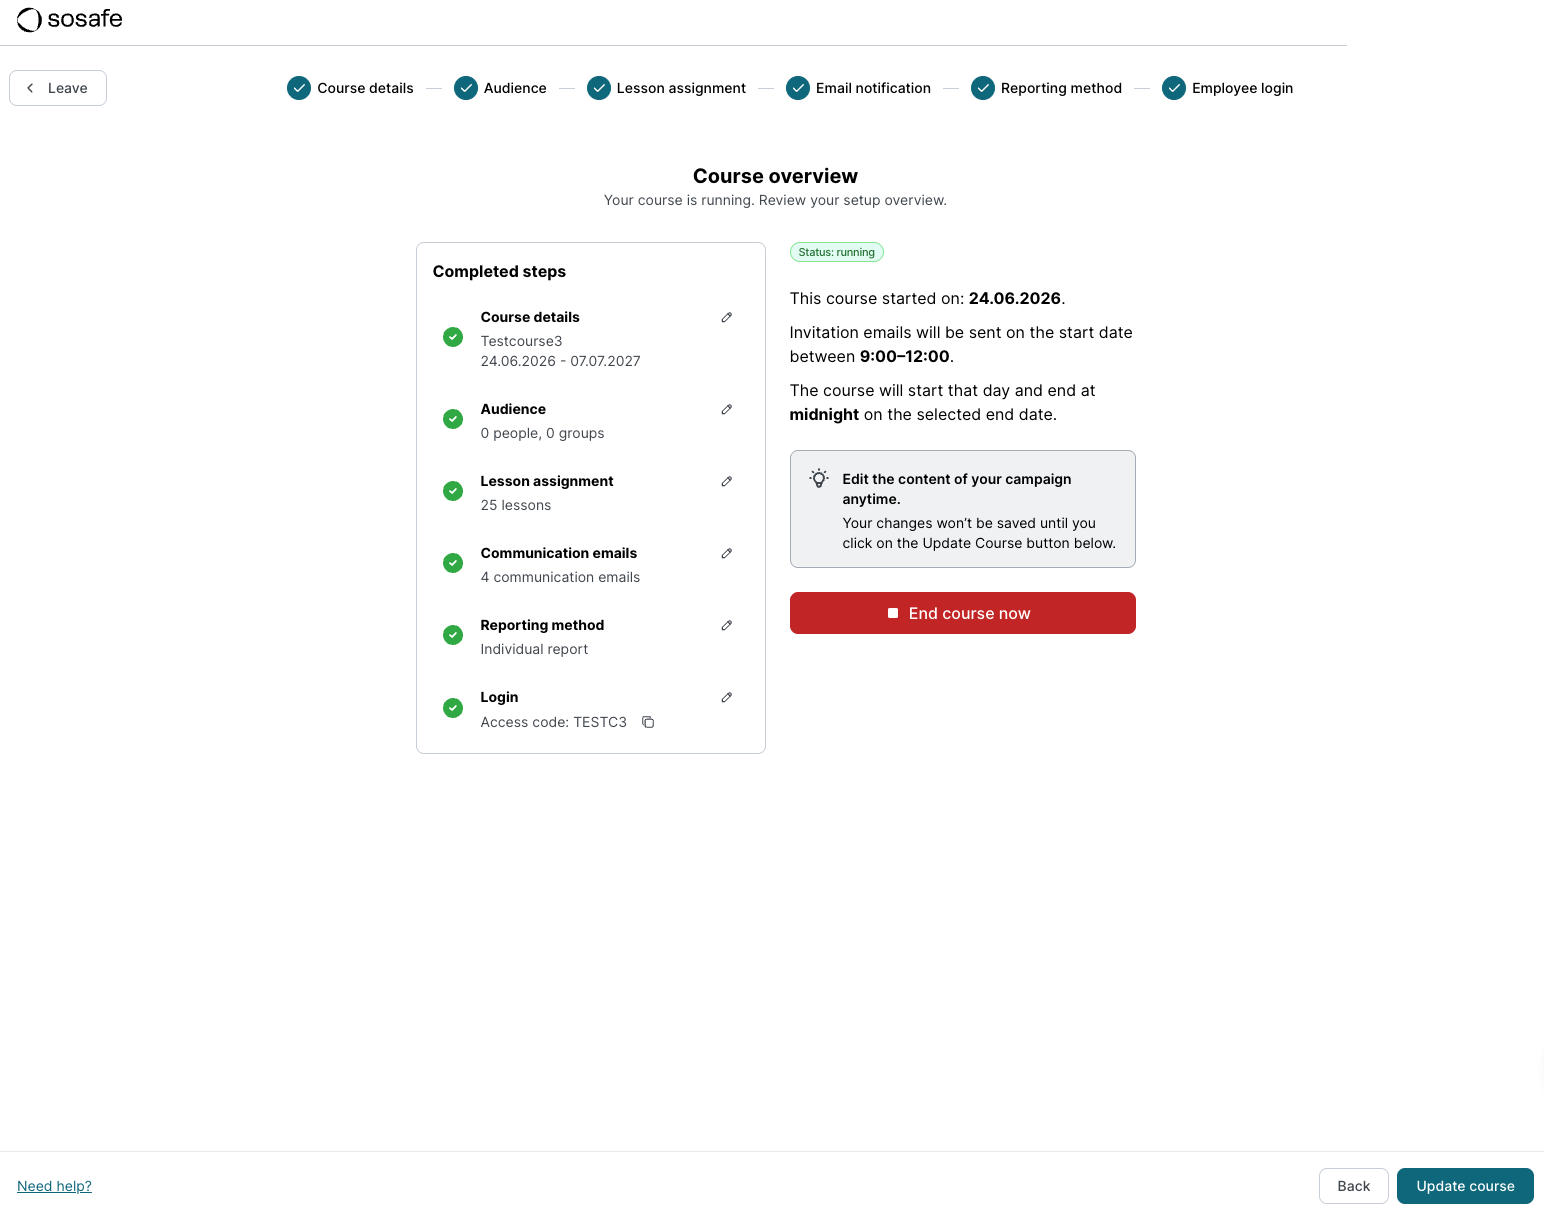
After selecting the pencil icon, you will be directed to the Course overview.
-
Within the listed completed step section, select the respective pencil icon of the step to make specific changes to that step.
-
Select Continue to move through the subsequent steps until you are back at the course overview.
-
Select Update course to save your changes. You will then be automatically redirected back to the Course Management page.
c) Editing a course in "Running" status
After selecting the pencil icon, you will also land on the Course overview.
Changing settings:
-
Select the pencil icon next to the desired step in the completed step section to make adjustments.
-
Select Continue to move through the subsequent steps until you are back at the course overview.
-
Select Update course at the end to apply the changes.
Note: The start date of courses that are already running cannot be changed retroactively.
Ending a course prematurely:
If you want to stop the course, select the red End course now button and confirm the action.
Attention: This action is irreversible. A completed course cannot be restored.
d) Viewing a course in "Finished" status
Courses with the Finished status cannot be edited retroactively. However, you can check the applied settings at any time by selecting the eye icon in the Actions column.
You will then be redirected to the course overview to review the settings.
Duplicating E-Learning courses
You can easily reuse already created courses as templates by duplicating them.
Duplicating a course is particularly useful for your second-year campaign, for instance.
-
In the Actions column, select the double rectangle icon (Duplicate) next to the desired course.
-
The duplicated course will immediately appear as a new Draft in your course overview.
-
The title of the original course will be adopted and appended with (Copy) for better recognition. You can now freely edit and customize this draft.