
In this article, we explain how to whitelist Exchange Online (Microsoft 365).
The following steps are required:
-
First, you set up an IP permission list that contains our IP address.
-
Then, you set up a message flow rule so that our incoming e-mail can bypass both the Clutter folder and Microsoft's EOP spam filter.
-
In addition, a rule must be created in Microsoft 365 regarding the Junk folder.
Once you have completed this process, it may take some time for the settings to be fully processed. We recommend that you wait one to two hours before you test whether the whitelisting was successful.
For the IP addresses used, please refer to the SoSafe Manager Portal under Simulation > Whitelisting. Self-service customers can only view this information through their individual SoSafe Manager access. All other customers can also access this information via the following direct link:
When using Microsoft Defender for Microsoft 365, please also see this article:
Whitelisting domains with safe links (Microsoft Defender)
Chapter 1: Setting Up the IP Permission List
Step 1
Log in to your mail server portal.
Step 2
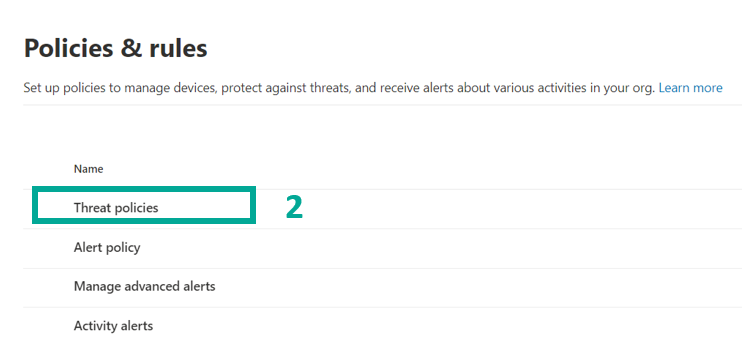
Under “Policies & rules” (1) select “Threat policies” (2).

Step 3
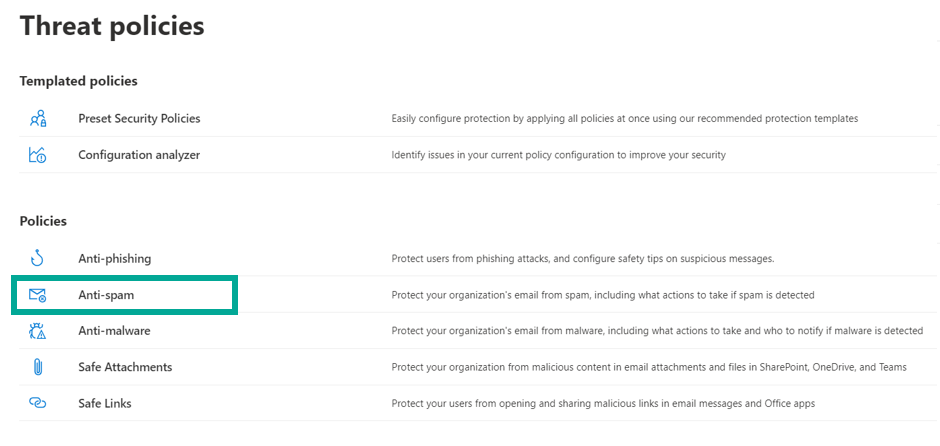
Click on “Anti-spam”.
Step 4
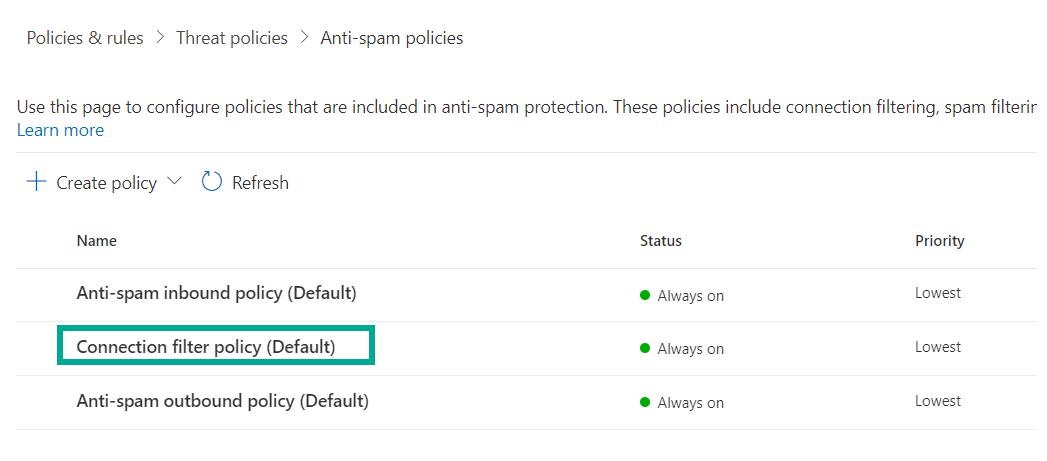
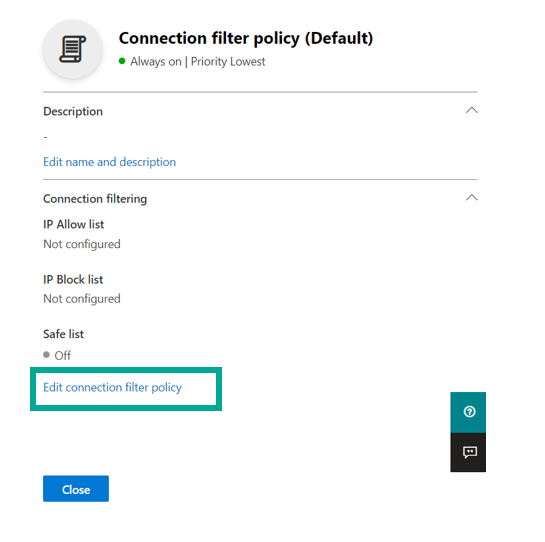
Click on Connection filter policy. A pop-up window will open.
Step 5
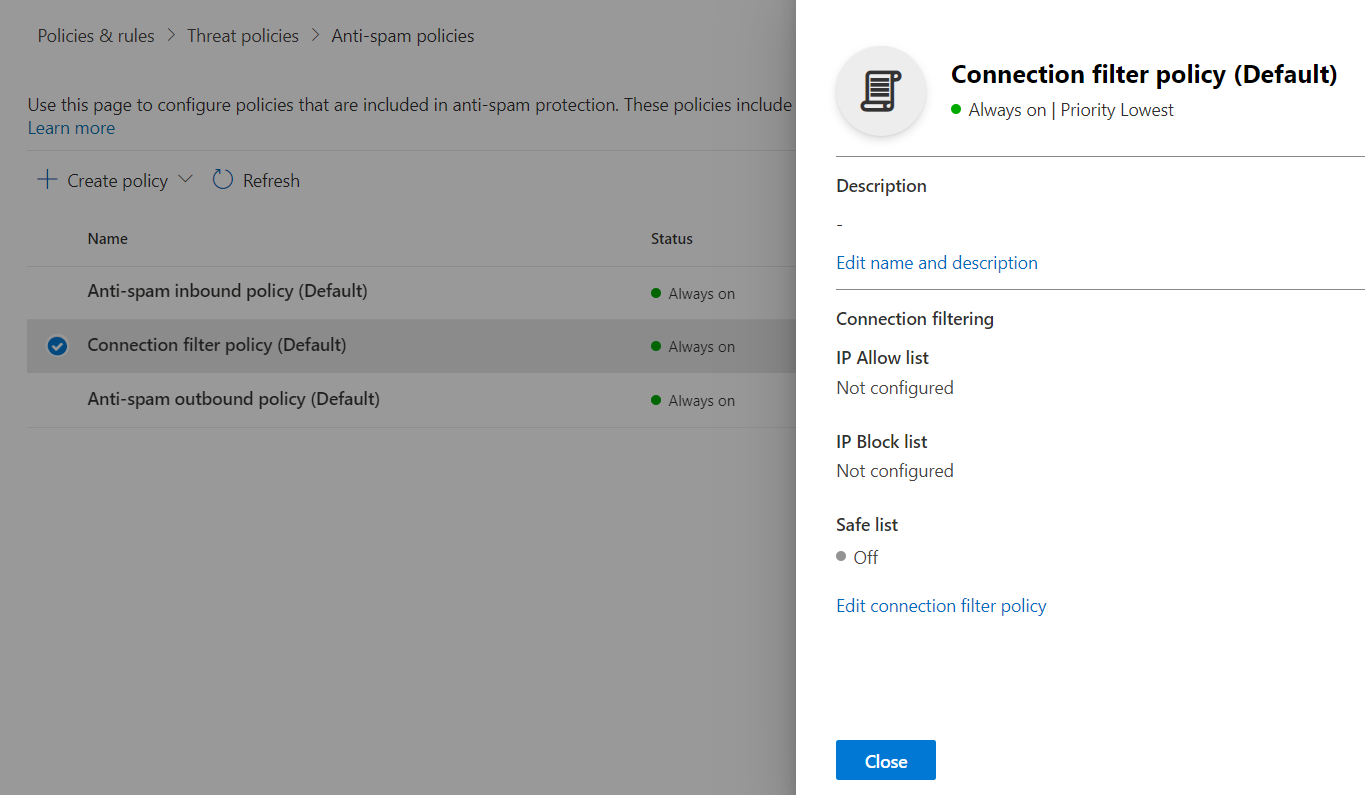
Click “Edit connection filter policy”.
Step 6
Insert our IP address here (see platform or direct link) (1) and click “Save” (2).
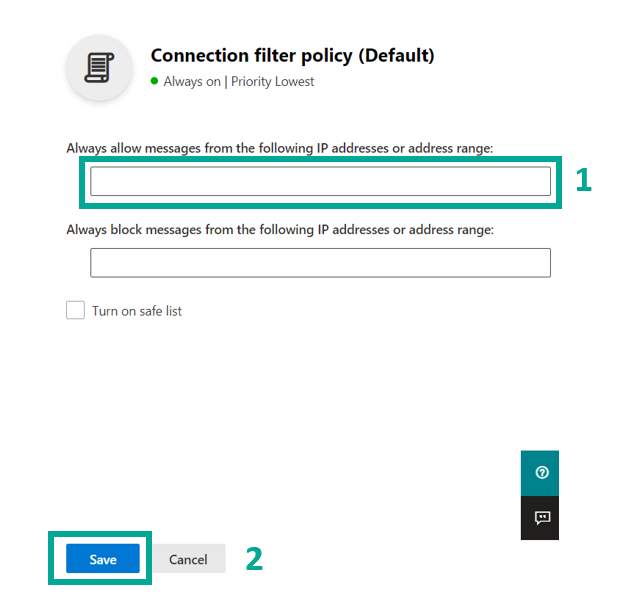
Step 7
Click on “Save”. This completes the Setting Up the IP Permission List section.
Chapter 2: Bypass Spam and Clutter filters
Step 1
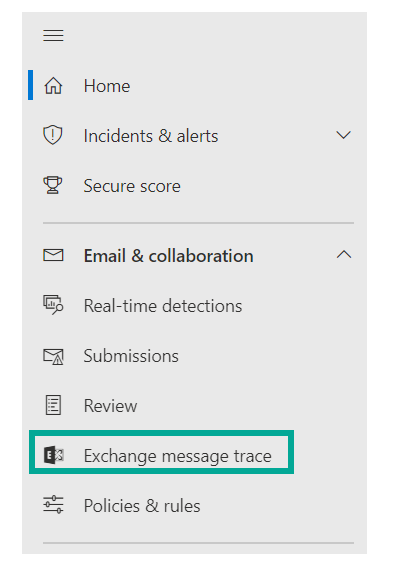
Log in to your mail server portal and click on the main menu on the left side.
Choose “Exchange message trace” in the left menu. The Exchange Admin Center opens in a new window.
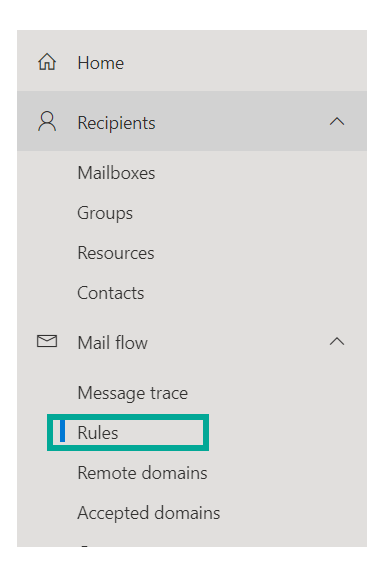
Step 2
Click on “Rules” under the drop-down menu “Mail flow”.
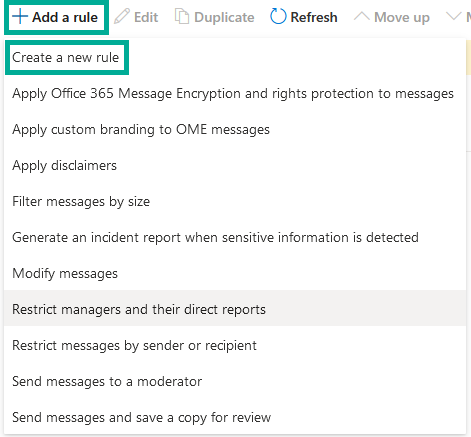
Step 3
Click on the plus icon and select “Add a rule…”. A pop-up window opens.

Step 4
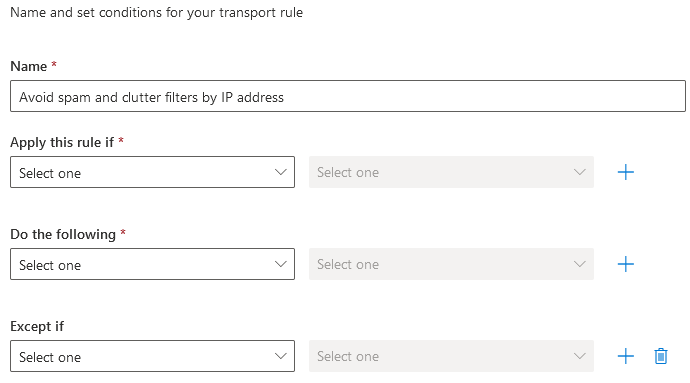
Give the rule a name, e.g., “Avoid spam and clutter filters by IP address”.
Step 5
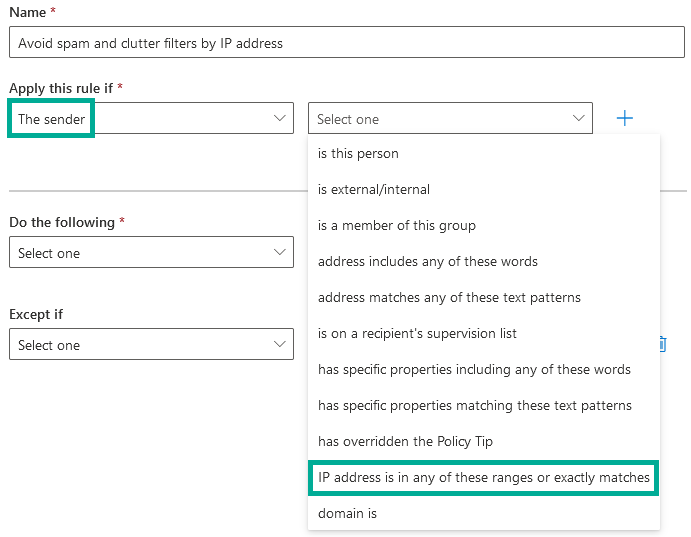
In the drop-down menu, under the “Apply this rule if...” item, select the “The sender...” item. - then activate the rule “IP address is in any of these ranges or exactly matches”.
Step 6
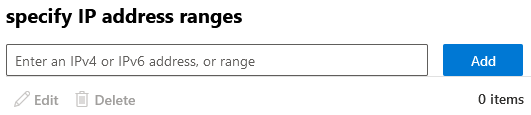
Enter our IP address (see platform or direct link) in the window that opens and click on the “Add” button to add them. Add more addresses if necessary and then click on “Save”.
Step 7
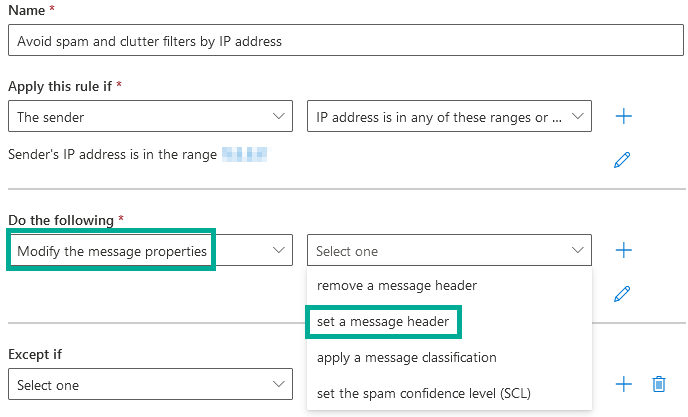
In the drop-down menu under “Do the following...” click “Modify the message properties...” and then click “set a message header”.
Step 8
On the right this text should appear: Set the message header *Enter text… to the value *Enter text....
Enter “X-MS-Exchange-Organization-BypassClutter” for the first placeholder and “true” for the second placeholder.

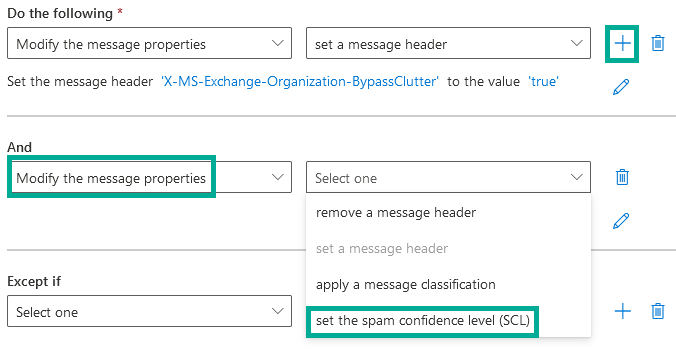
Step 9
Click on the blue plus symbol (+) to add another action and select “Modify the message properties…” from the drop-down menu, then select “set the spam confidence level (SCL)”.
Step 10
In the pop-up window, select the option “Bypass spam filtering” and press “Save”.

Step 11
Now click on “Next” to get to the next section “Set rule settings”.
Scroll down to the “Match sender address in message” field and select “Envelope” instead of “Header”.
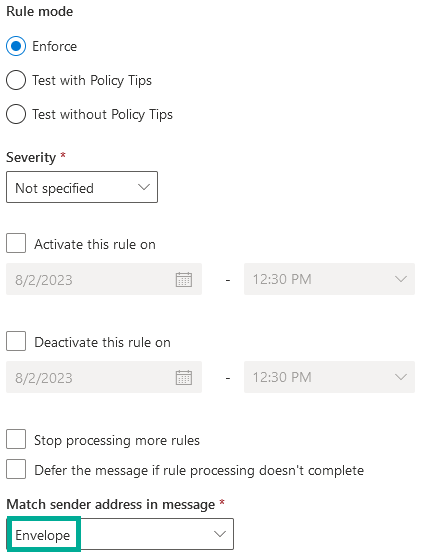
Click on “Next” again.
The finished rule should look like this:
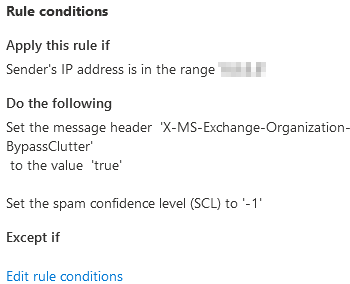
Press “Finish”. Then set the rule from “Disabled” to “Enabled”.
This completes the chapter Bypass Spam and Clutter filters.
Chapter 3: Bypass Junk filter
Step 1
Follow the steps 1 – 3 in chapter 2 and open “Rules” under the drop-down menu “Mail flow”.

Step 2
Click on the plus icon and select “Add a rule…”. A pop-up window opens.
Step 3
Give the rule a name, e.g., “Junkfilter”.
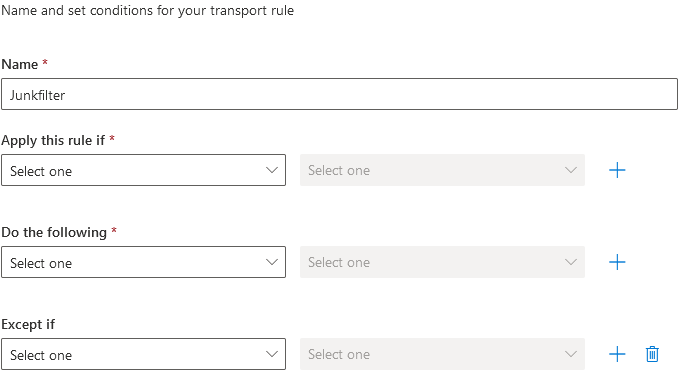
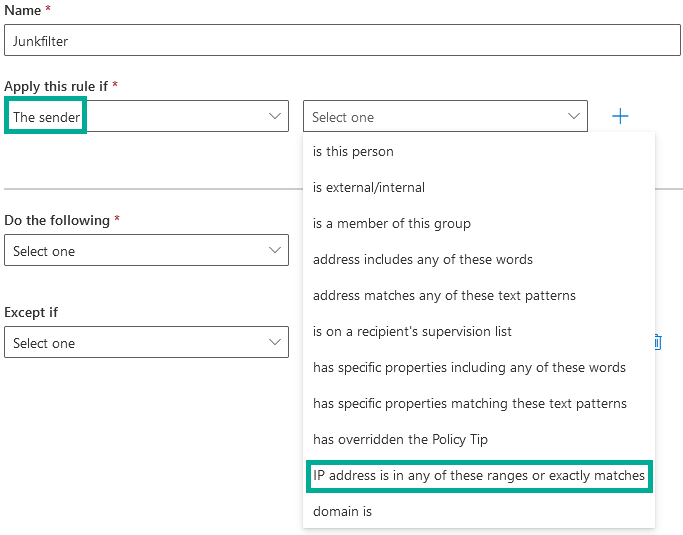
Step 4
In the drop-down menu, under the “Apply this rule if...” item, select the “The sender...” item. - then activate the rule “IP address is in any of these ranges or exactly matches”.
Step 5
Enter our IP address (see platform or direct link) in the window that opens and click on the “Add” button to add them. Add more addresses if necessary and then click on “Save”.

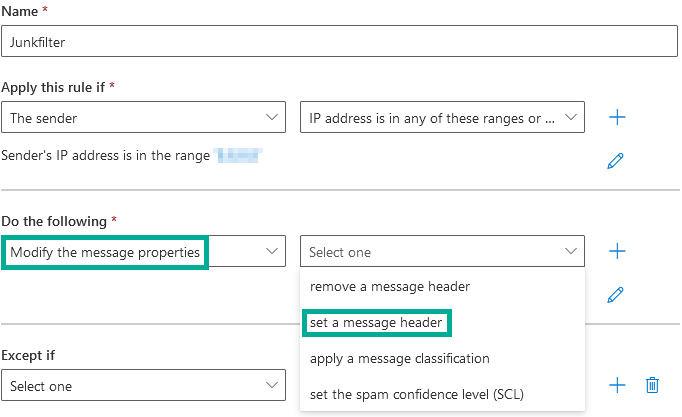
Step 6
In the drop-down menu under “Do the following...” click “Modify the message properties...” and then click “set a message header”.
Step 7
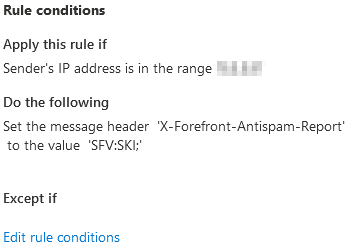
On the right this text should appear: Set the message header *Enter text… to the value *Enter text....
Enter “X-Forefront-Antispam-Report” for the first placeholder and “SFV:SKI;” for the second placeholder.

Step 8
Now click on “Next” to get to the next section “Set rule settings”.
Click on “Next” again.
The finished rule should look like this:
Now press “Finish”.
Then set the rule from “Disabled” to “Enabled”.