Read this article in: Deutsch
After completing the New MSP Client Setup, partners are automatically redirected to the client Dashboard. This dashboard features an initial wizard designed to guide them through the initial configuration process, with dynamic options tailored to the selected package. This ensures a smooth and fast onboarding experience for both partners and clients.
All configurations made through this initial wizard can be reviewed and adjusted later if needed.
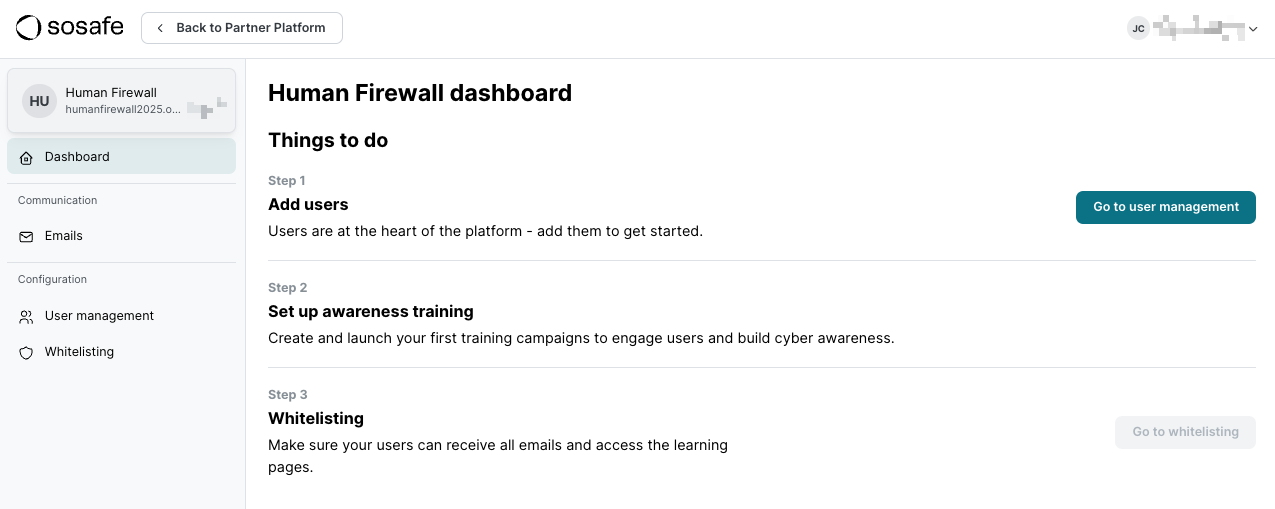
The first mandatory step in the dashboard is configuring the client’s users, as all awareness training activities require active users to target. Without user accounts, no awareness training can be assigned or launched.
Step 1: Add users
To add client users, select Go to user management.
For detailed guidance on the available options to create and manage users, see the article How to manage users.
You can move to the subsequent configuration options once you have at least one active user.
On the side navigation, select Dashboard, and you should now see two new Set up awareness training options: SoSafe default setup and Custom setup.
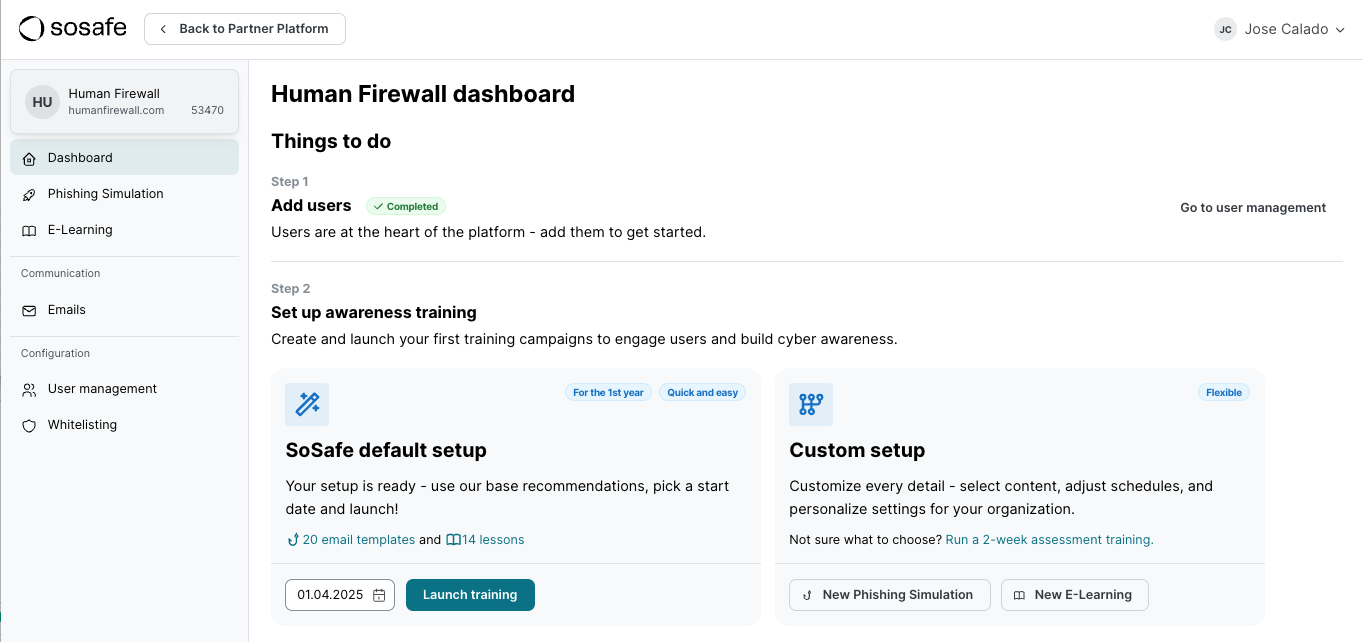
Step 2: Set up awareness training
SoSafe Default Setup
The SoSafe default setup is our recommended baseline configuration designed to help most clients get started quickly and effectively, without needing to make complex decisions.
It includes pre-configured simulation and e-learning trainings that partners can confidently launch for their first-time clients. Therefore, the default setup option is only available
The setup for the bundle package (E-learning + Simulation) includes:
-
The initial two-week simulation-only training with 3 templates assesses employee vulnerability and establishes a baseline for tracking behavior change over time.
-
Two follow-up trainings run automatically until the end of the first subscription year:
-
Simulation training with 15 templates, balanced across difficulty levels, attack vectors, business, and personal context.
-
E-learning training with 16 Cyber Security Fast Start e-learning training modules that cover the foundational topics every employee should be educated on. All e-learning add-ons purchased in advance are automatically added to this training, with no additional configuration required.
The default setup is only available before any awareness training is configured — it’s intended for first-time clients. Once a setup (default or custom) has been applied, the default option is no longer available.
The default setup will automatically adjust and remove the training options not purchased for the E-learning or Phishing Simulation standalone package scenarios.
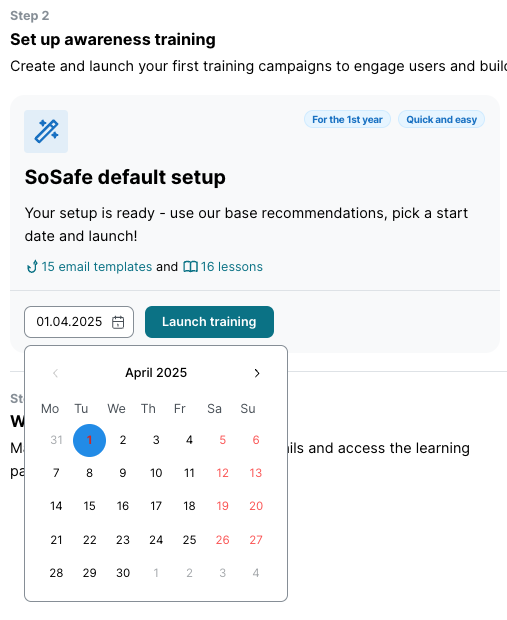
To go with the SoSafe default setup, select a starting date from the calendar and click Launch training.
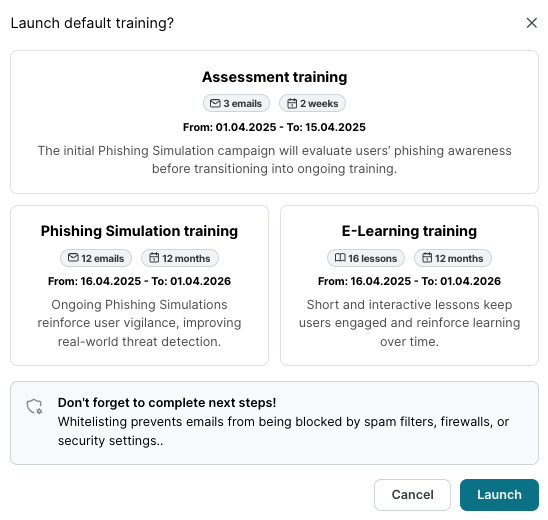
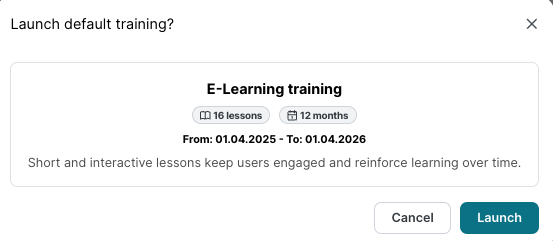
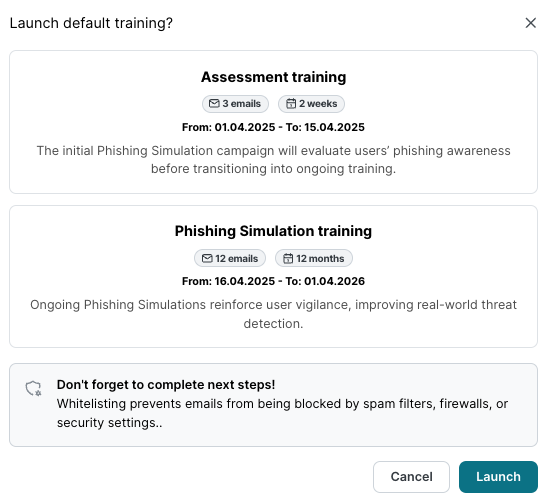
On the Launch default training? page, depending on the package selection, you should see one of the following options. Click Launch to confirm the setup configuration.
E-learning + Phishing Simulation
E-learning
Phishing Simulation
Custom setup
The Custom setup should be selected when a client’s requirements don’t align with the options available in the default setup, or when more flexibility is needed to tailor the awareness training configuration.
With the custom setup, trainings are created from scratch, giving complete control over timing, content, and structure.
To proceed, partners should follow these step-by-step guides:
First awareness training setup
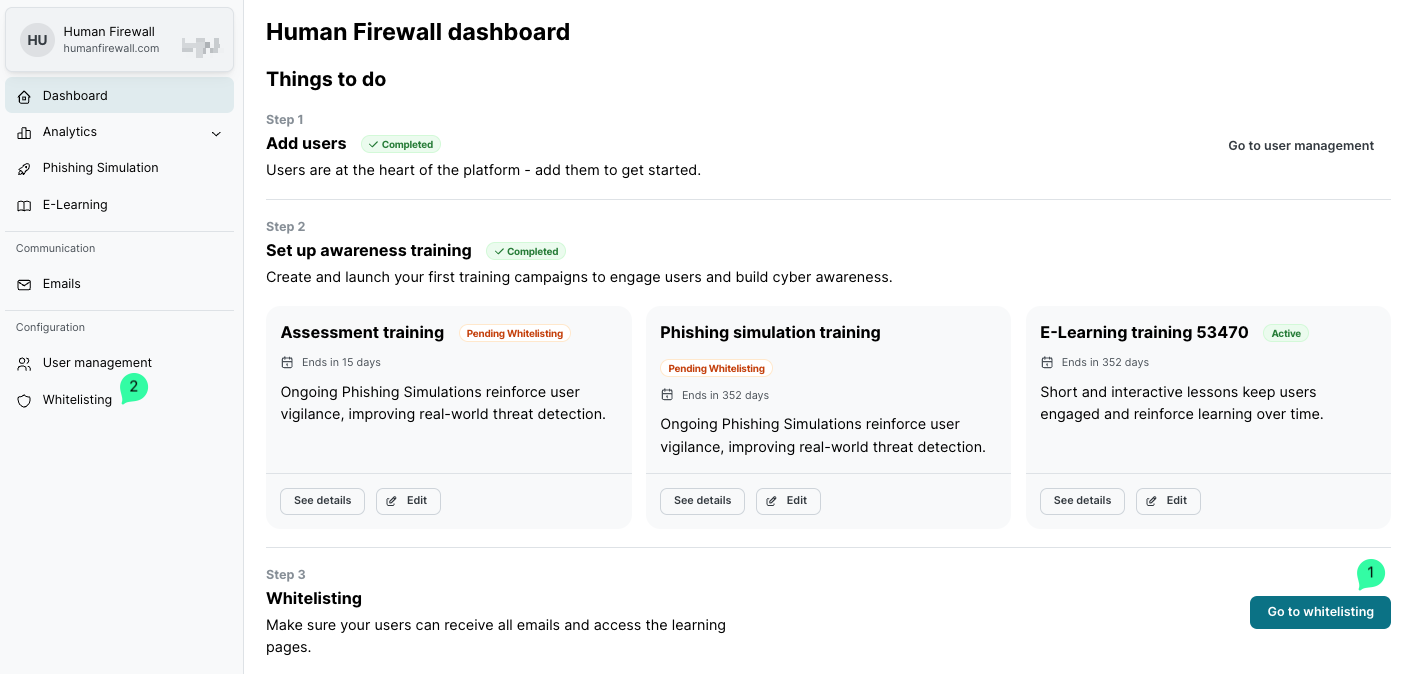
The awareness trainings setup in the previous step should now be visible on the client Dashboard, as shown in the example below for a default setup configuration.
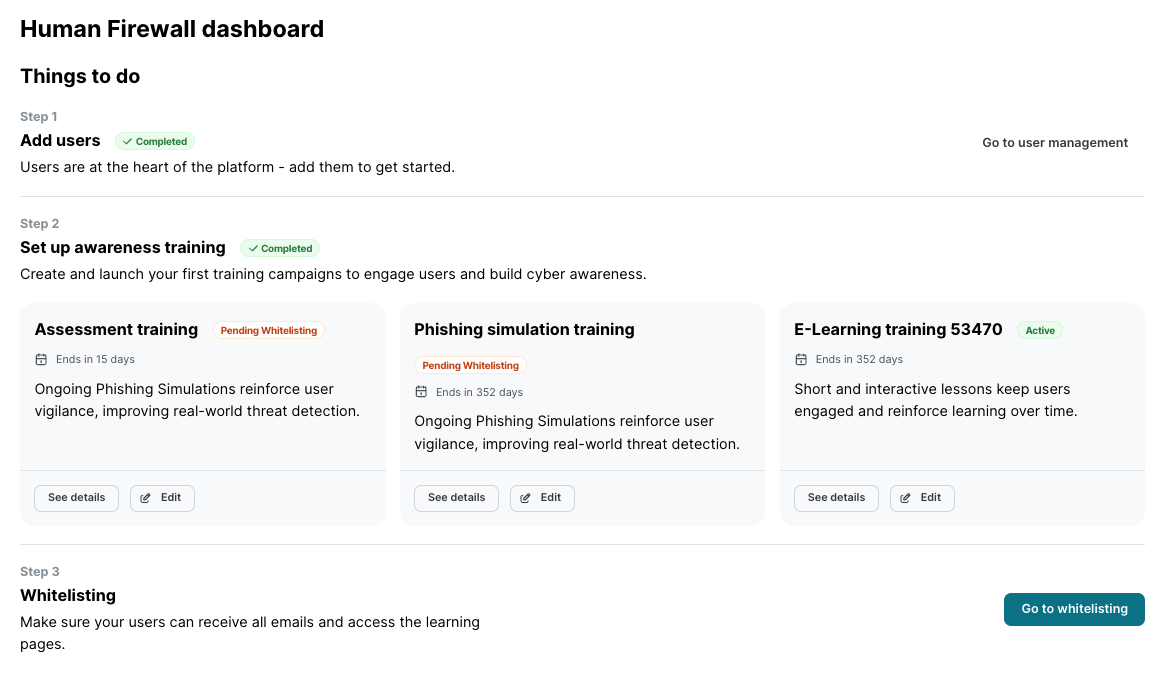
Step 3: Whitelisting
If Phishing Simulation has been configured, you can move to the last configuration step - Whitelisting.
Even after the start date has passed, phishing simulation training will not commence until the whitelisting configuration is confirmed.
To start the whitelisting configuration, click the Go to whitelisting (1) button or go to the Whitelisting (2) side menu navigation option.
To learn more about whitelisting and all the available configuration options, please visit the Partner Platform Whitelisting Guide article.
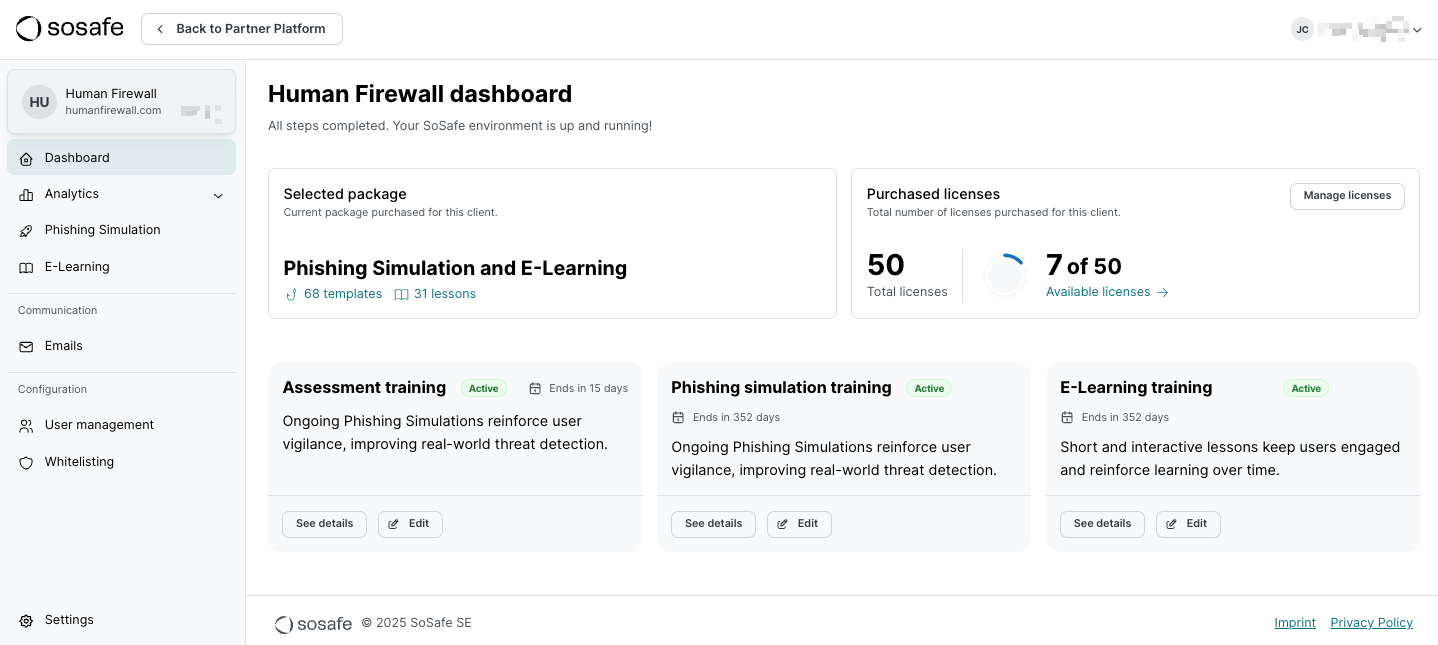
You’re all set
Everything is now configured and visible in the main client dashboard.
This dashboard is designed to be the default entry point for managing each client. It provides a clear overview of all key information, including packaging details, licensing status, and awareness training configuration.