
Read this article in: Deutsch
User management user creation
User email addresses uniquely identify each user in the SoSafe Partner Platform and are needed to provide access to the E-learning platform and send Phishing Simulations.
You will see two configuration options the first time you access User management.
Warning: Only one user management method can be active at a time.
To switch methods, you must first delete all existing users from the current setup.
This action is irreversible and will permanently erase all user data, including training history and reporting.
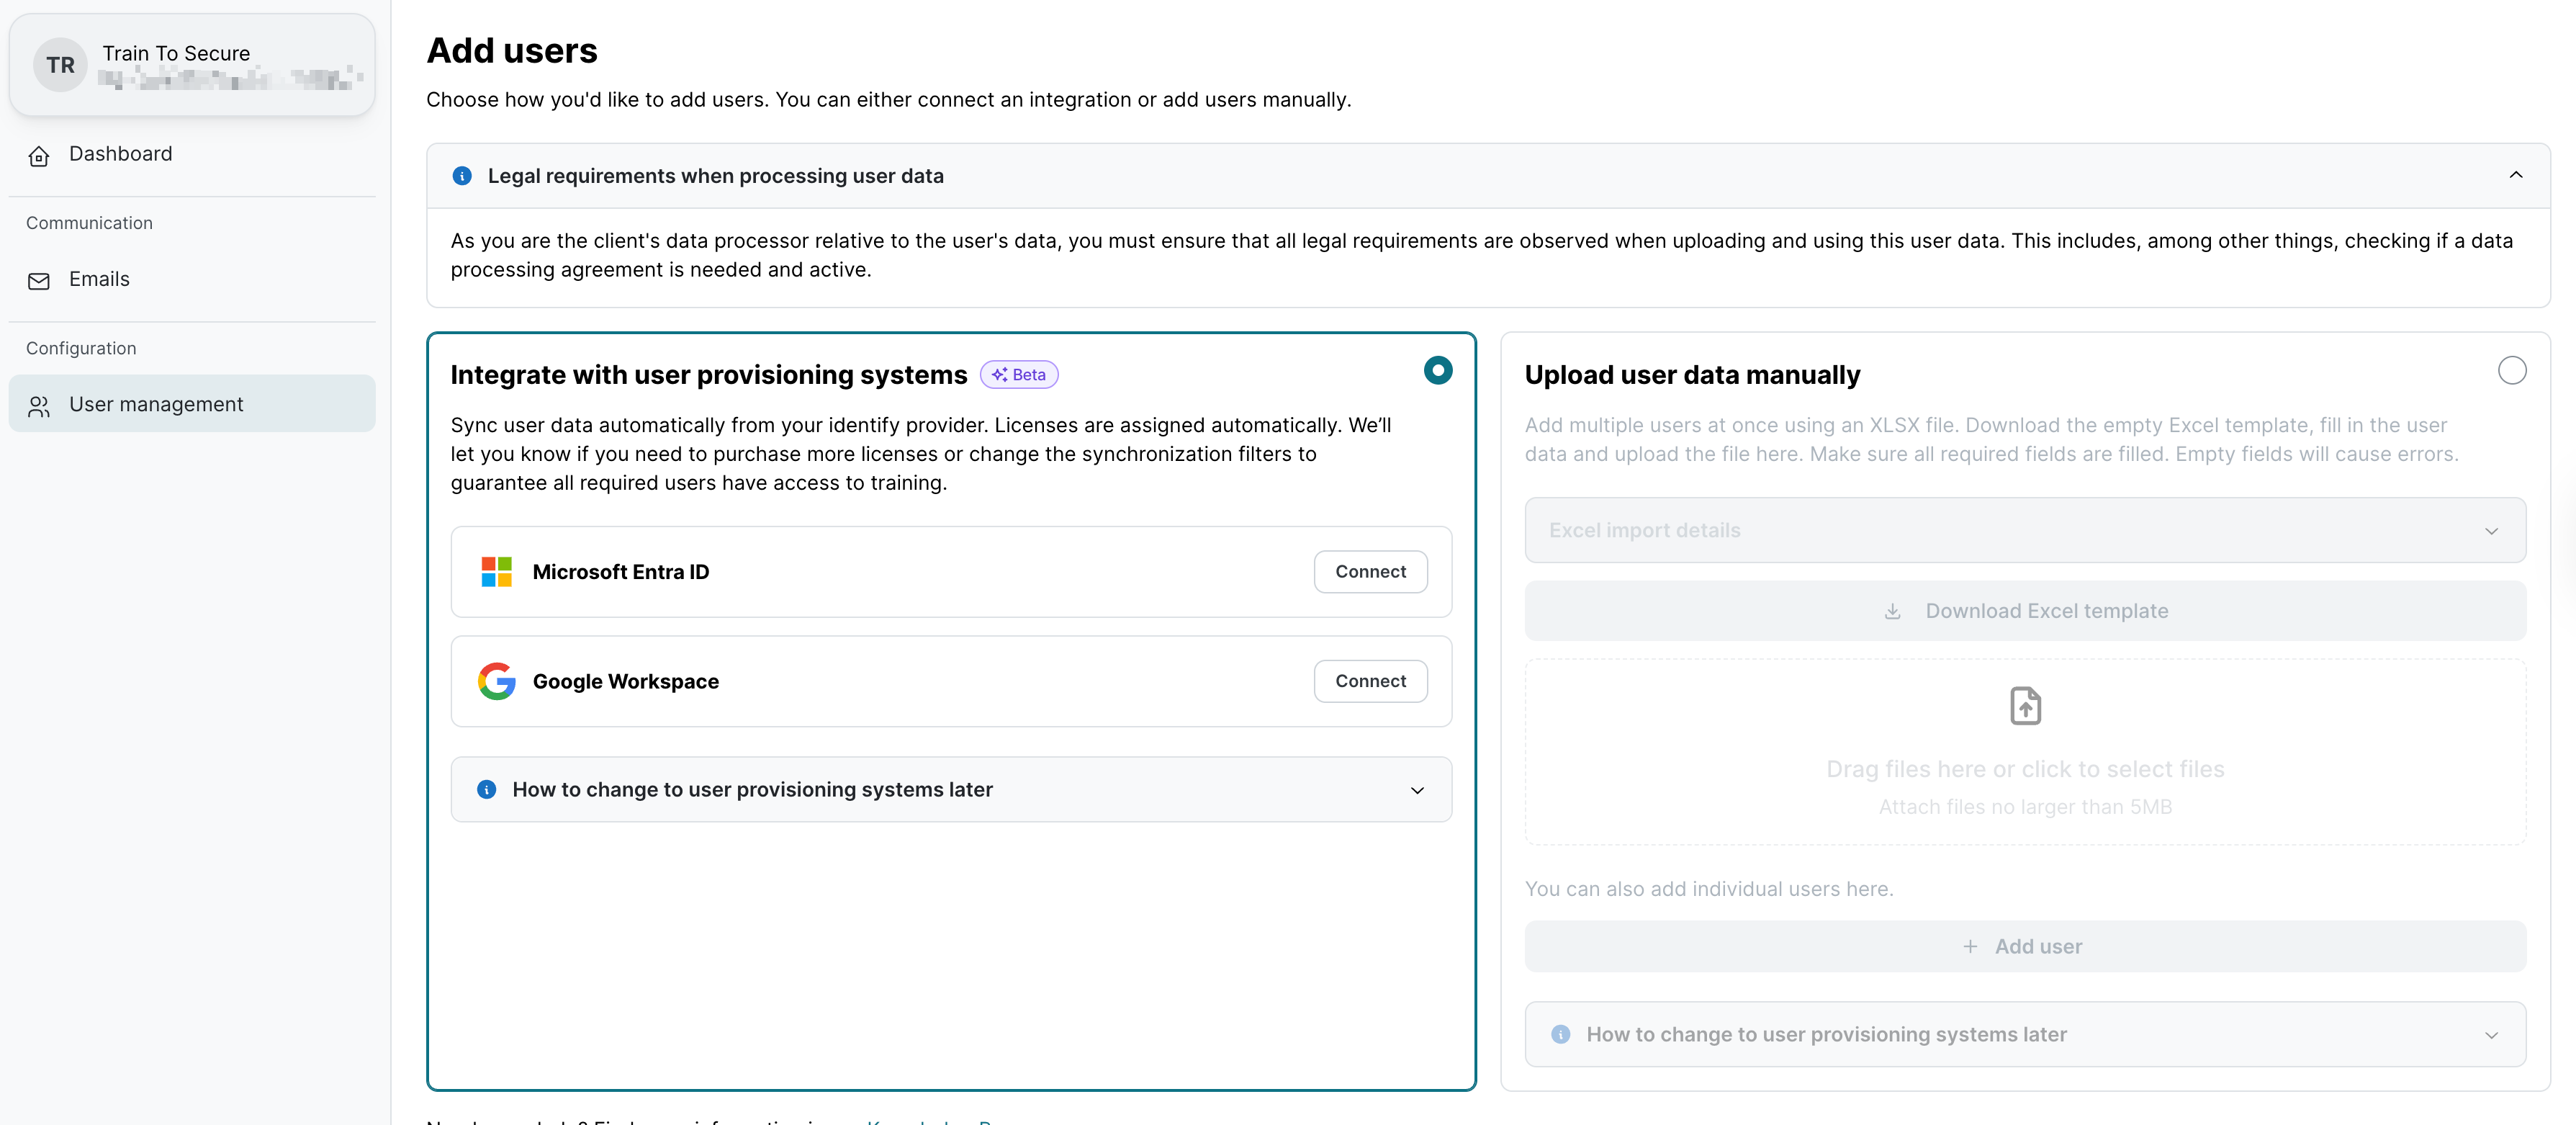
Integrate with user provisioning systems
Automatically sync users from Microsoft 365 or Google Workspace.
Benefits:
-
Hands-off user management with real-time sync
-
No need for manual updates or Excel uploads
-
Ideal for keeping user data consistent and up to date
Considerations:
-
Requires correct setup of permissions
-
Less granular control over individual user entries
How-to guide:
How to automatically manage users
Upload user data manually
Add users manually or via Excel file.
Benefits:
-
Full control over which users are added and when
-
Flexible setup for clients without centralized identity systems
-
No integration permissions required
Considerations:
-
Requires ongoing manual updates
-
Higher risk of outdated or incomplete data over time
How-to guide:
Privileged users
In addition to the standard users who receive E-learning and Phishing Simulation trainings, there are also two types of privileged users designed to support client-side administration and visibility:
Analytics Viewer
-
Read-only access to real-time analytics dashboards and client KPIs
-
Can download reports and data exports for internal analysis
-
Ideal for stakeholders who need visibility into training results but don’t manage configurations
How-to guide:
How to manage analytics viewer users
Client Admin
-
Full administrative access to all client-related features, including:
-
User management
-
Awareness training setup and adjustments
-
Company data and preferences
-
-
Subscription management is excluded: client admins cannot modify the number of licenses, package selection, or billing-related settings
How-to guide:
User groups
To keep things simple and scalable, we don’t support user groups. For SMB clients with fewer than 250 employees, grouping users is typically unnecessary and adds complexity. Instead, all awareness trainings are configured at the company level, making setup faster and ongoing management much easier.