Read this article in: Deutsch
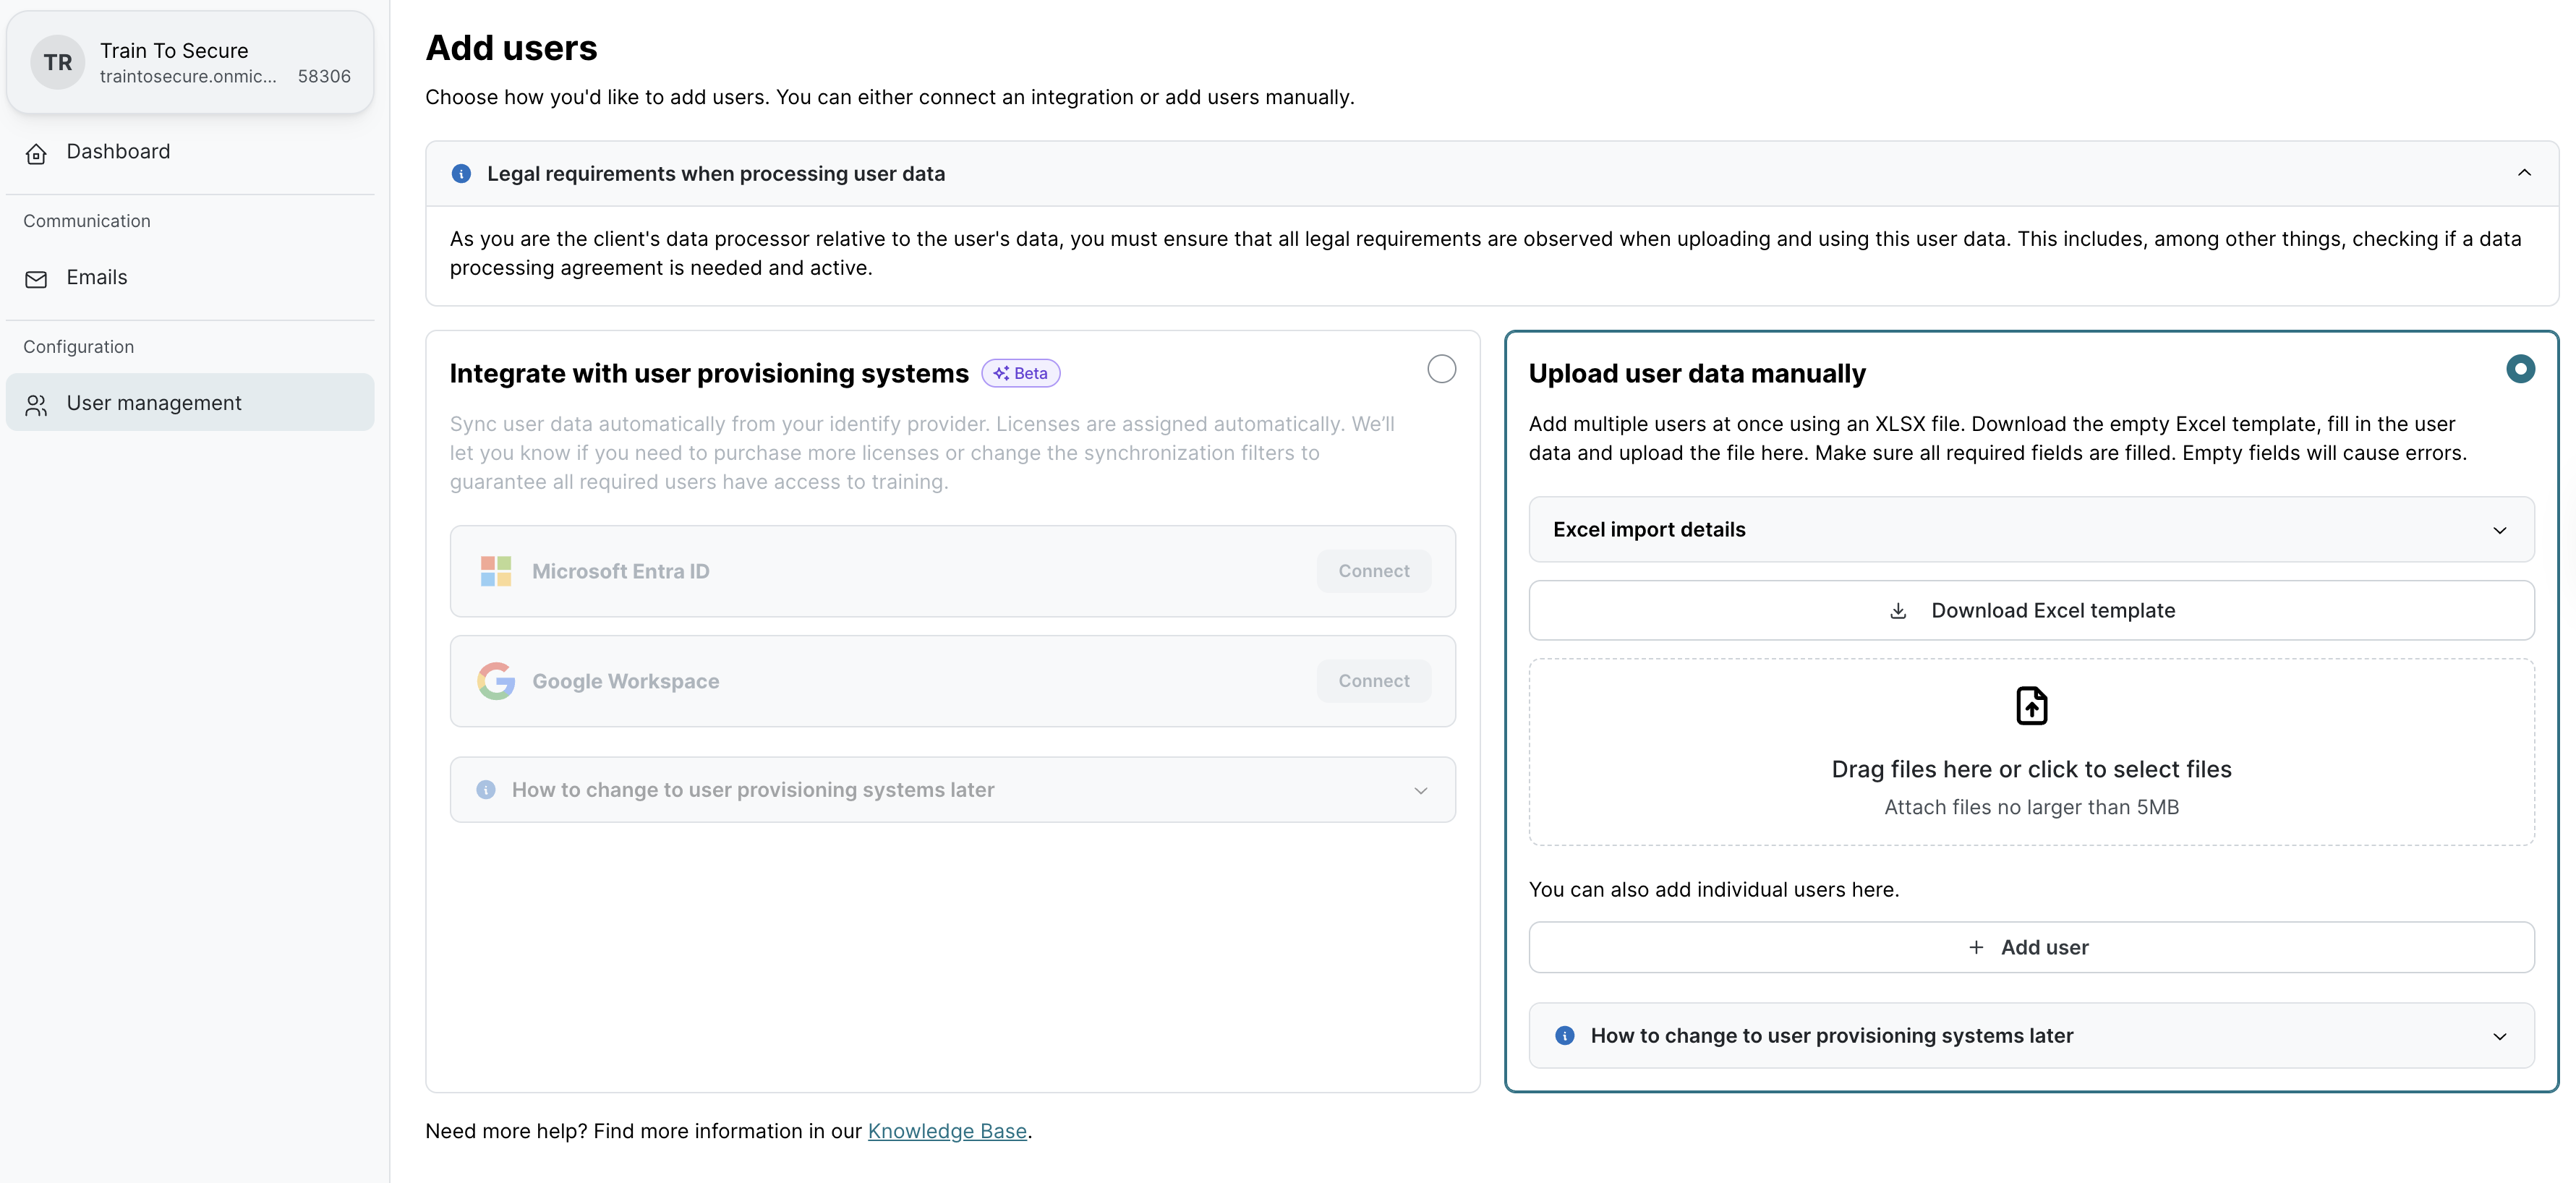
Initial user creation
To create the first users, use an Excel list to import several users at once or add each user individually.
Add users via Excel import
-
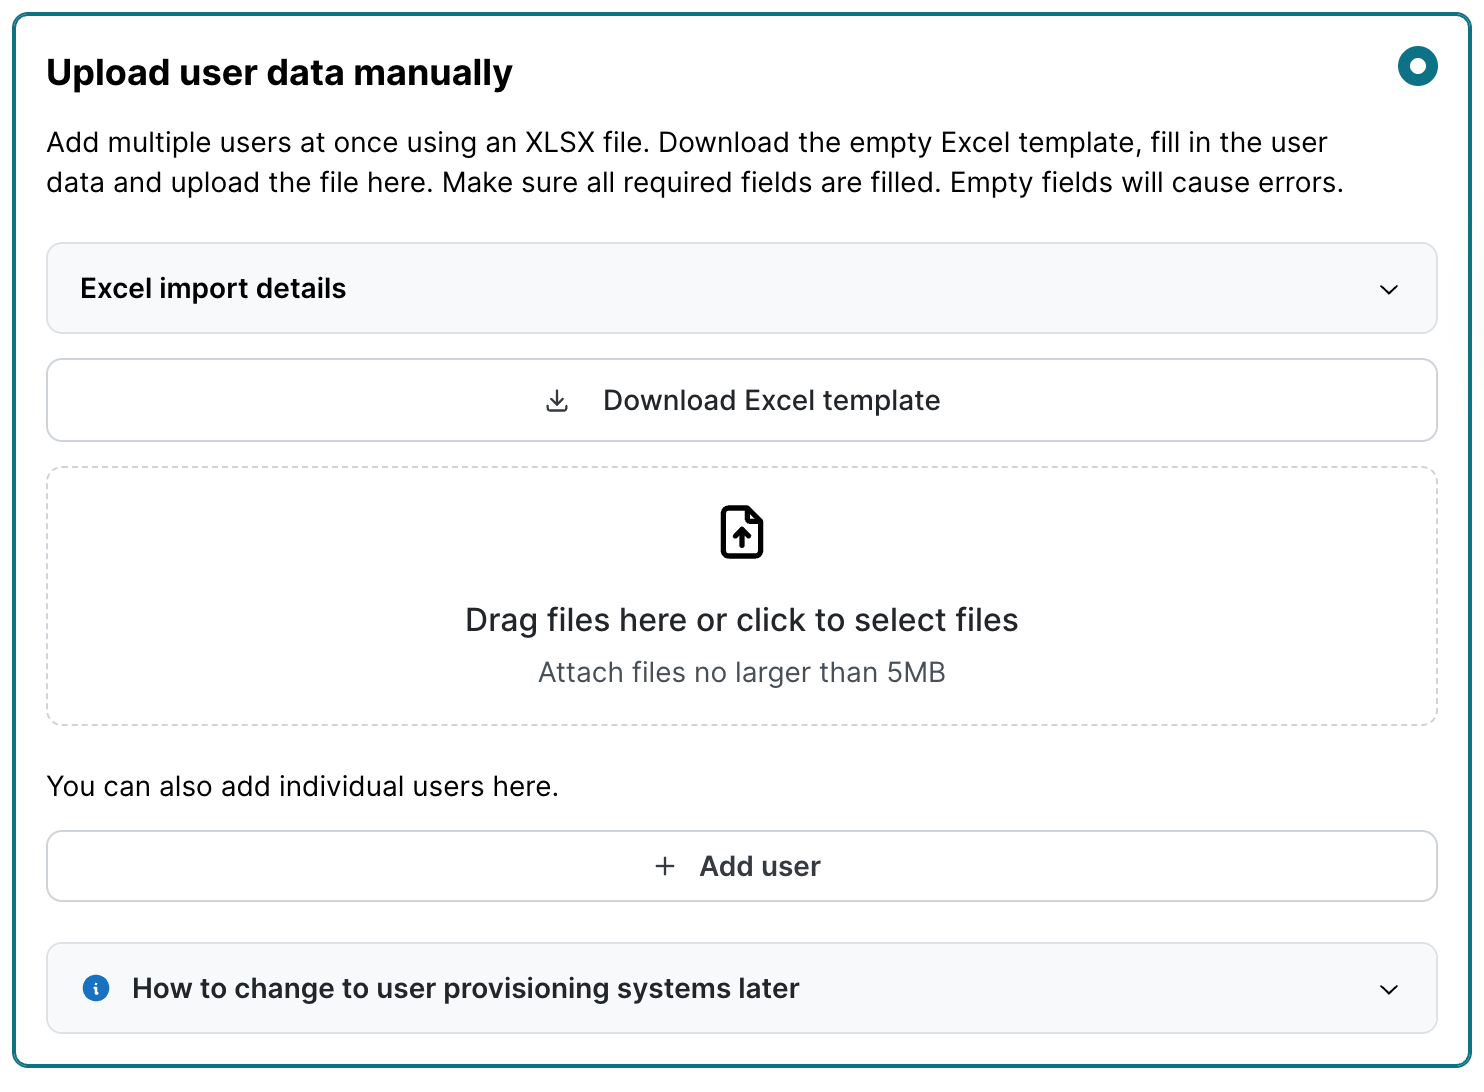
On the User management page, click on Upload user data manually.
-
Click Download Excel template to download a template structure (“user_data_template.xlsx”) to fill in with the user data. You can rename the file to include recognizable details such as versioning, dates, or other relevant information.
-
In the XLSX file, enter the user data with the following rules:
-
First name, Last name, and Email are mandatory fields.
-
Gender definition is optional. If left blank, the value will be Other.
-
Academic degree definition is optional. If left blank, the value will be empty.
-
Language definition is optional. If left blank, the value will be based on the client’s default language.
-
Address Type is optional. If left blank, the value will be Single address. Single address represents an ordinary user account, while a Group address list represents a generic/shared user account for whom the phishing simulation will adapt any direct salutations.
-
Only users with email addresses matching the client’s Domain(s) will be imported.
-
-

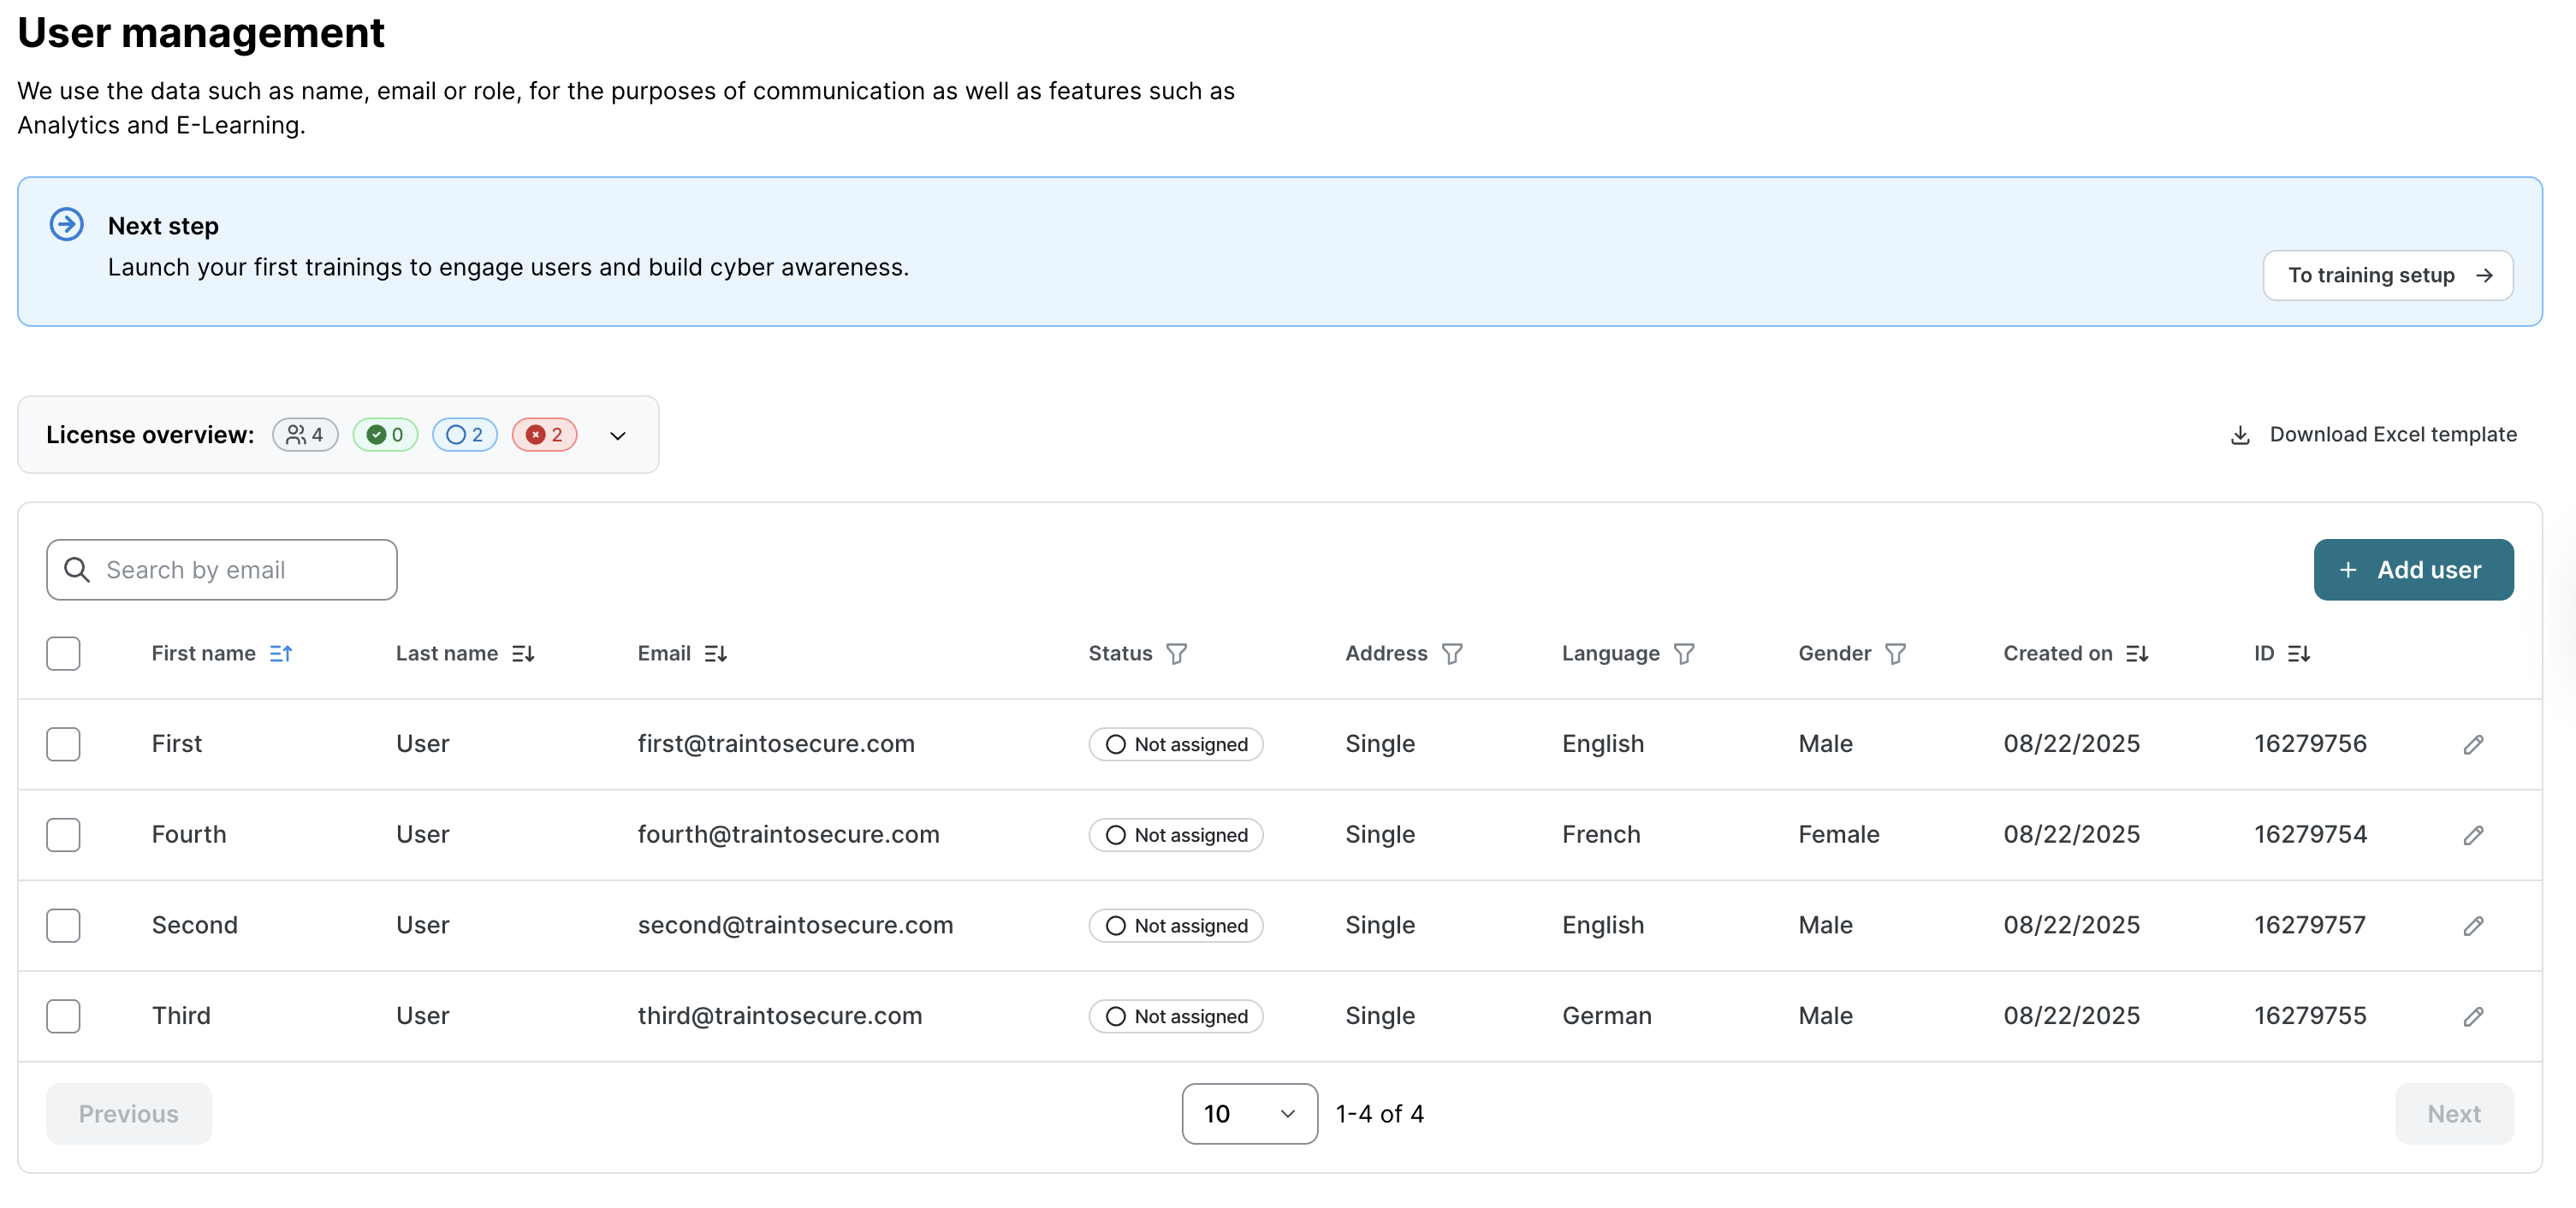
To enable importing more users than the number of available licenses, all users imported via Excel file will not have assigned licenses by default.
-
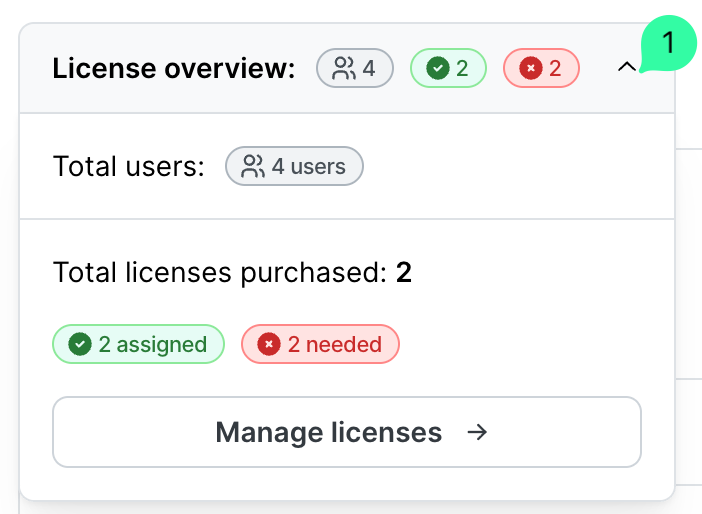
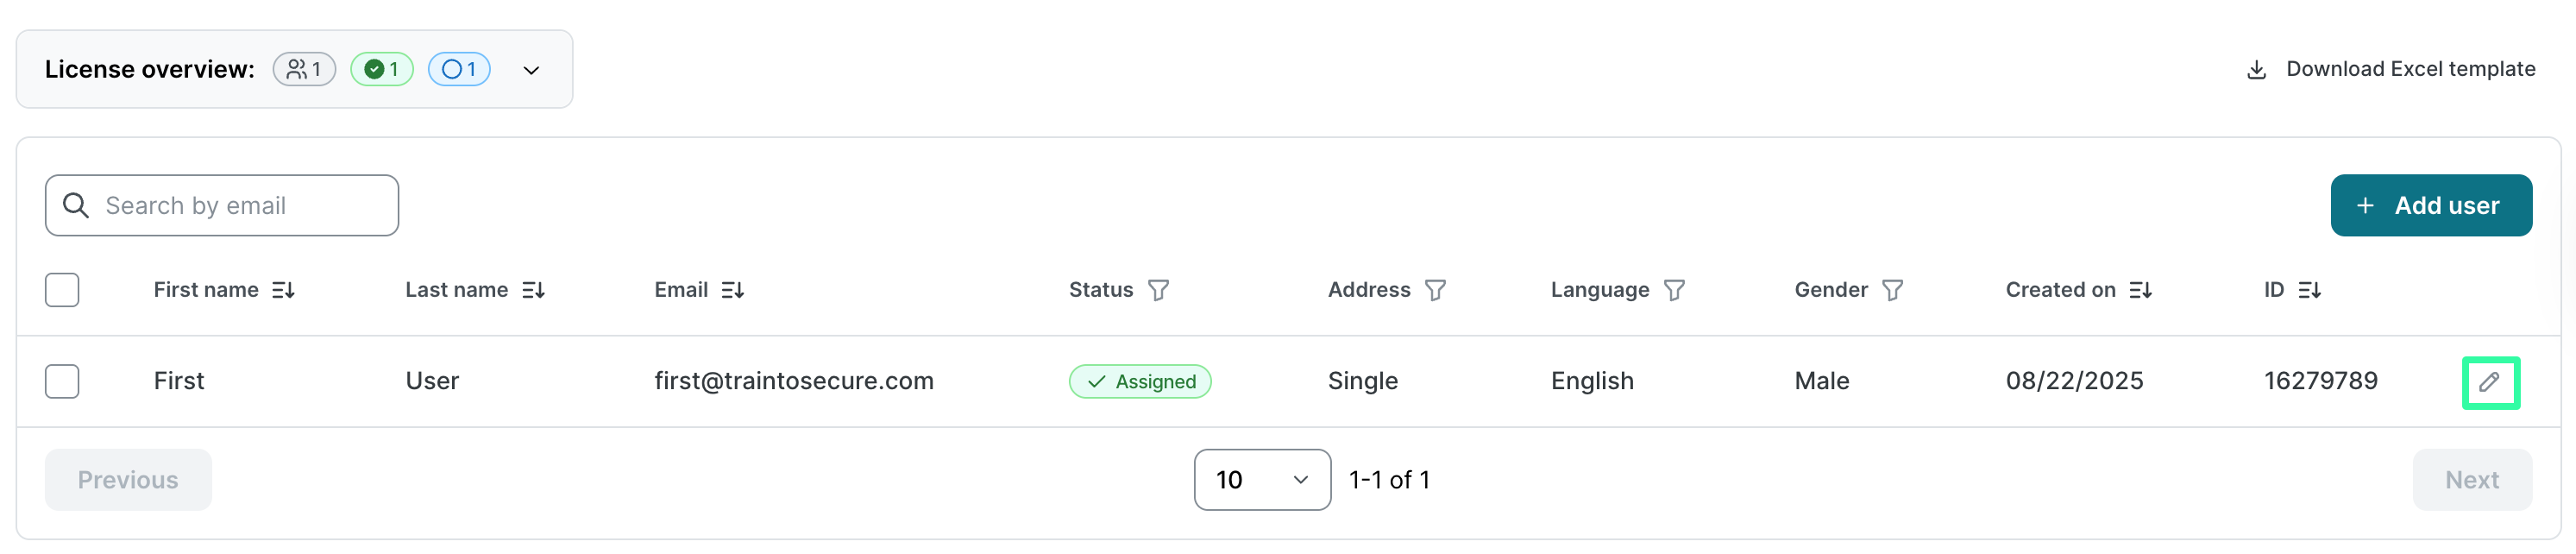
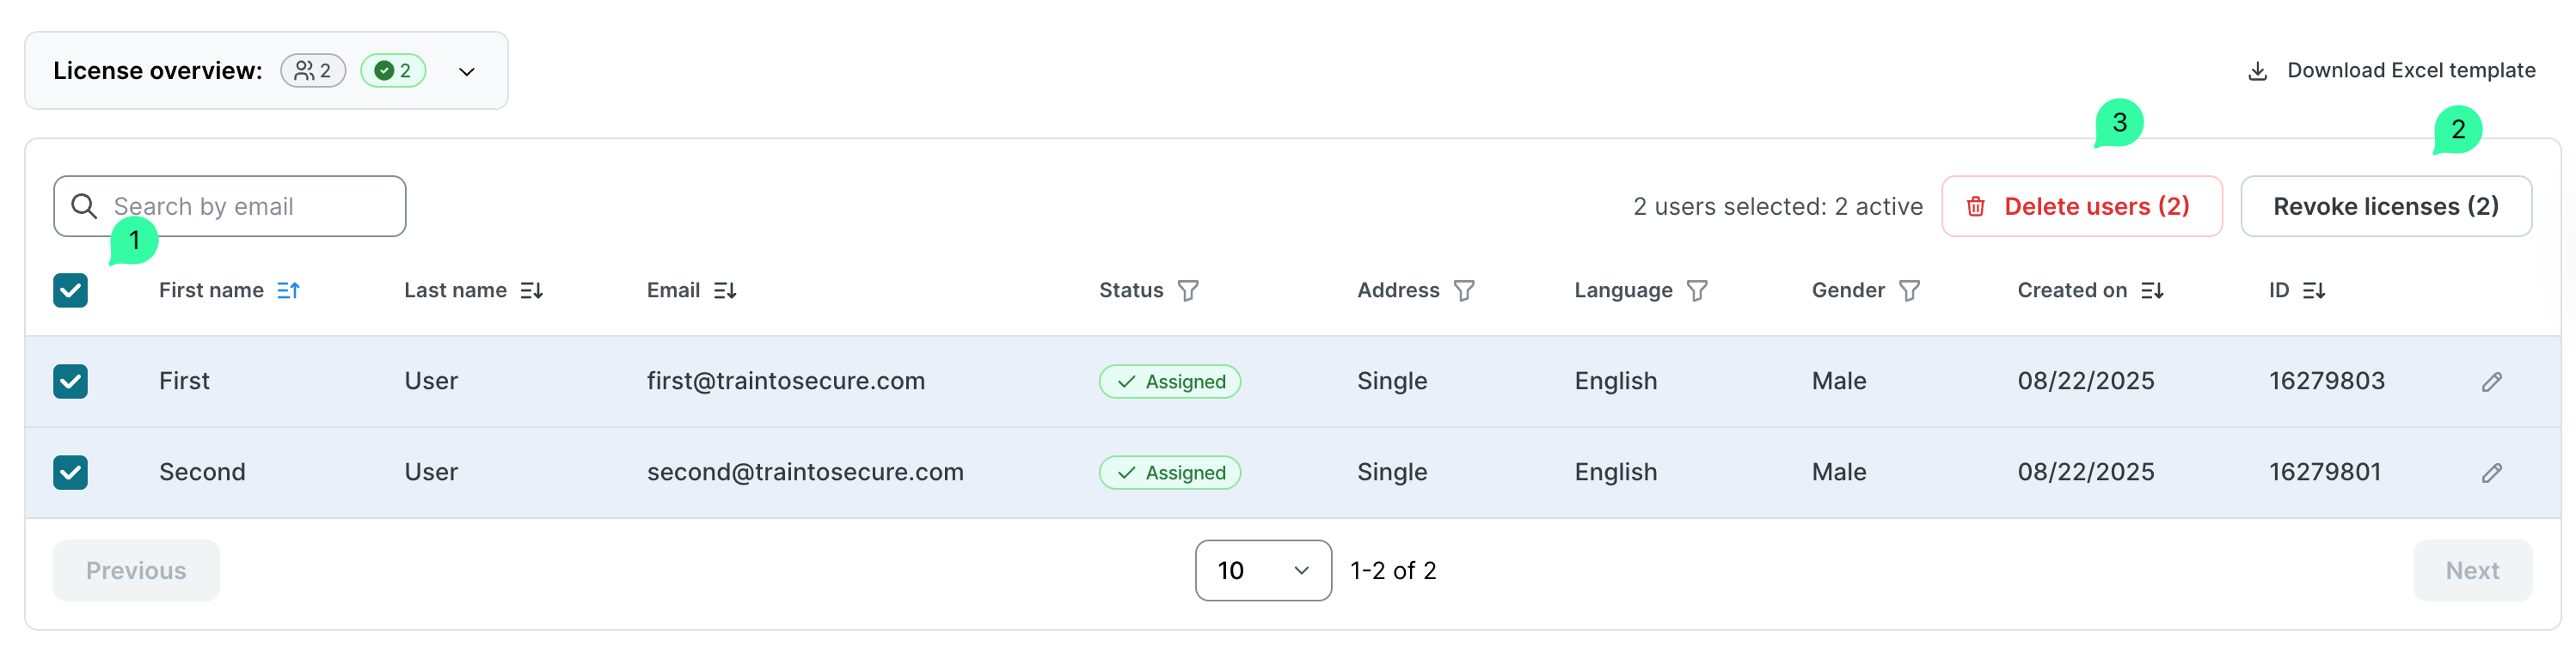
To check how many users can have assigned licenses, click the arrow on the License overview.
-
To assign licenses to users, click the top left checkbox (1) to select all users, or click each user’s checkbox (2) and click Assign licenses (3).
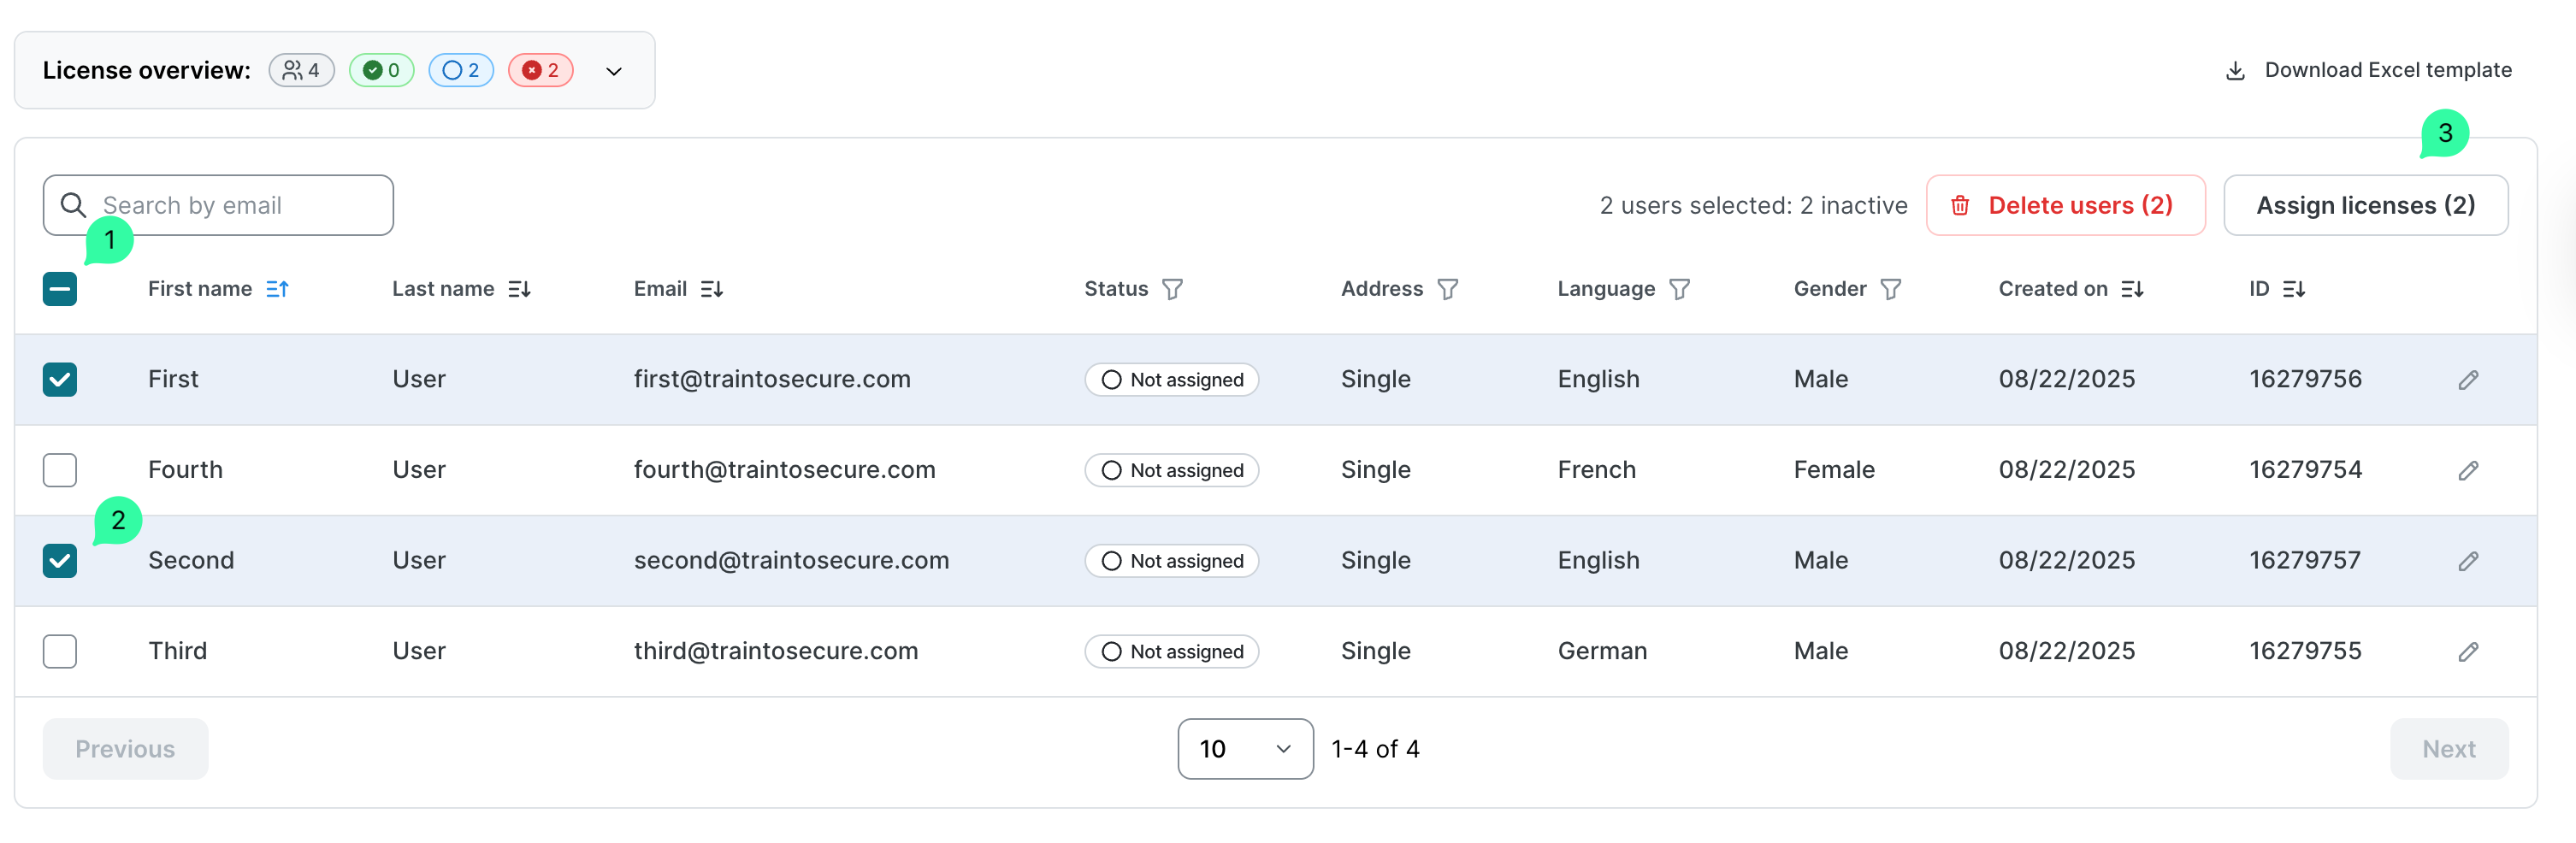
-
On the Assign licenses confirmation box, click Assign.
-
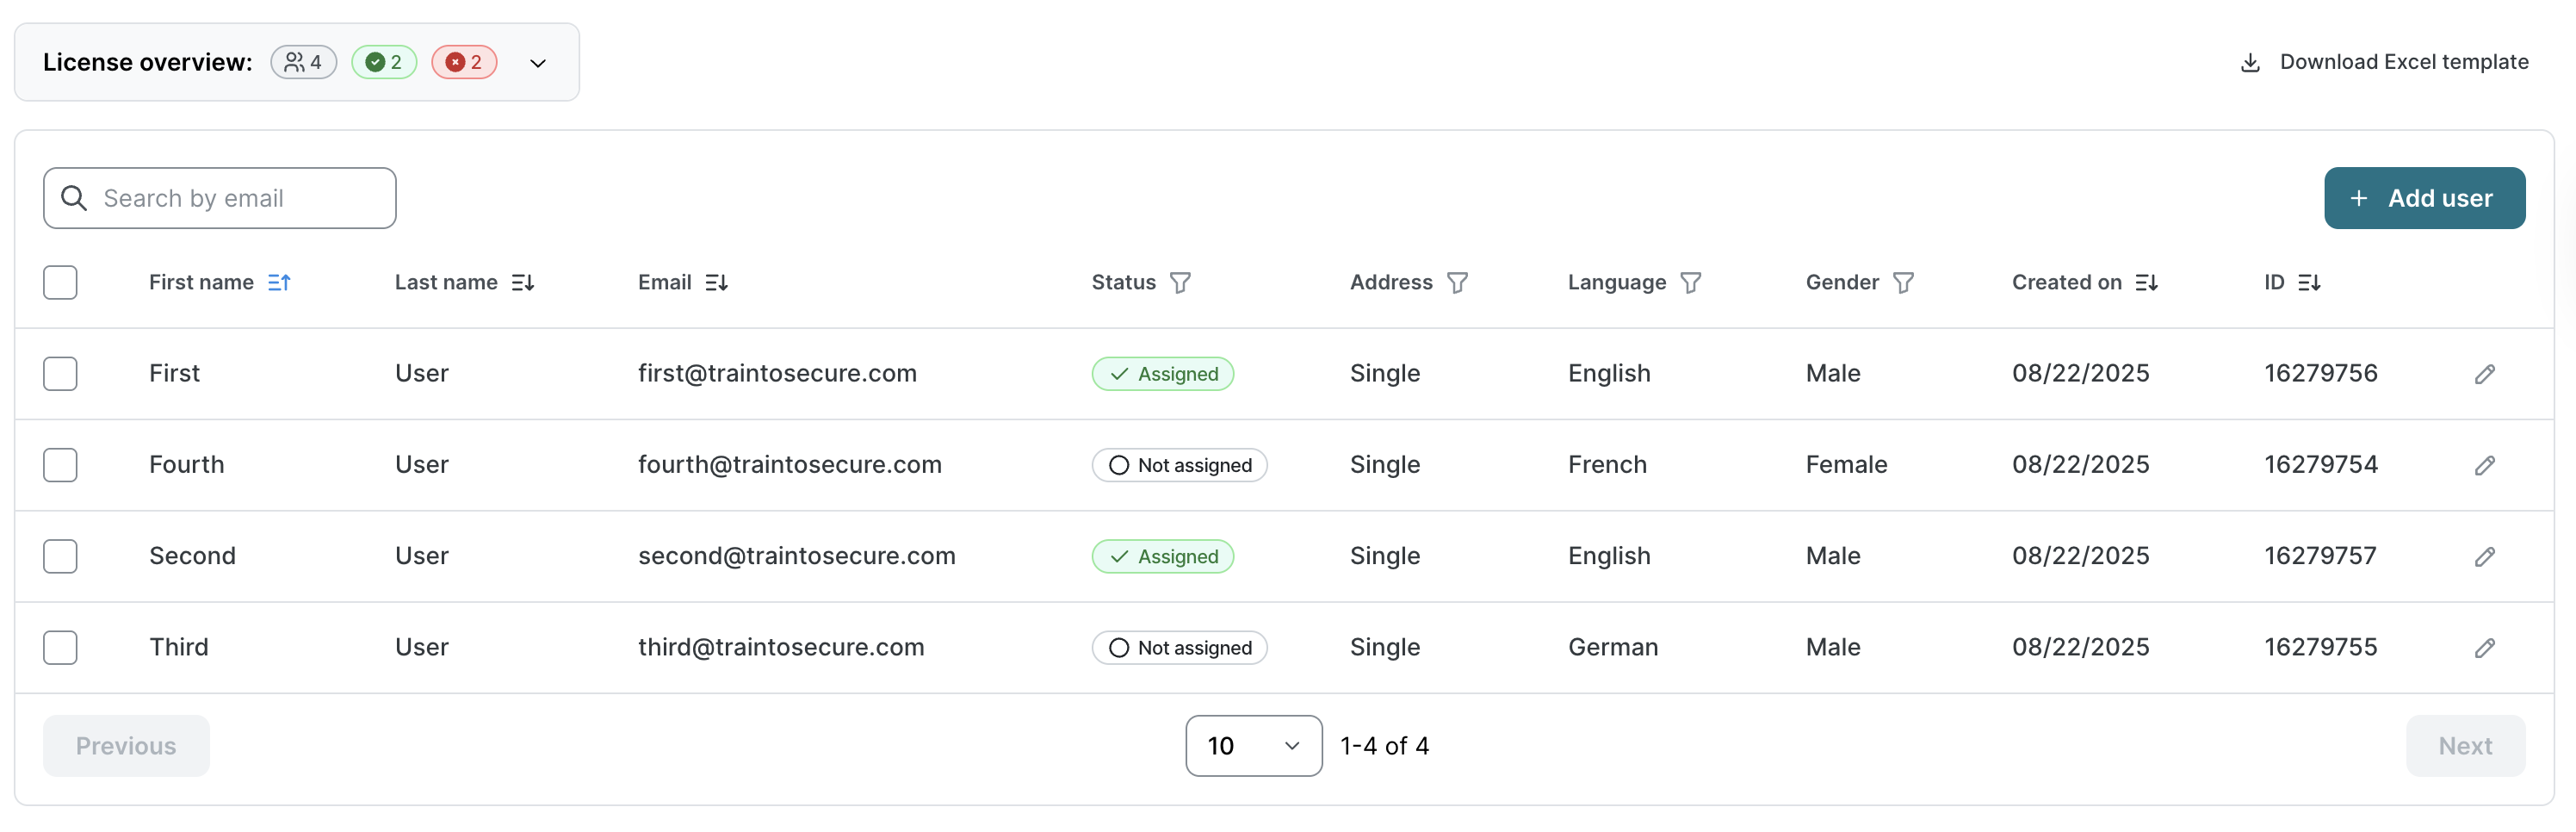
You should now see the user status changed to Assigned and the License overview updated accordingly with the number of assigned licenses.
-
After an Excel import, you can click on + Add user to add new users manually.
Add users manually
-
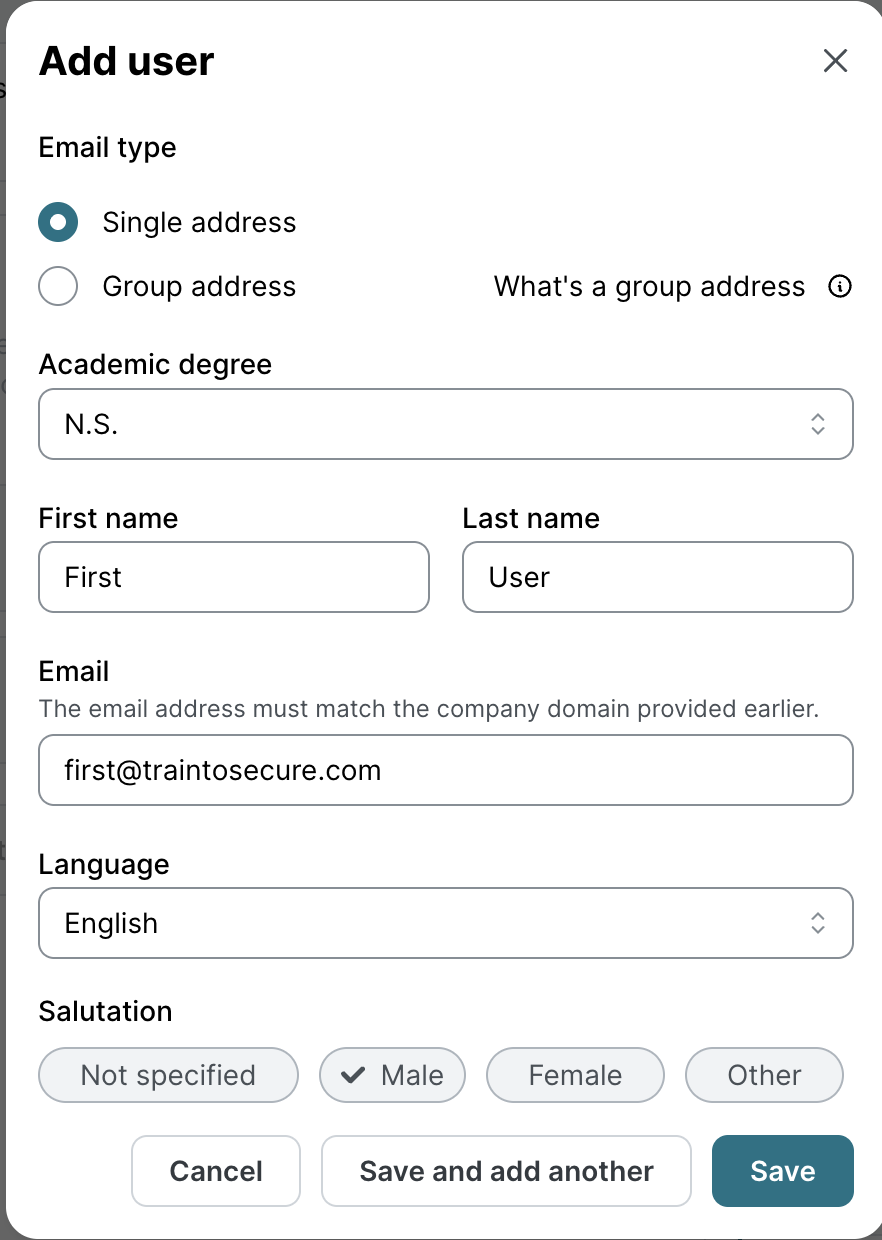
On the User management page, click on + Add user.
-
On the Add user page, enter the user details and click Save.
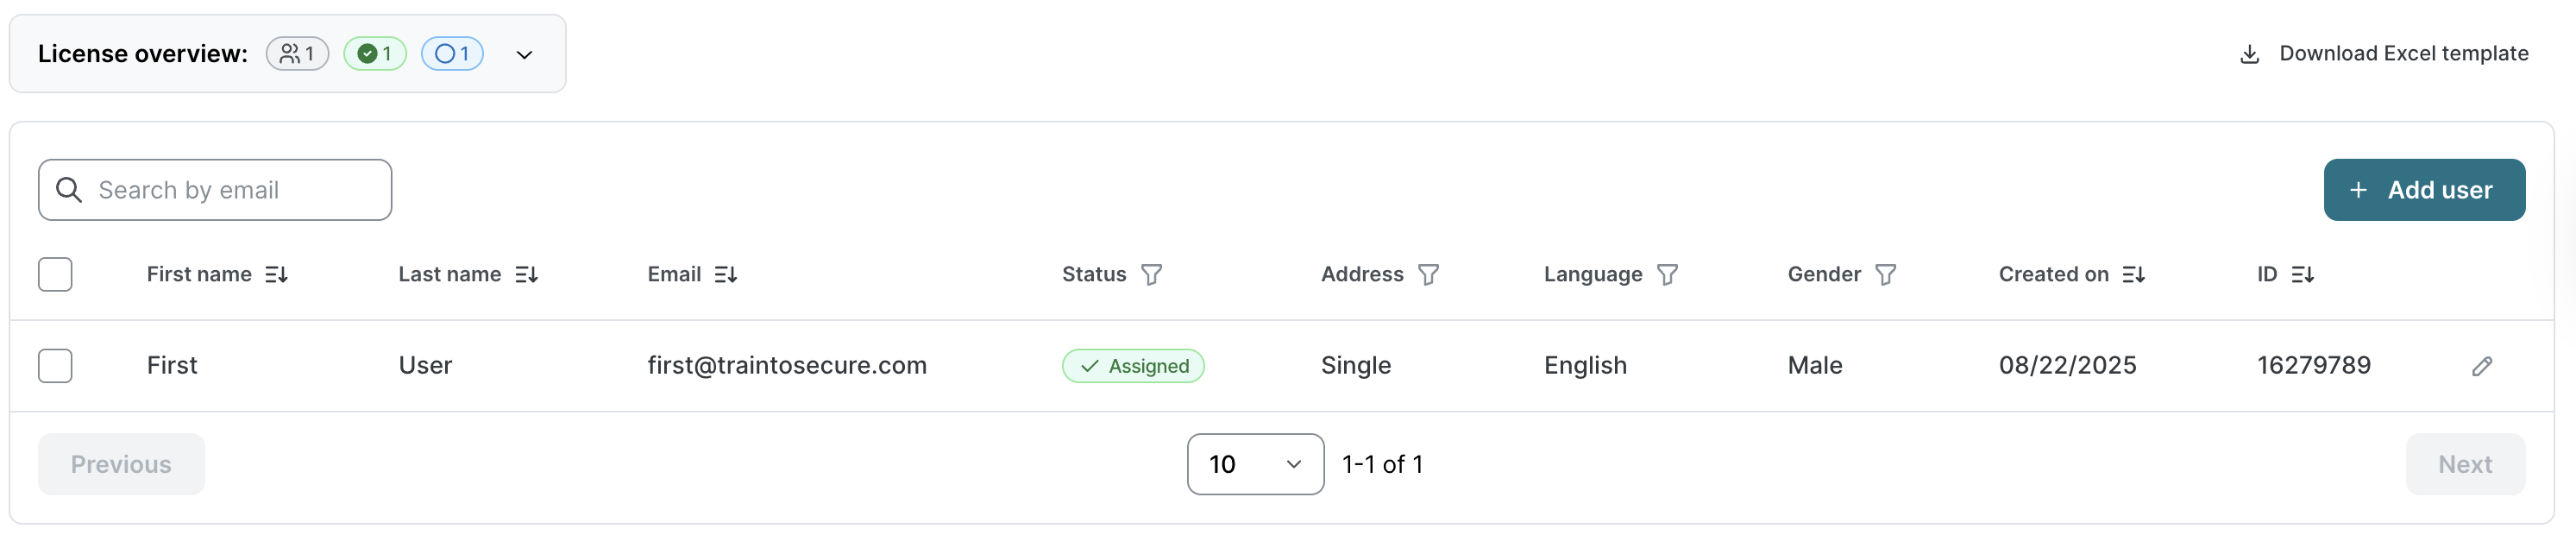
Each manually added user will automatically receive a license, up to the available limit. Once all licenses are assigned, you can still add new users, but they won’t be licensed until additional licenses become available.
Add further users later
When new users with assigned licenses are added, they’re automatically enrolled in any ongoing awareness training campaigns. The training will adjust based on their join date, using that as their individual start point. End dates stay the same for all users.
On the User management page, click on + Add user and select from one of the available options.

As explained in Initial user creation, only users whose email addresses match the client’s Domain(s) can be added.
-
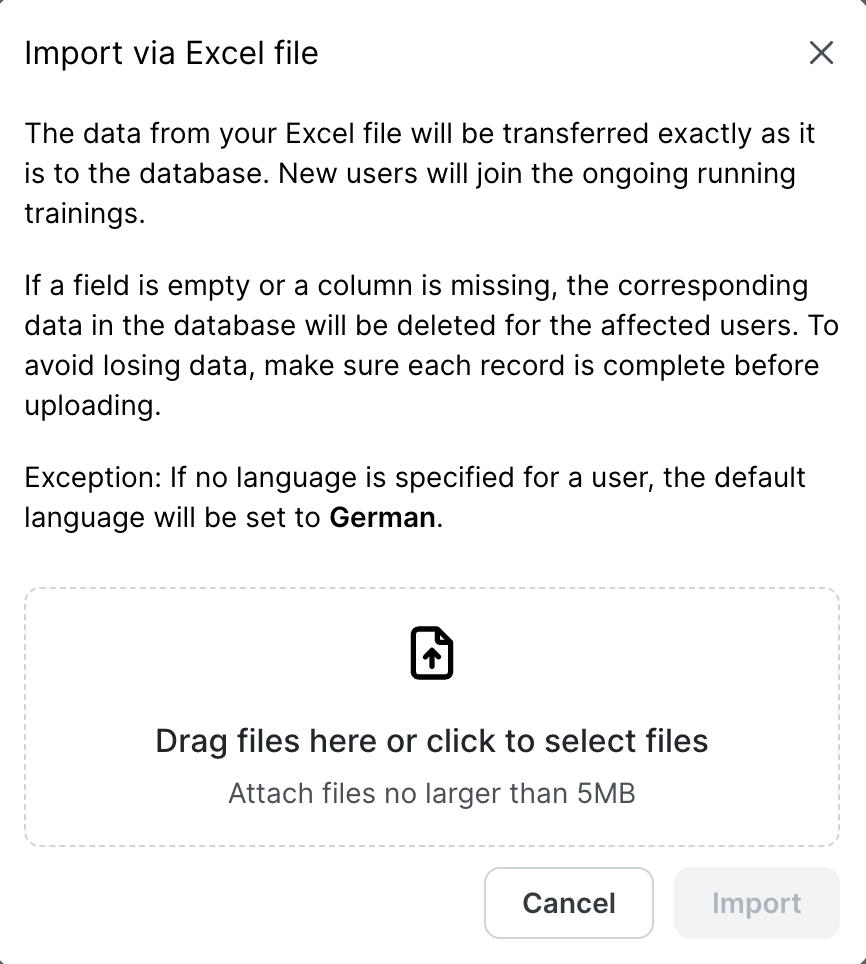
Click Import via Excel file to open the Import via Excel file page:
-
Drag the Excel file with the users to import or click to select the file from the local computer.
-
Click Import to add new users. Any new information will update existing users (when using the same email address) in the file, but users missing from the Excel file won’t be removed or deactivated.
-
-
Click Add manually to add users following the same experience explained above in Add Users Manually.
Edit existing users
Go to the User management page.
-
To edit an individual user:
-
Click on the pencil icon corresponding to the user to be updated.
-
b. Update the user data and click Save. All user details, including the email address, are fully editable through individual editing.
-
To edit several users simultaneously:
-
Click on + Add user and import an Excel file with the updated information. This approach prevents updating user email addresses, as they are used to match new information with existing users.
-
User history is preserved when editing.
Users without a license won’t be automatically assigned one during edits unless specifically configured.
Revoking or deleting existing users
On the User management page:
-
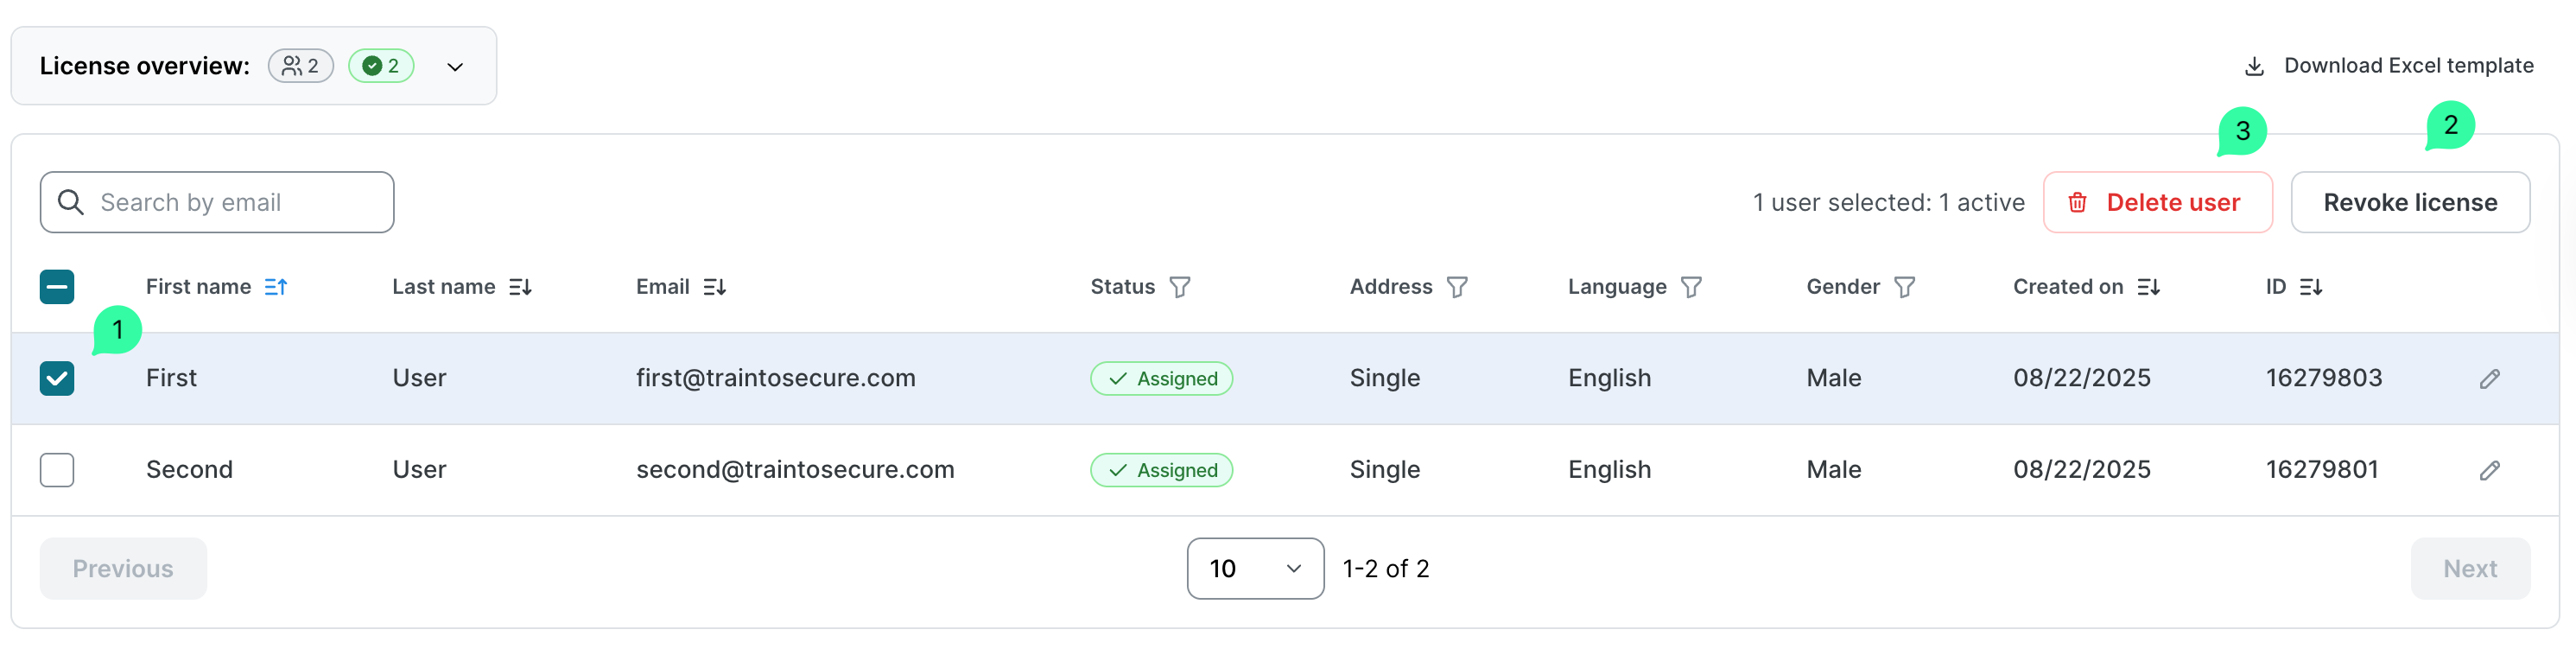
Click the top left checkbox to select all existing users.
-
Click the individual checkbox(es) to select one or more existing users.
-
Then click on Revoke license (2) or Delete user (3).
What is the difference between Revoke and Delete
Revoke
Revoking a user’s license immediately blocks their access to the e-learning platform and prevents them from receiving further phishing simulations.
Their license is freed up and can be assigned to another user.
However, the user’s historical data is preserved. If the user is reactivated later and their previous awareness training is still ongoing, they will resume from where they left off.
Delete
Deleting a user will permanently remove them from the user list.
Unlike deactivation, this action erases their presence from the platform and is not reversible.
Deleting all existing users
After deleting all existing users, it is possible to choose again between Integrate with user provisioning systems and Upload user data manually, as explained in the KB article How to manage users.