
Read this article in: Deutsch
Creating a client admin
-
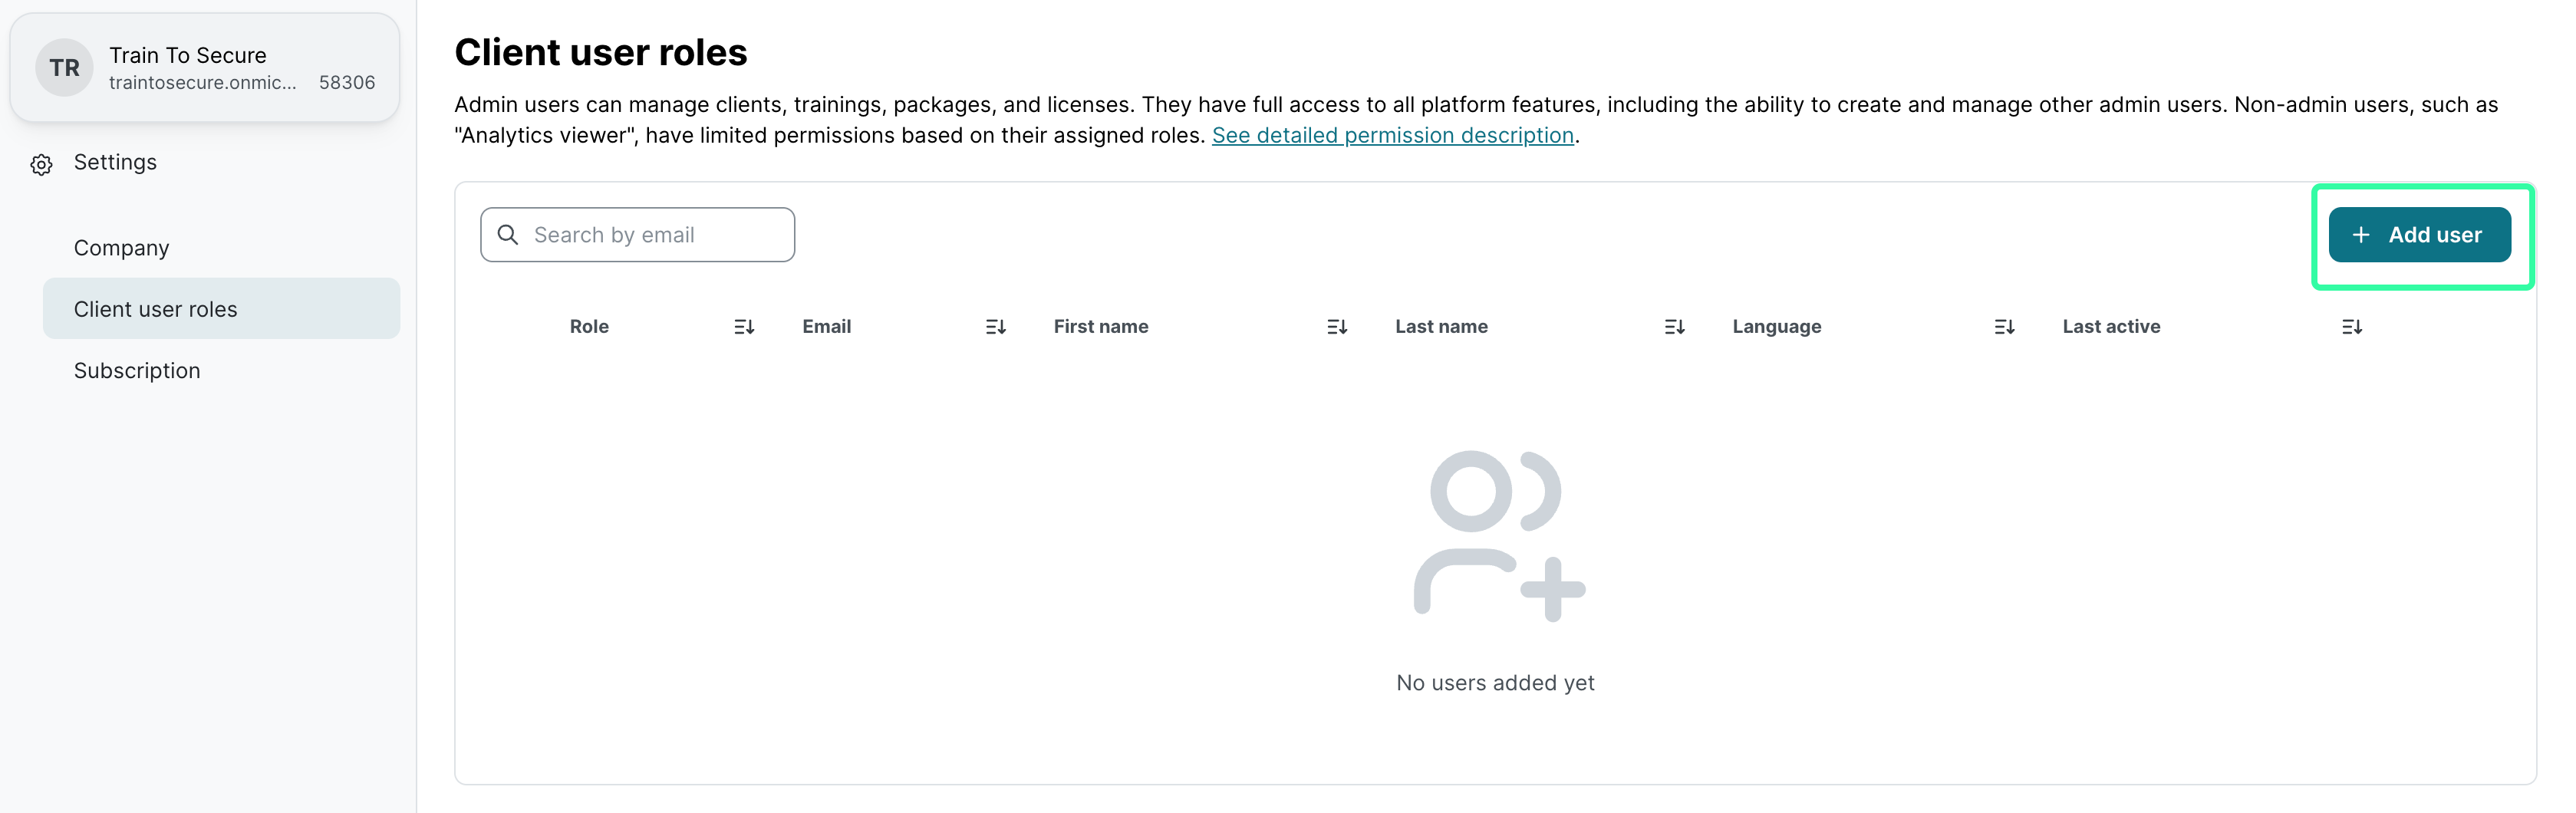
Go to the client settings and open the Settings menu.
-
Then, open the Client user roles menu and select + Add user.
-
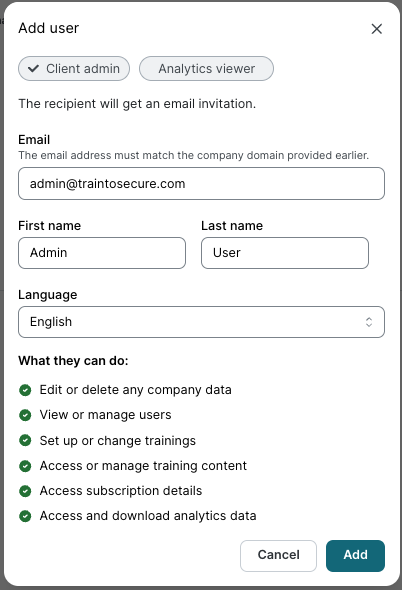
On the Add user page, select Client admin.
-
Enter the client admin data and select Add.
-
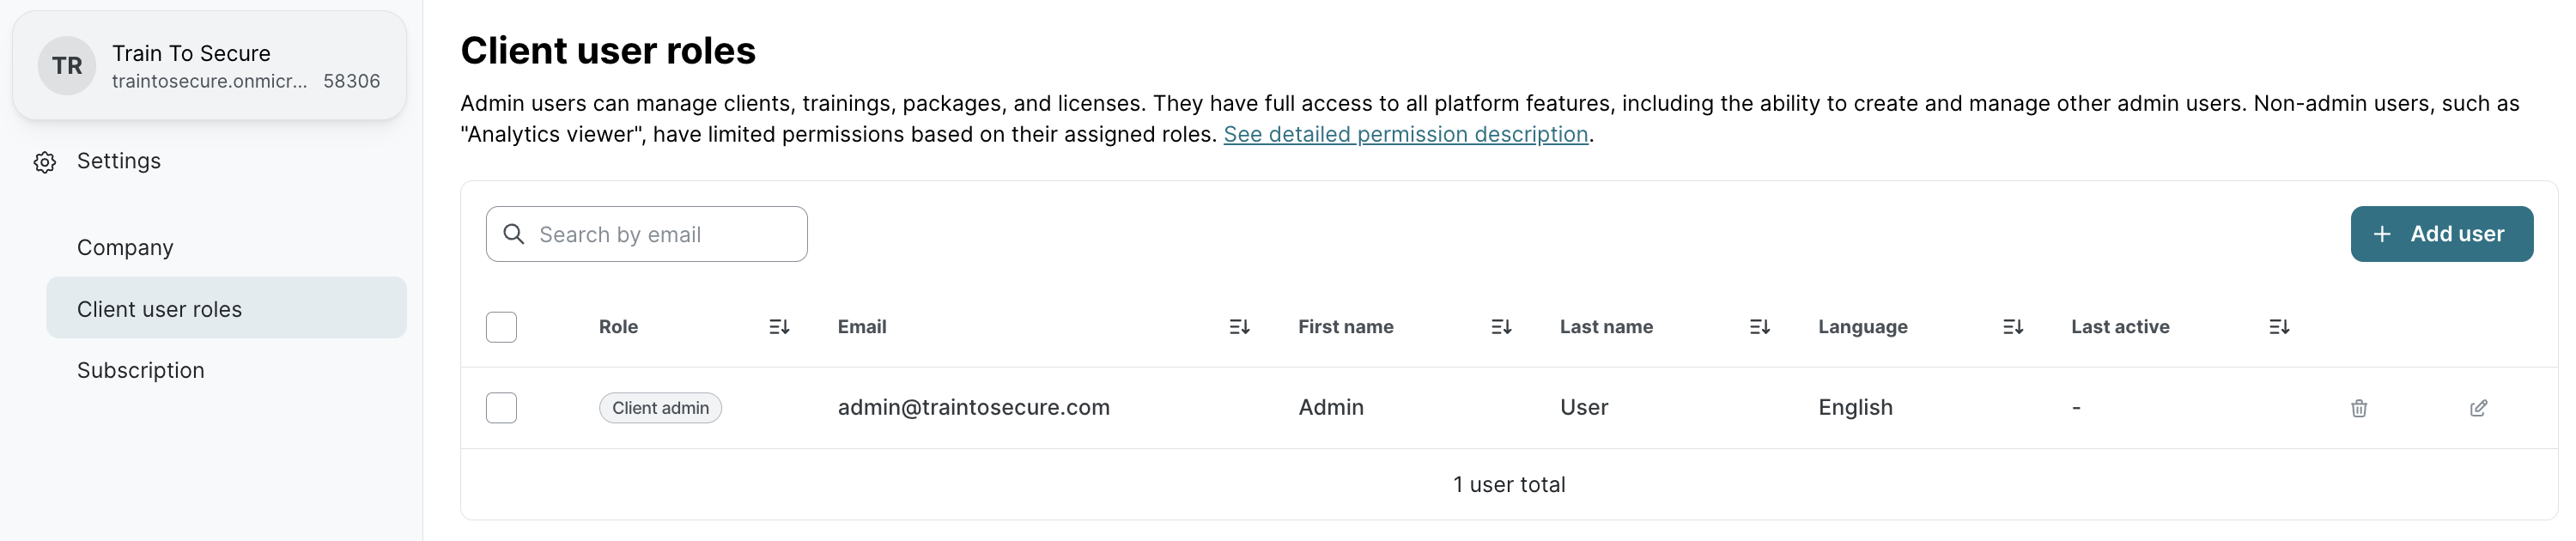
The newly added client admin should now be listed under the Client user roles menu.
-
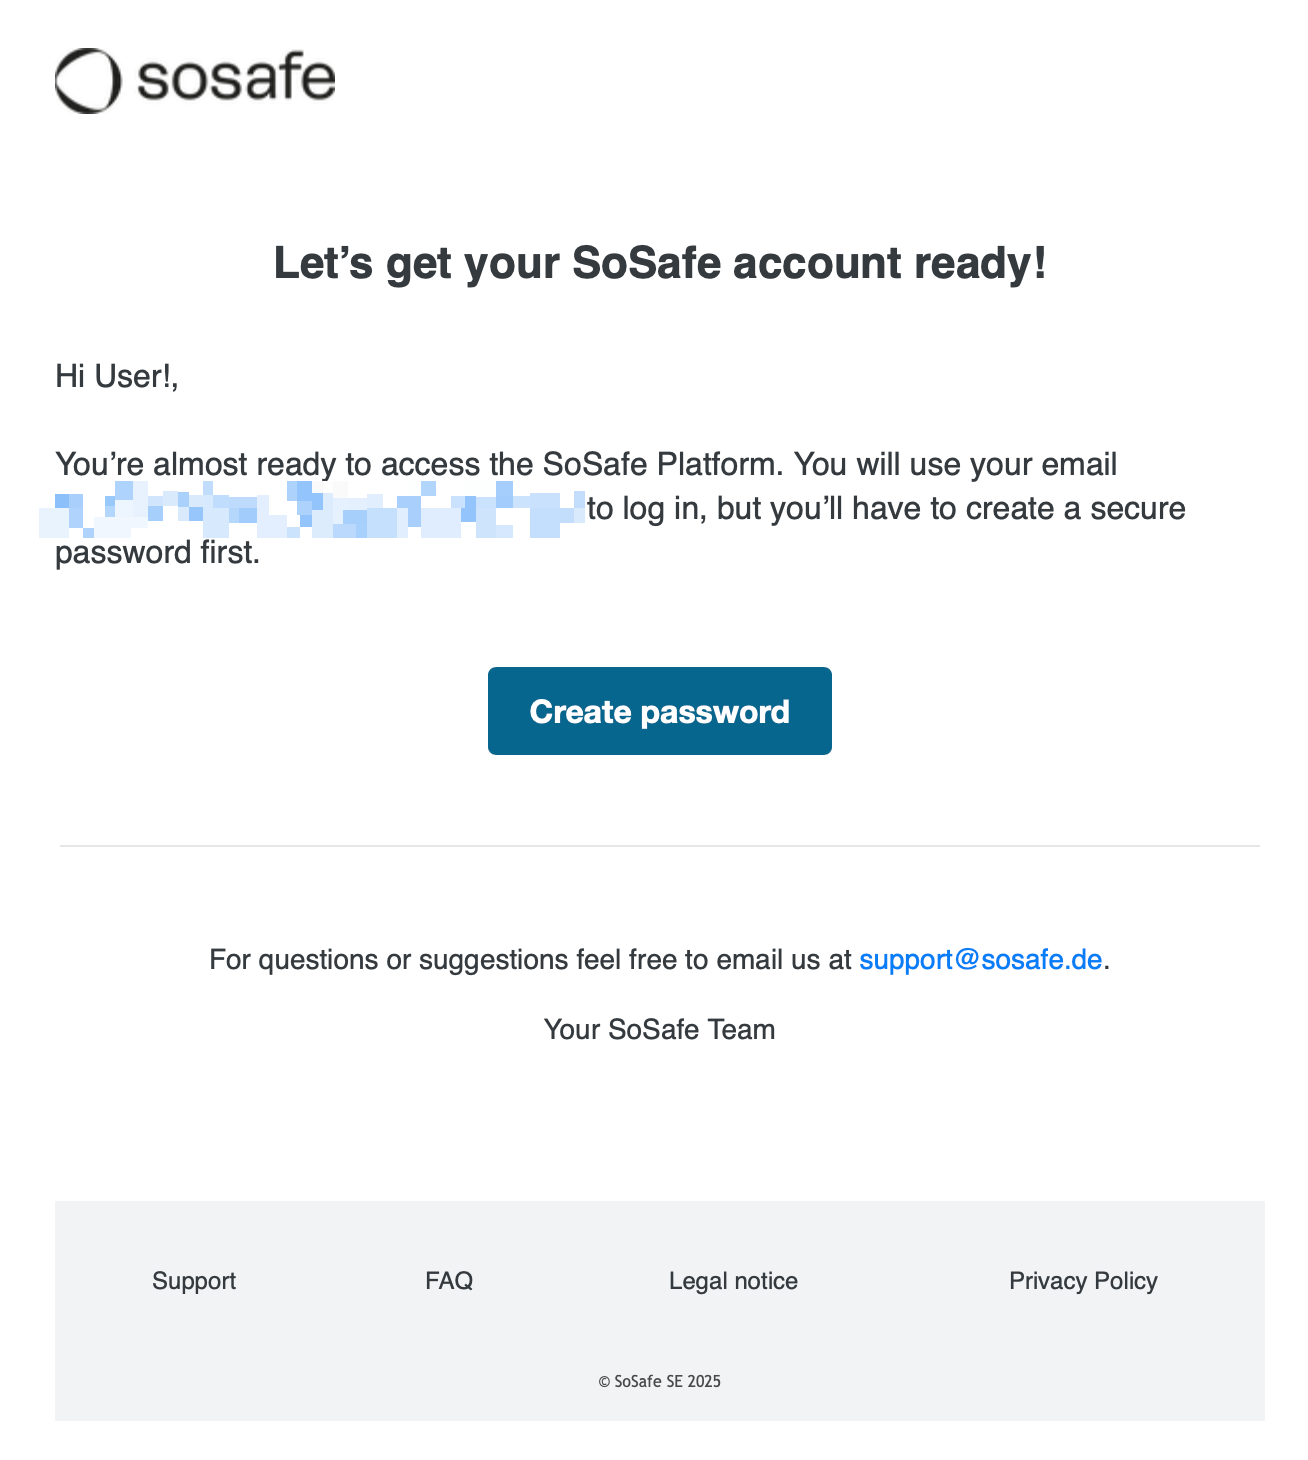
The new client admin should receive a welcome email from noreply@sosafe.de with the subject “Let’s get your SoSafe account ready!“.
Accessing the client platform
-
After the creation, you’ll receive a welcome email from noreply@sosafe.de with the subject “Let’s get your SoSafe account ready!“
-
Check your spam/junk folder if the email isn’t in your inbox within a few minutes.
-
-
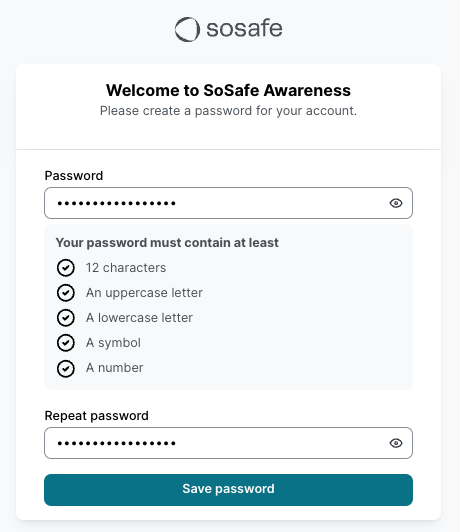
On the welcome email, Create password.
-
On the page Welcome to SoSafe Awareness, enter a valid password and select Save password.
-
On the SoSafe Partner Platform login page (https://app.sosafe.de), enter the new login credentials and select Login.

-
On the Welcome to the SoSafe Partner Platform page, select Start to begin the MFA configuration.
-
Follow the instructions and use the Authenticator app of your choice to activate MFA.
-
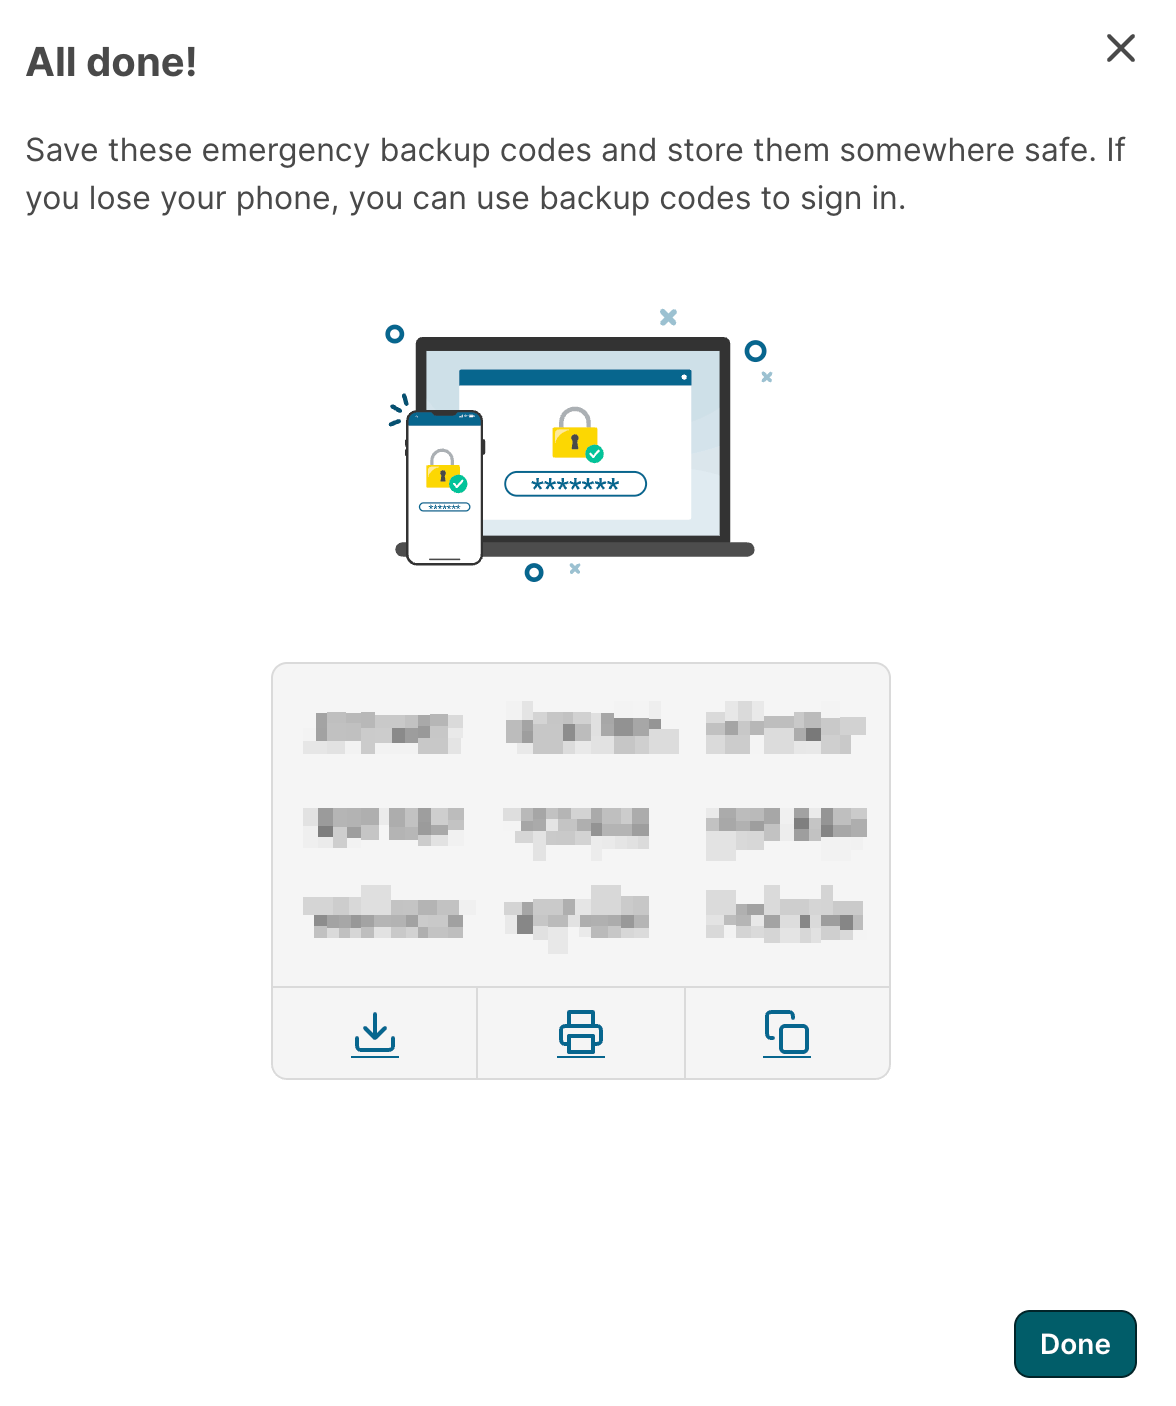
On the All done! page, save the emergency backup codes, and select Done.
-
You are now logged in to the SoSafe Partner Platform and can start accessing the client platform.
Updating a client admin's data
-
Go to the client settings and open the Settings menu.
-
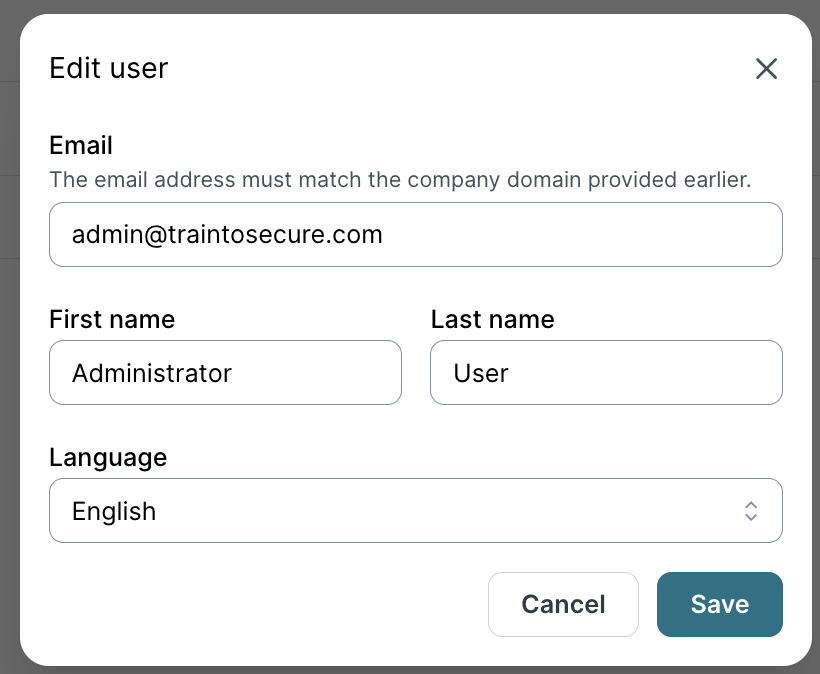
Then, open the Client user roles menu and select the edit icon for the user to update.
-
On the page Edit user, change the required fields, like First Name, Last Name, or Language, and select Save.
-
If the Multi-factor authentication confirmation window is shown, enter the authorization code sent to your authenticator app and select Submit.
Changing a client admin's password
-
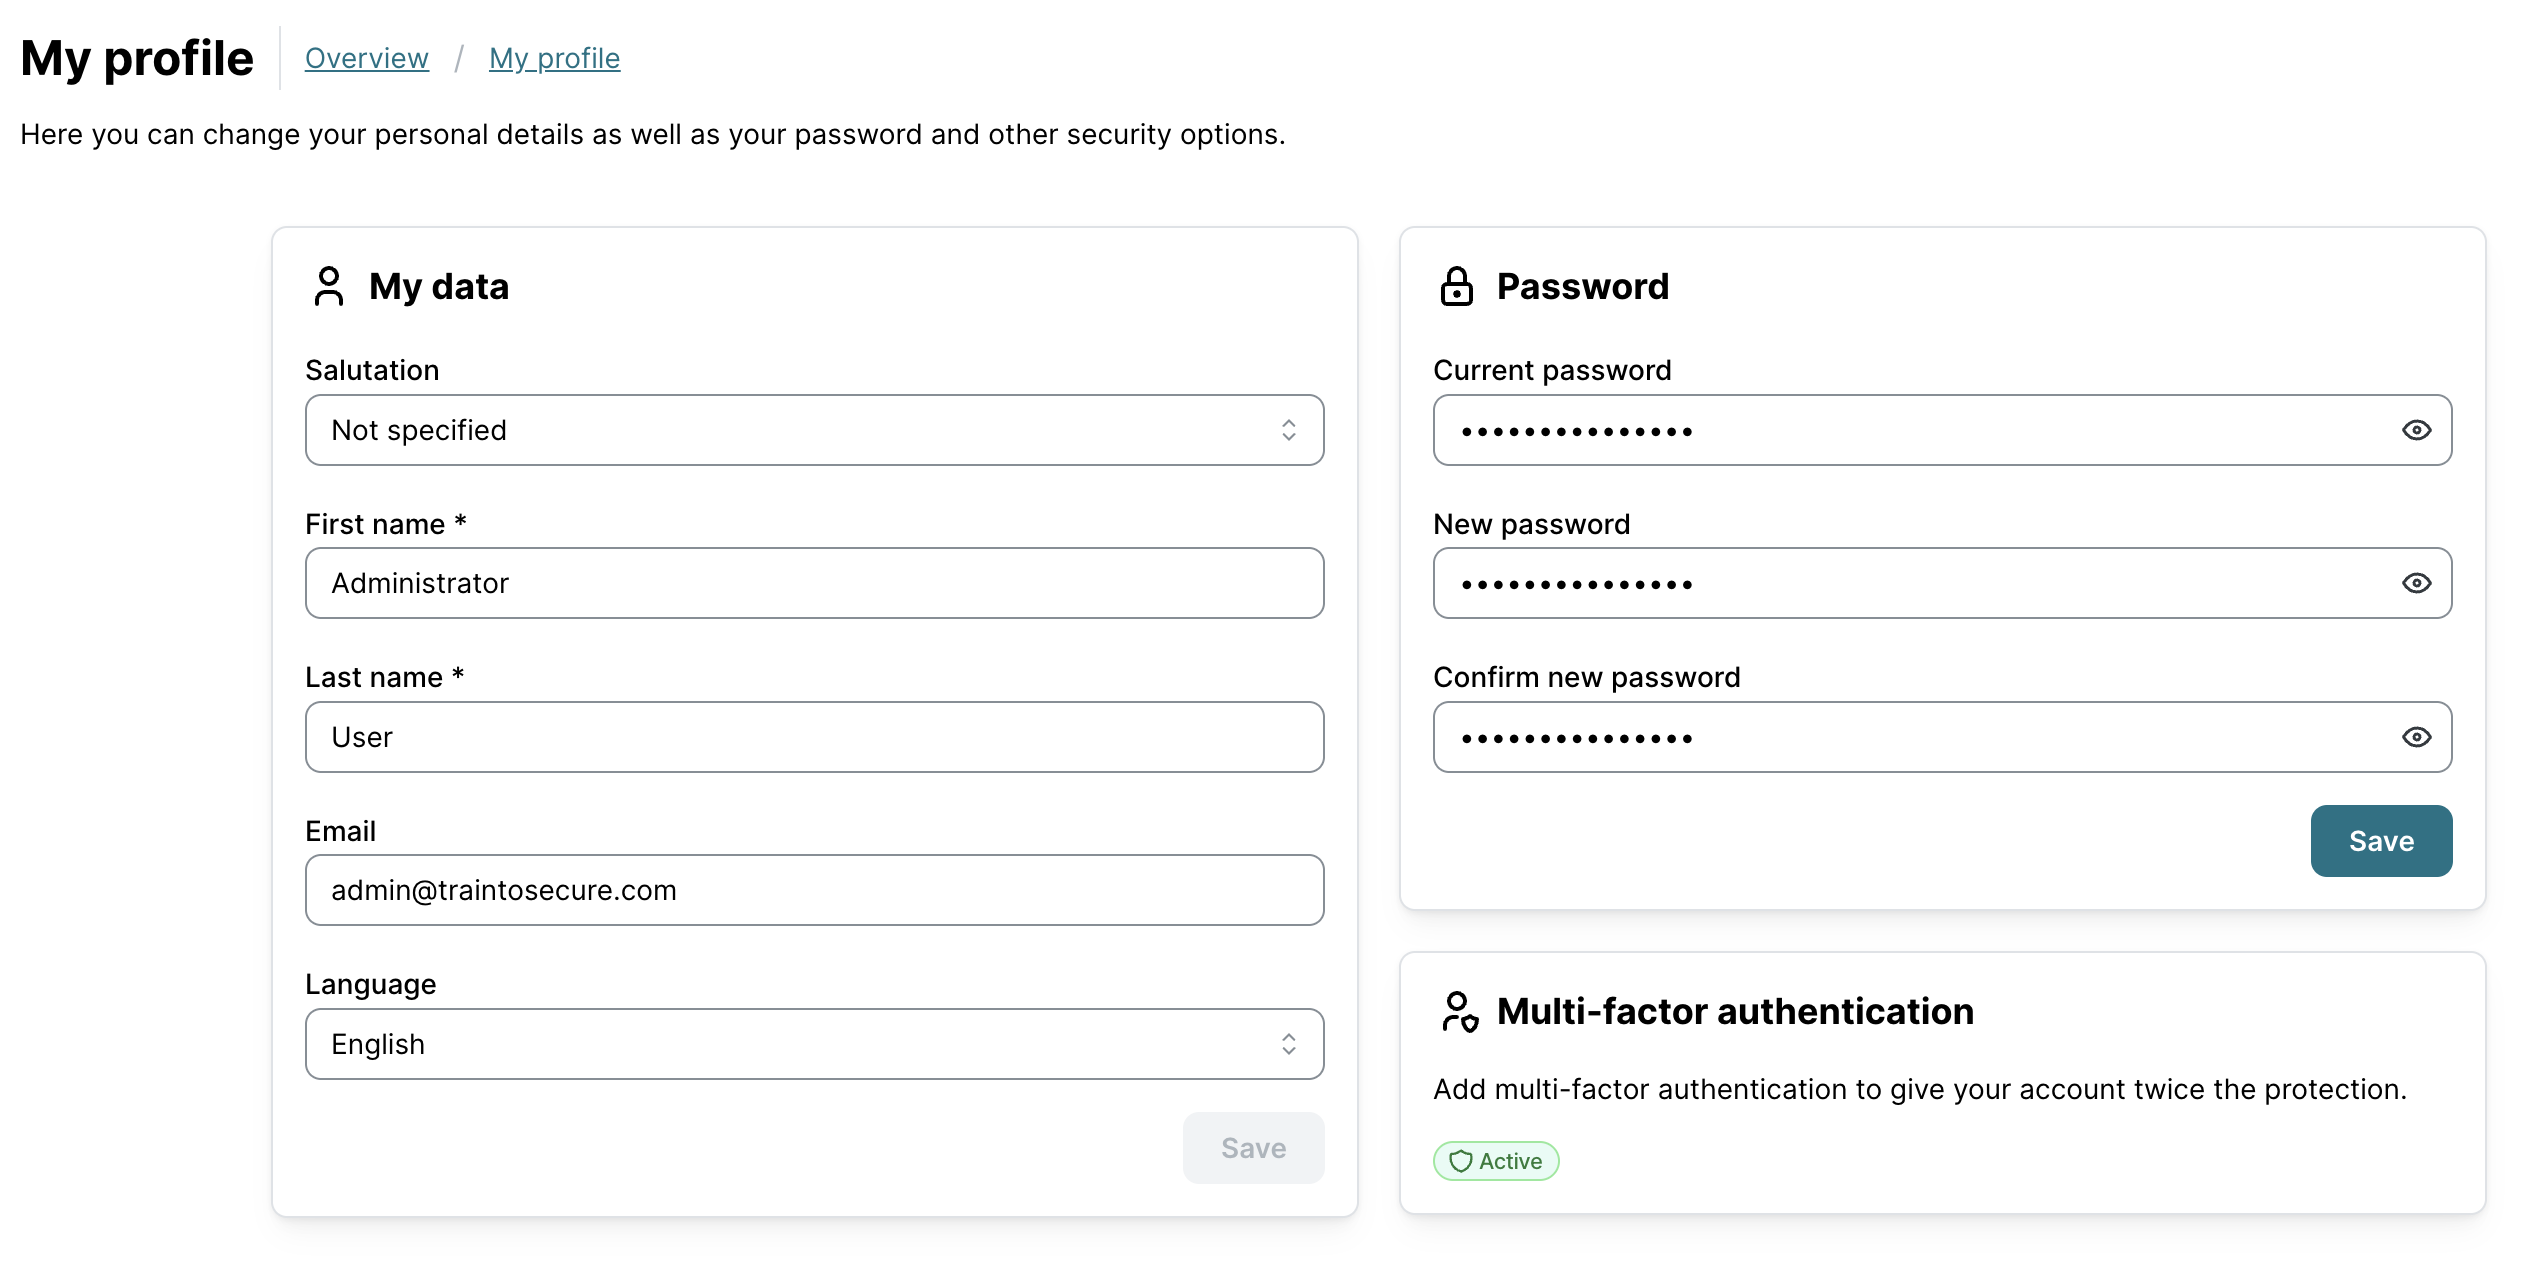
Go to SoSafe’s Partner Platform. In the top-right corner, select your client admin name, and then Profile.

-
On the page My profile,
-
To change your password, enter your Current password and the New password
-
To change other data, enter the updated information in the corresponding fields
-
-
Then select Save
-
If the Multi-factor authentication confirmation window is shown, enter the authorization code sent to your authenticator app and select Submit.
-
Resetting a client admin's password and MFA
Note: For security reasons, all client admin accounts must have Multi-Factor Authentication (MFA) active to log in to the SoSafe Partner Platform.
An Admin can reset the password and/or the MFA for another admin.
-
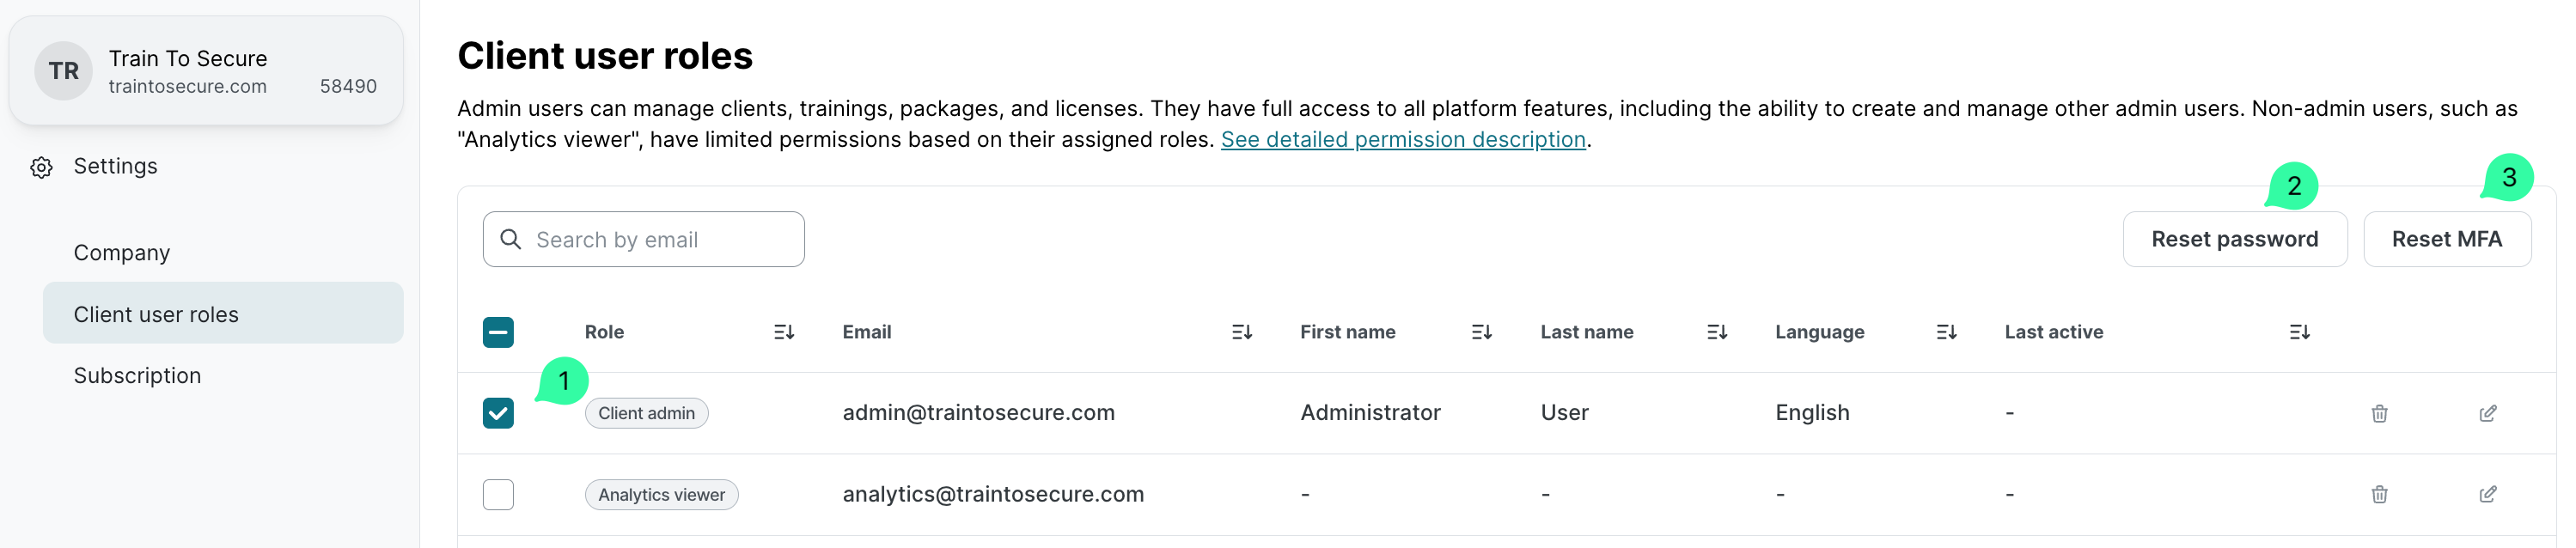
Go to the client settings and open the Settings menu.
-
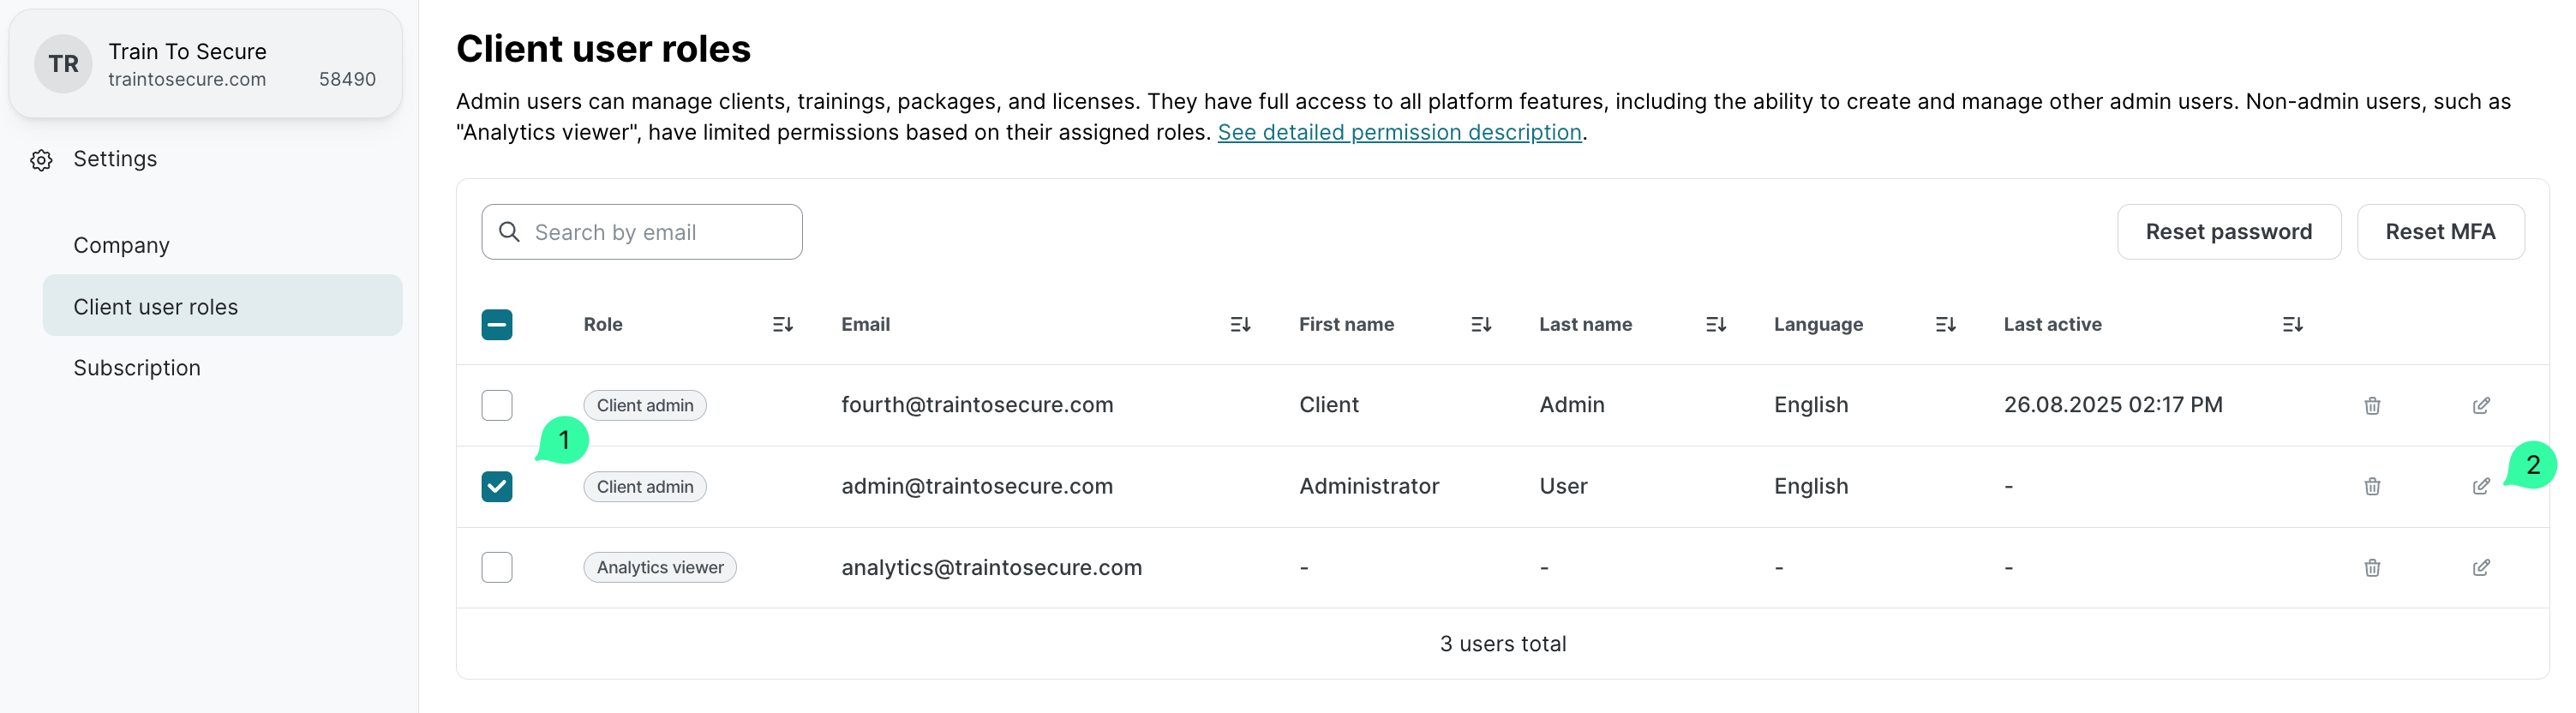
On the Client user roles, select the user (1) for the password and/or MFA reset.
-
Select Reset password (2), and then select Reset password to send an email with the password reset link directly to the client admin.
-
Select Reset MFA (3), and then select Reset MFA to delete the existing MFA configurations.
Note: The MFA reset does not change the existing client admin’s password. But the next time this analytics viewer user logs into the Partner Platform, they will need to complete the MFA configuration process again.
Deleting a client admin account
-
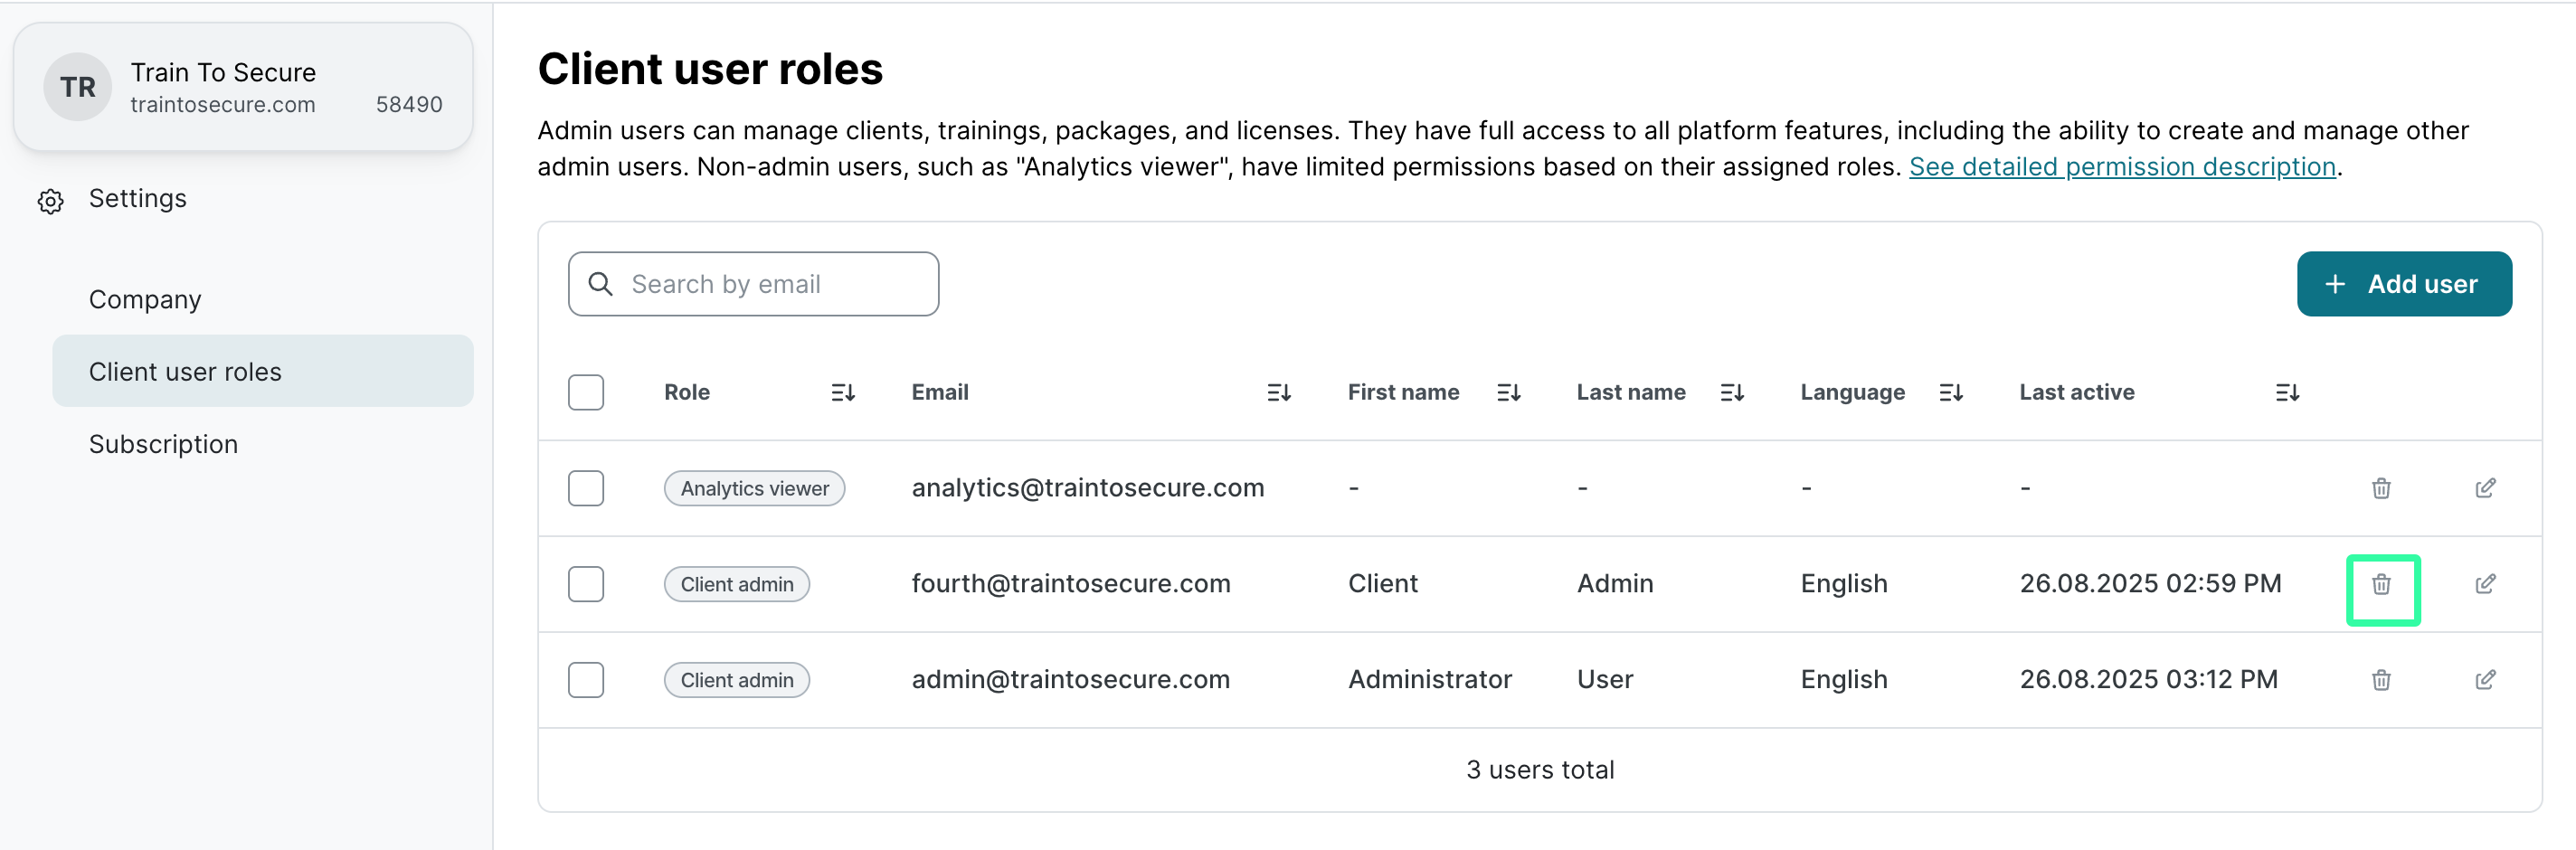
Go to the client settings and open the Settings menu.
-
On the Client user roles, select the delete icon next to the user to be deleted.
-
On the Delete user page, select Delete to confirm the deletion.