
When using Microsoft 365, it is possible that simulated phishing mails cause these warnings to appear:
-
This sender (example@example.com) is from outside your organization
-
We could not verify the identity of the sender. Click here to learn more.
-
The actual sender of this message is different than the normal sender. Click here to learn more
To prevent this warning, you can make use of the Tenant Allow/Block Lists feature in Microsoft 365. Doing so only takes a few minutes and we have prepared a step-by-step guide to make things easy for you.
-
Log in to your Microsoft Defender with an administrator account.
-
Expand the Email & collaboration menu, select Policies & rules, and then choose Threat policies.
-
Under Rules, select Tenant Allow/Block Lists.
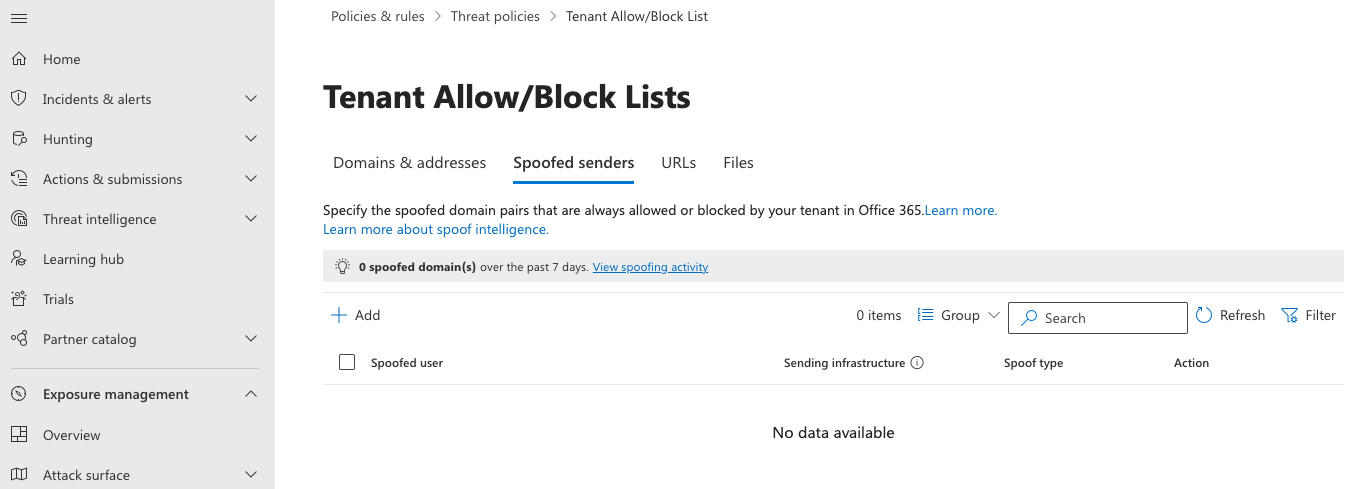
-
Select the Spoofed senders tab and then select Add. A new dialog will open.
-
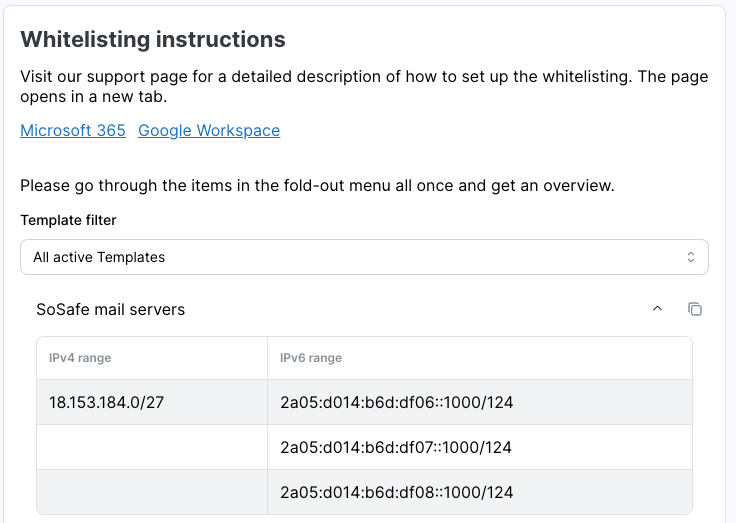
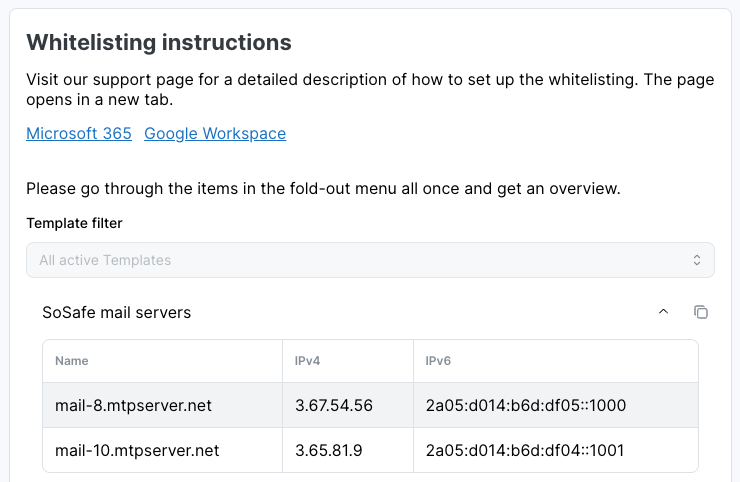
In the SoSafe Manager, navigate to Settings / Whitelisting and there select SoSafe mail servers. You must now determine whether your setup is based on individual IP addresses or an IP range. If an IP range is being used, follow the steps on the left. If individual IPs are used, follow the steps on the right.
-
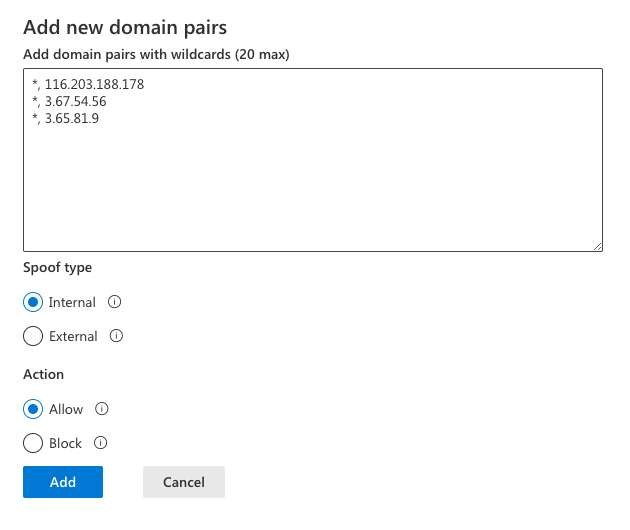
Go back to the email server portal. In the dialog window you opened (see 4.), you must add the entries in the list provided below. Note that you can only add 20 entries at a time. You must therefore split up the list into 2 add/save procedures.
-
Under Spoof type, select Internal. Under Action, select Allow. Finish the process by selection Add.
-
Go back to the email server portal. In the dialog window you opened (see 4.), you must add the IPv4 entries shown in the Manager. Following the example in the screenshot, these would be the required entries:
*, 3.67.54.56
*, 3.65.81.9
-
Under Spoof type, select Internal. Under Action, select Allow. Finish the process by selection Add.