
Read this article in: German
In this step, you can decide whether your organization will use dedicated accounts (email & password) to access SoSafe or instead set up a Single Sign-on (SSO) connection. Using email & password requires no setup beyond the user data you have already provided. However, we still recommend going with SSO. It’s not only more secure but also a lot easier for users because they won’t have to remember another password. Easier access to training improves both adoption and results!
Existing customer?
If you’ve already completed your onboarding, you can still set up SSO by navigating to Settings / SSO in the Manager. The process will be the same as shown here. Note that any existing legacy SSO setups must be disconnected before proceeding. Reach out to your SoSafe Customer Success point of contact to make the transition.
Prerequisites for SSO
Before starting the SSO setup, make sure you meet the following requirements:
-
Identity provider (IdP): You must use an identity provider supported by Auth0, such as Microsoft Entra ID, Google Workspace, or a custom SAML/OIDC provider.
-
Administrative rights: To complete the setup, you will need admin rights for your IdP. If you are not an admin, you can generate a setup link to send to your IT department.
Note: SSO is set up at the tenant level. It applies to your entire organization and not individual e-learning courses. Once it has been set up, it is applied to all e-learning campaigns.
Setting up the SSO integration
-
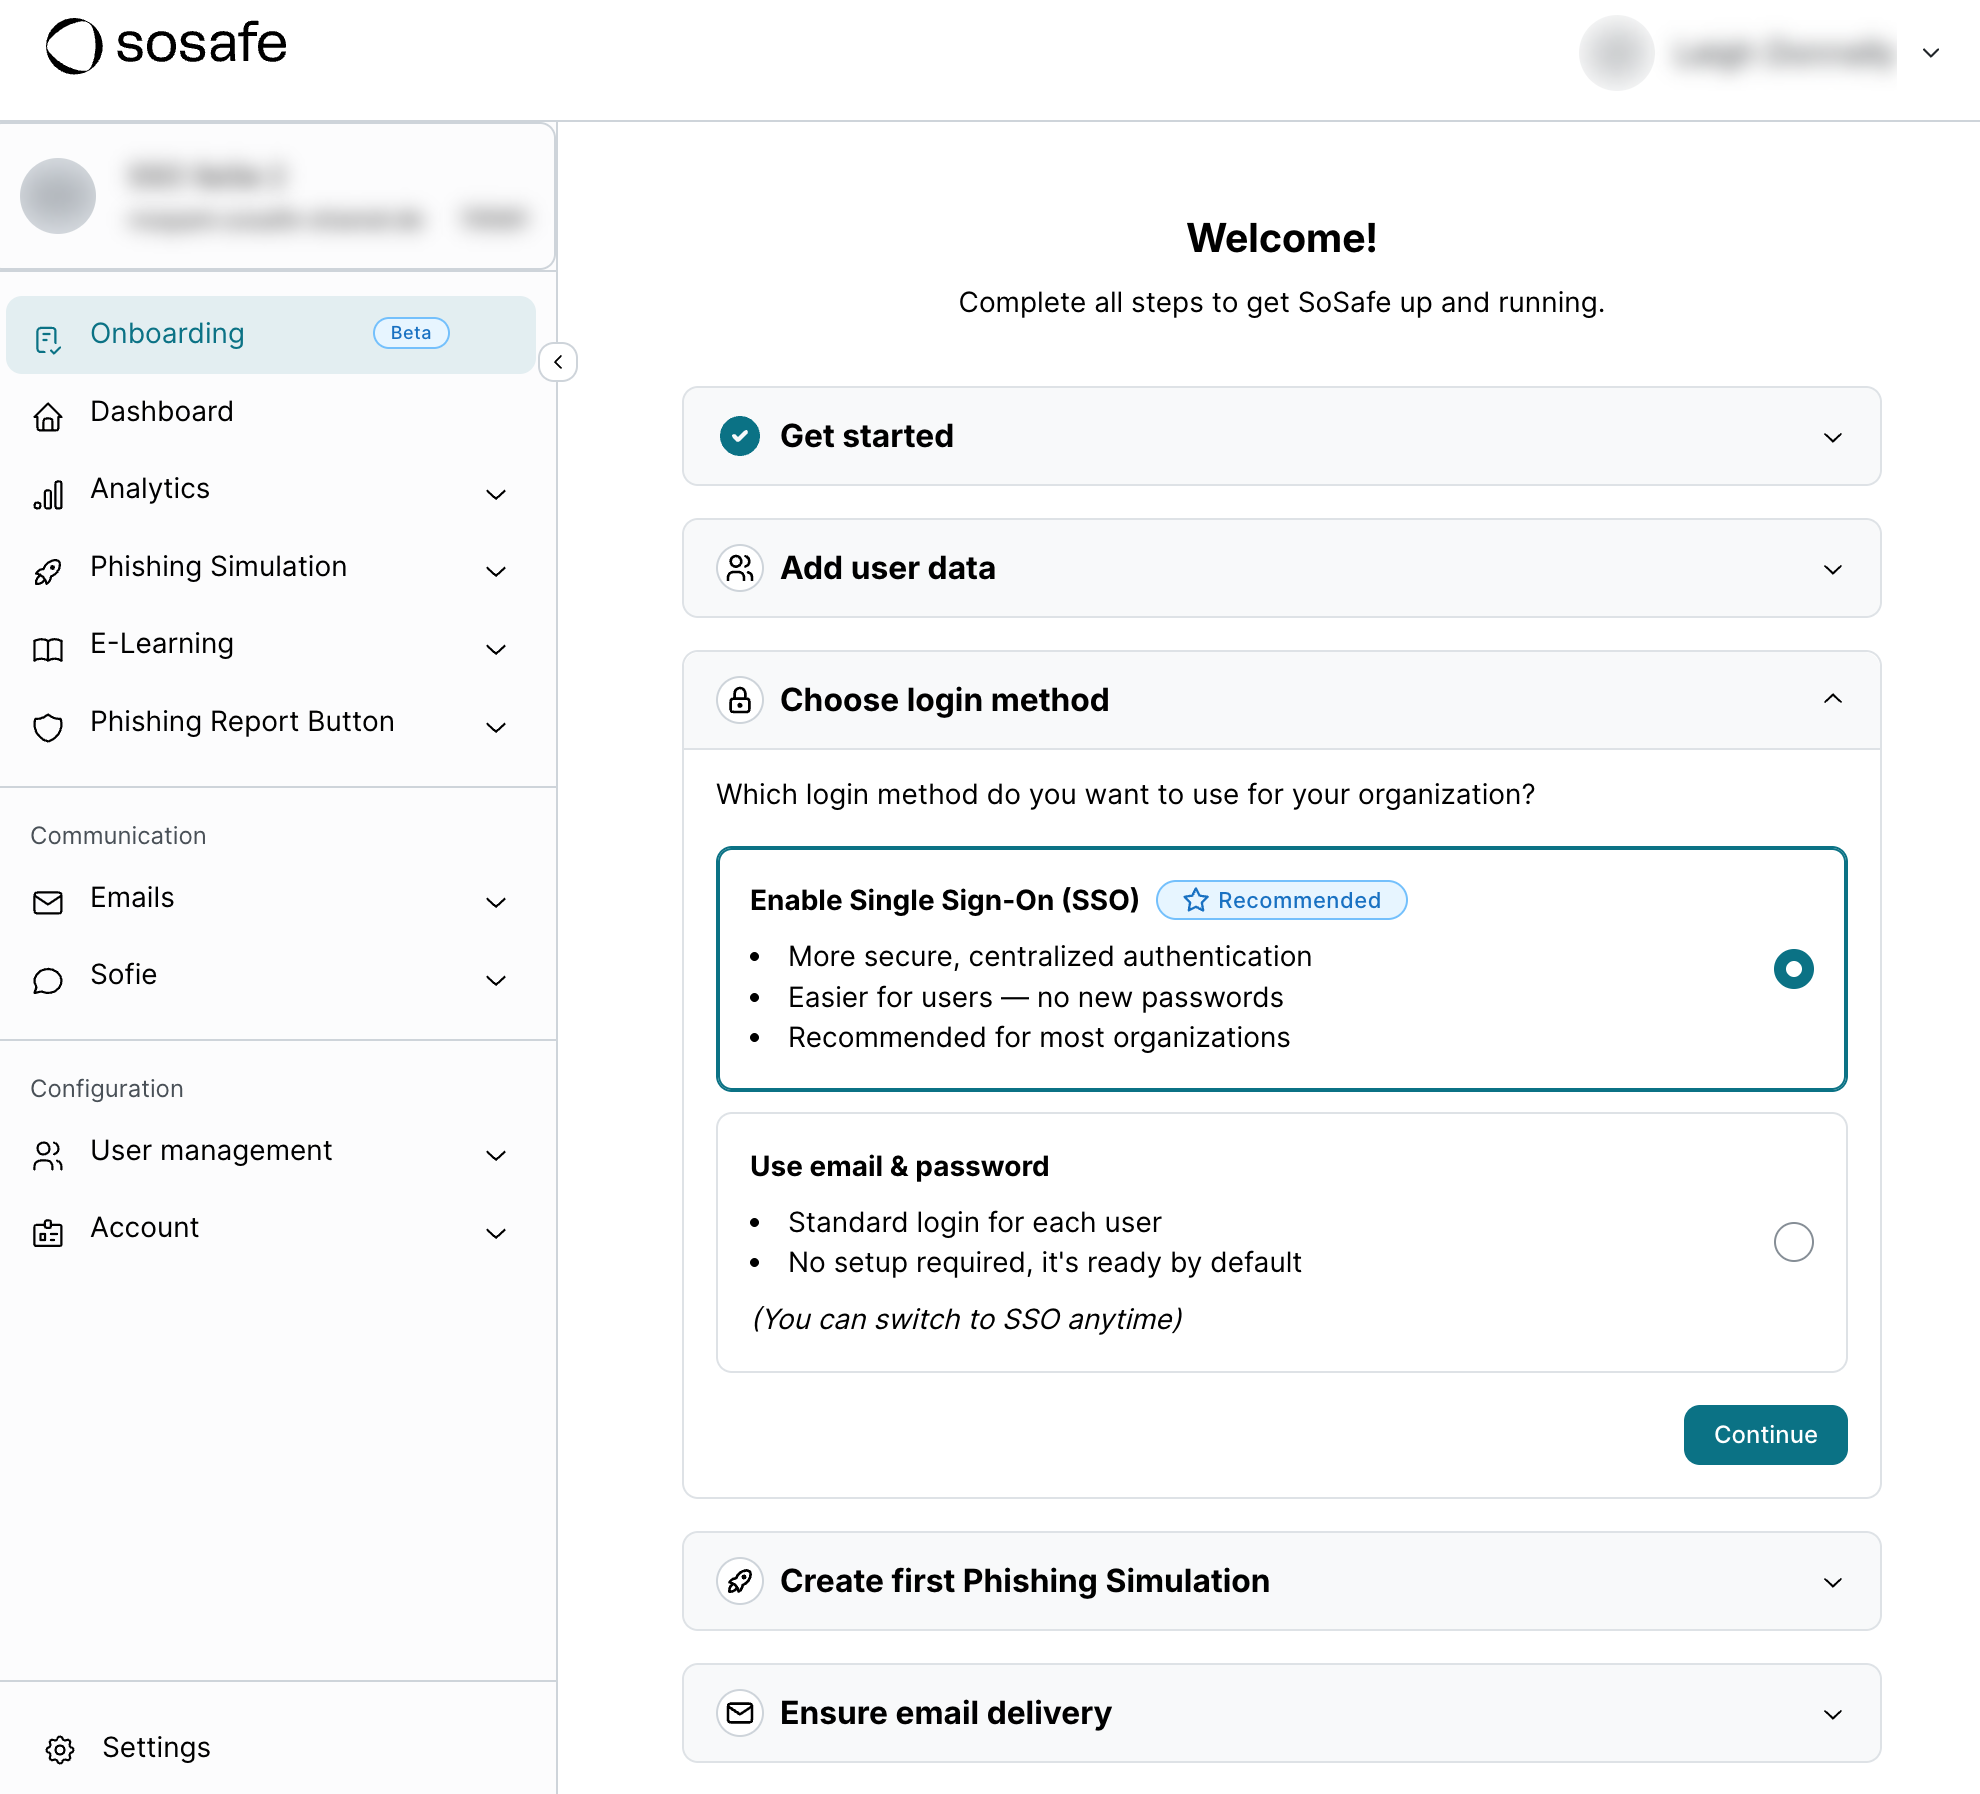
In the Onboarding dashboard, select Choose login method, followed by Enable Single Sign-On (SSO) and then by Continue.
-
Pick a name for your connection and select Start connection.

-
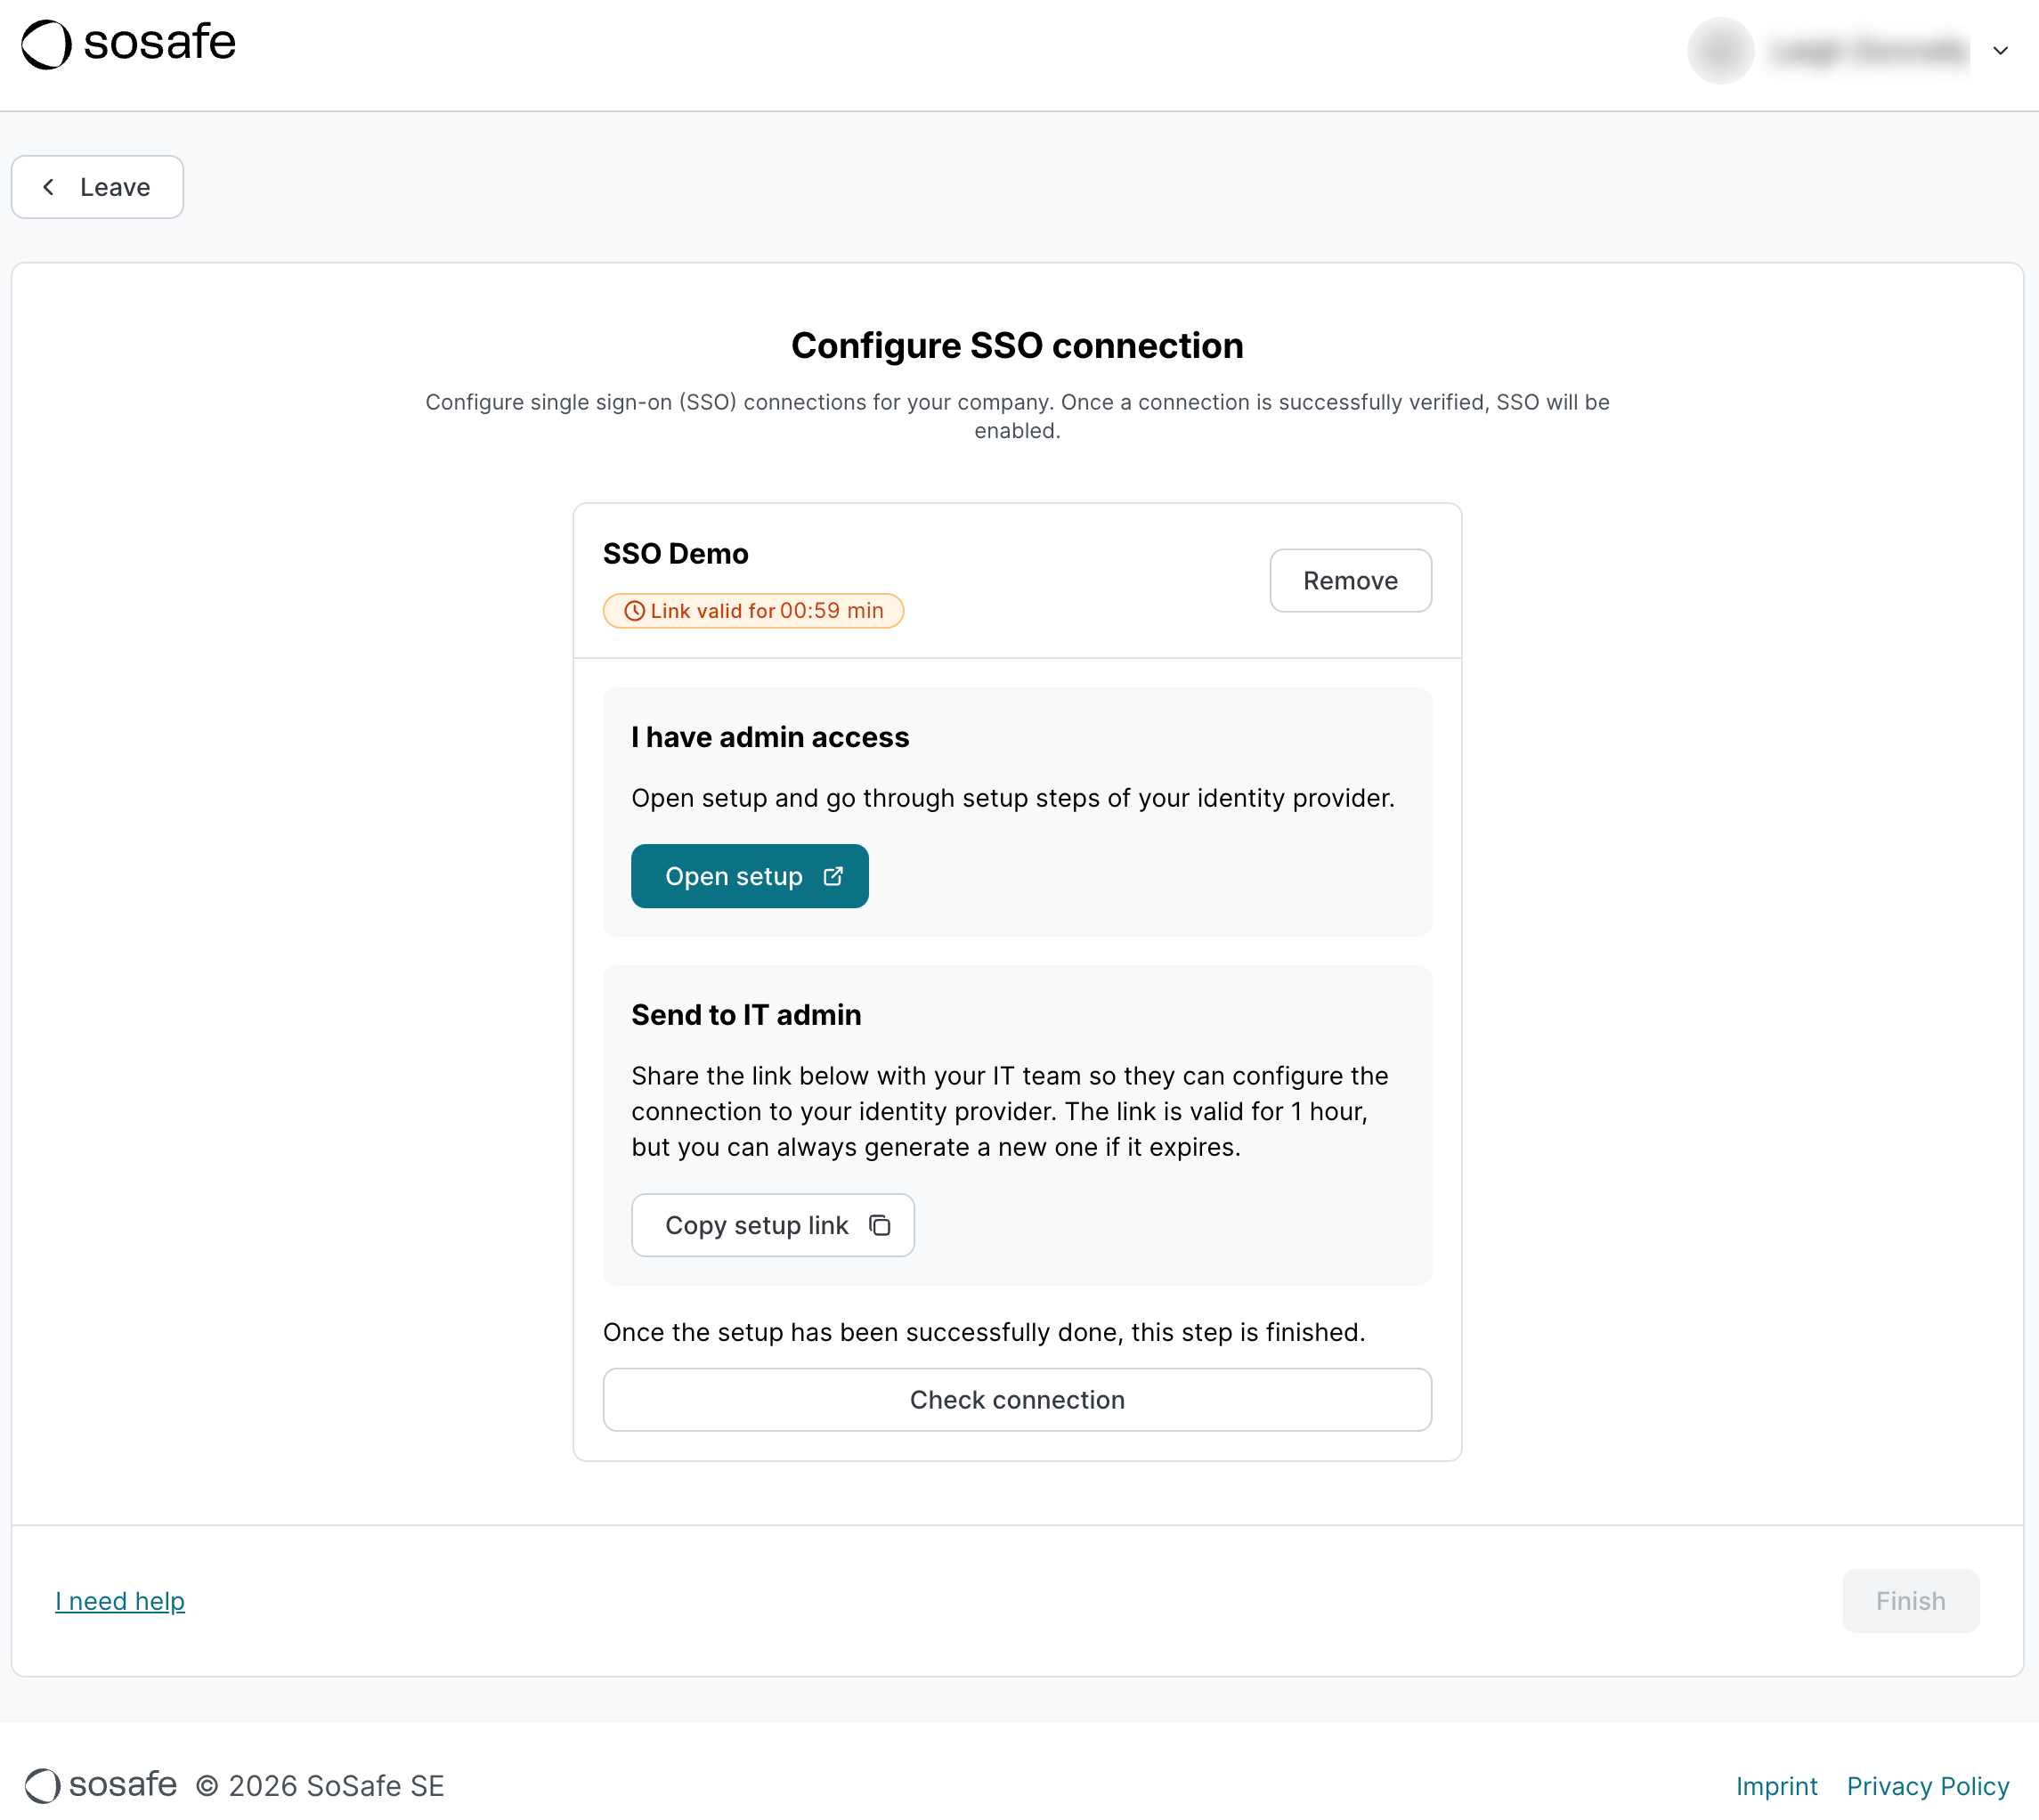
You now have 2 options. If you have admin access to your identity provider, select Open setup. A new page will open (see step 4). If you don’t have admin access, select Copy setup link and send that link to the responsible person, likely in your IT department. Either way, you have one hour for the connection to be set up. Afterwards, the link will expire and you will have to restart this process. This limitation exists for security reasons.
-
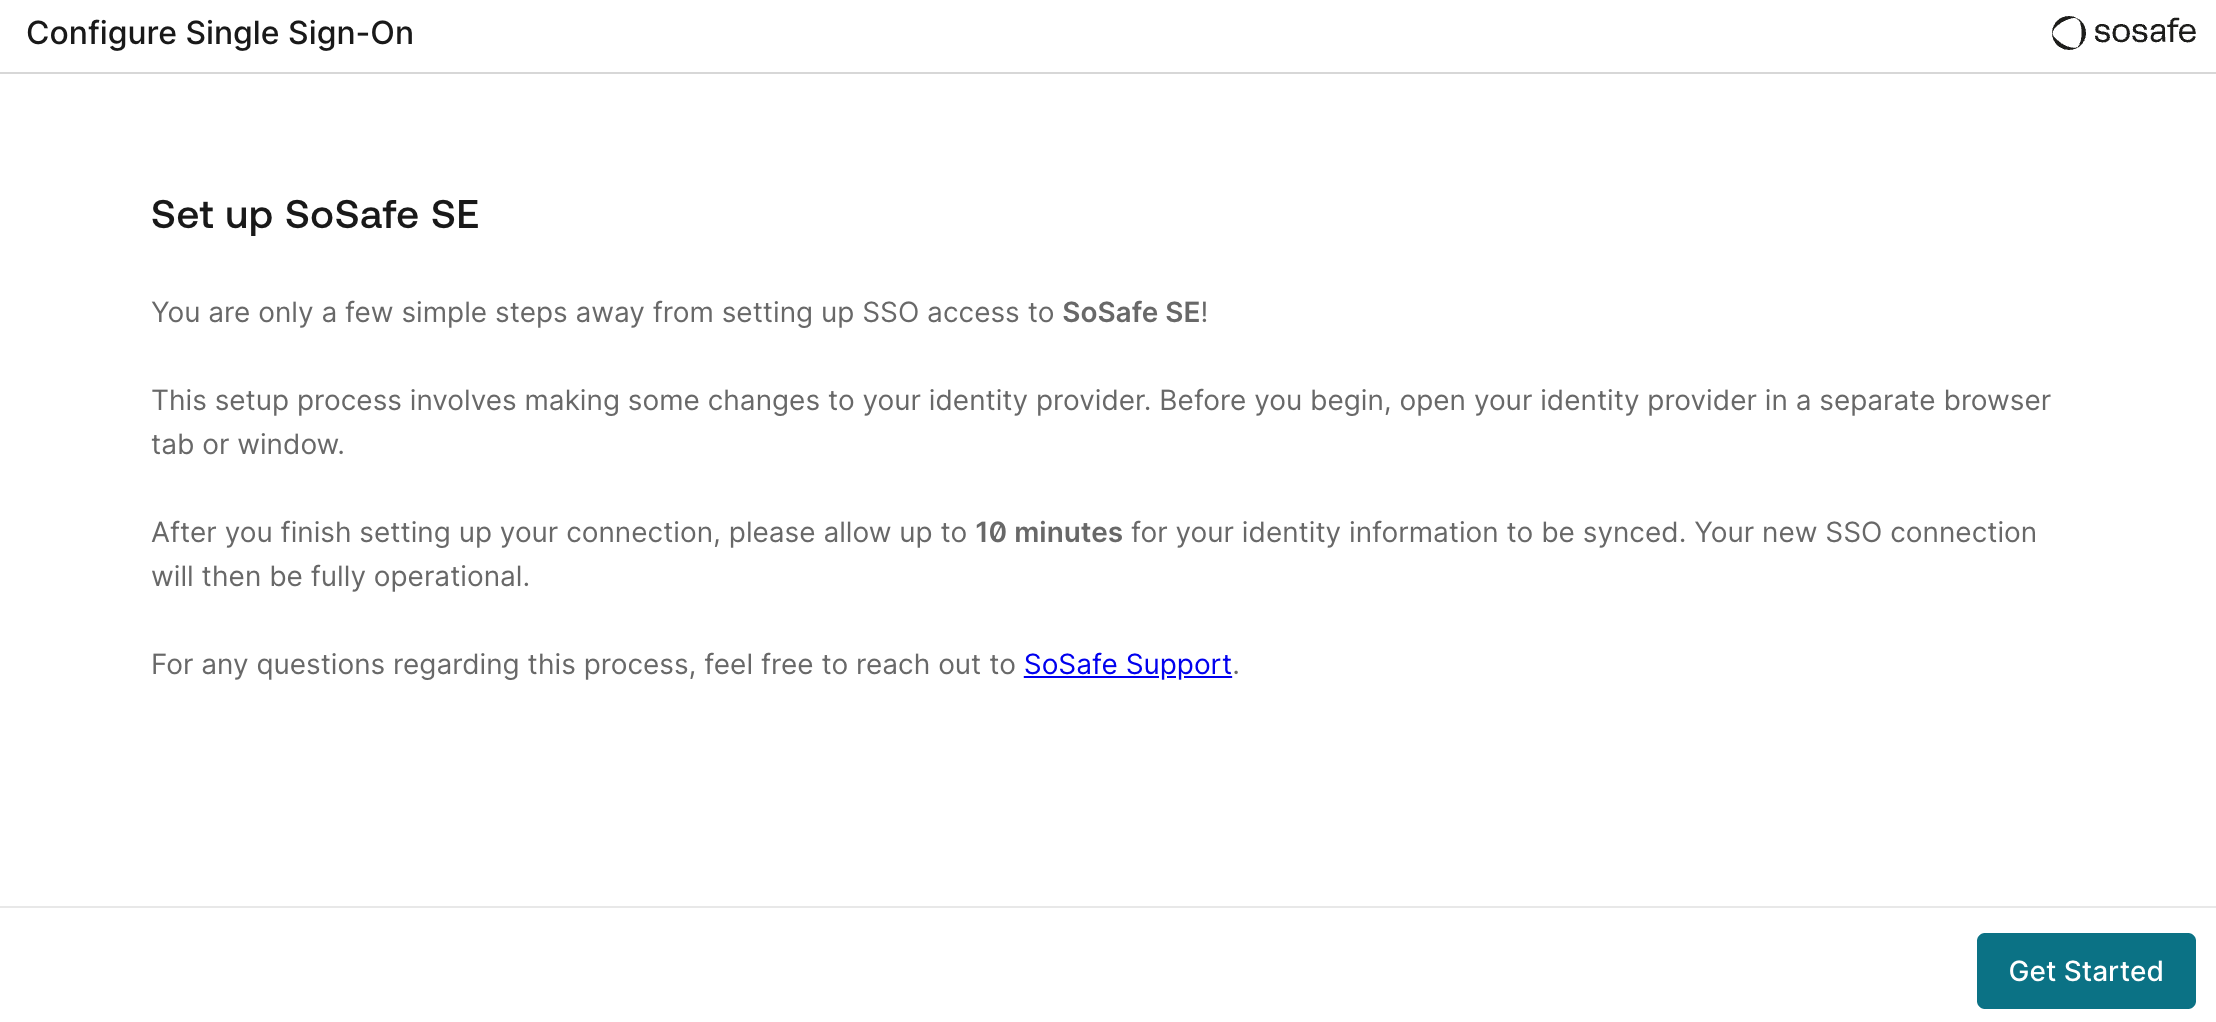
Follow the instructions provided directly on the page. This step depends on your Identity Provider and all required information is provided directly within the setup flow.
-
Once you have completed the process, return to the Manager and select Check connection to verify the setup.
-
If the test is successful, you will be shown a preview of your user data. Select Finish to activate the connection. The step Choose login method will now be marked as completed in your Onboarding dashboard.
-
If the test was not successful, please follow the process again from start to finish. When in doubt, reach out to your SoSafe Customer Success point of contact.
Managing the SSO integration
You can either select Details in the Choose login method step of your Onboarding dashboard or navigate to Settings / SSO.
Disconnecting and deleting the SSO integration
-
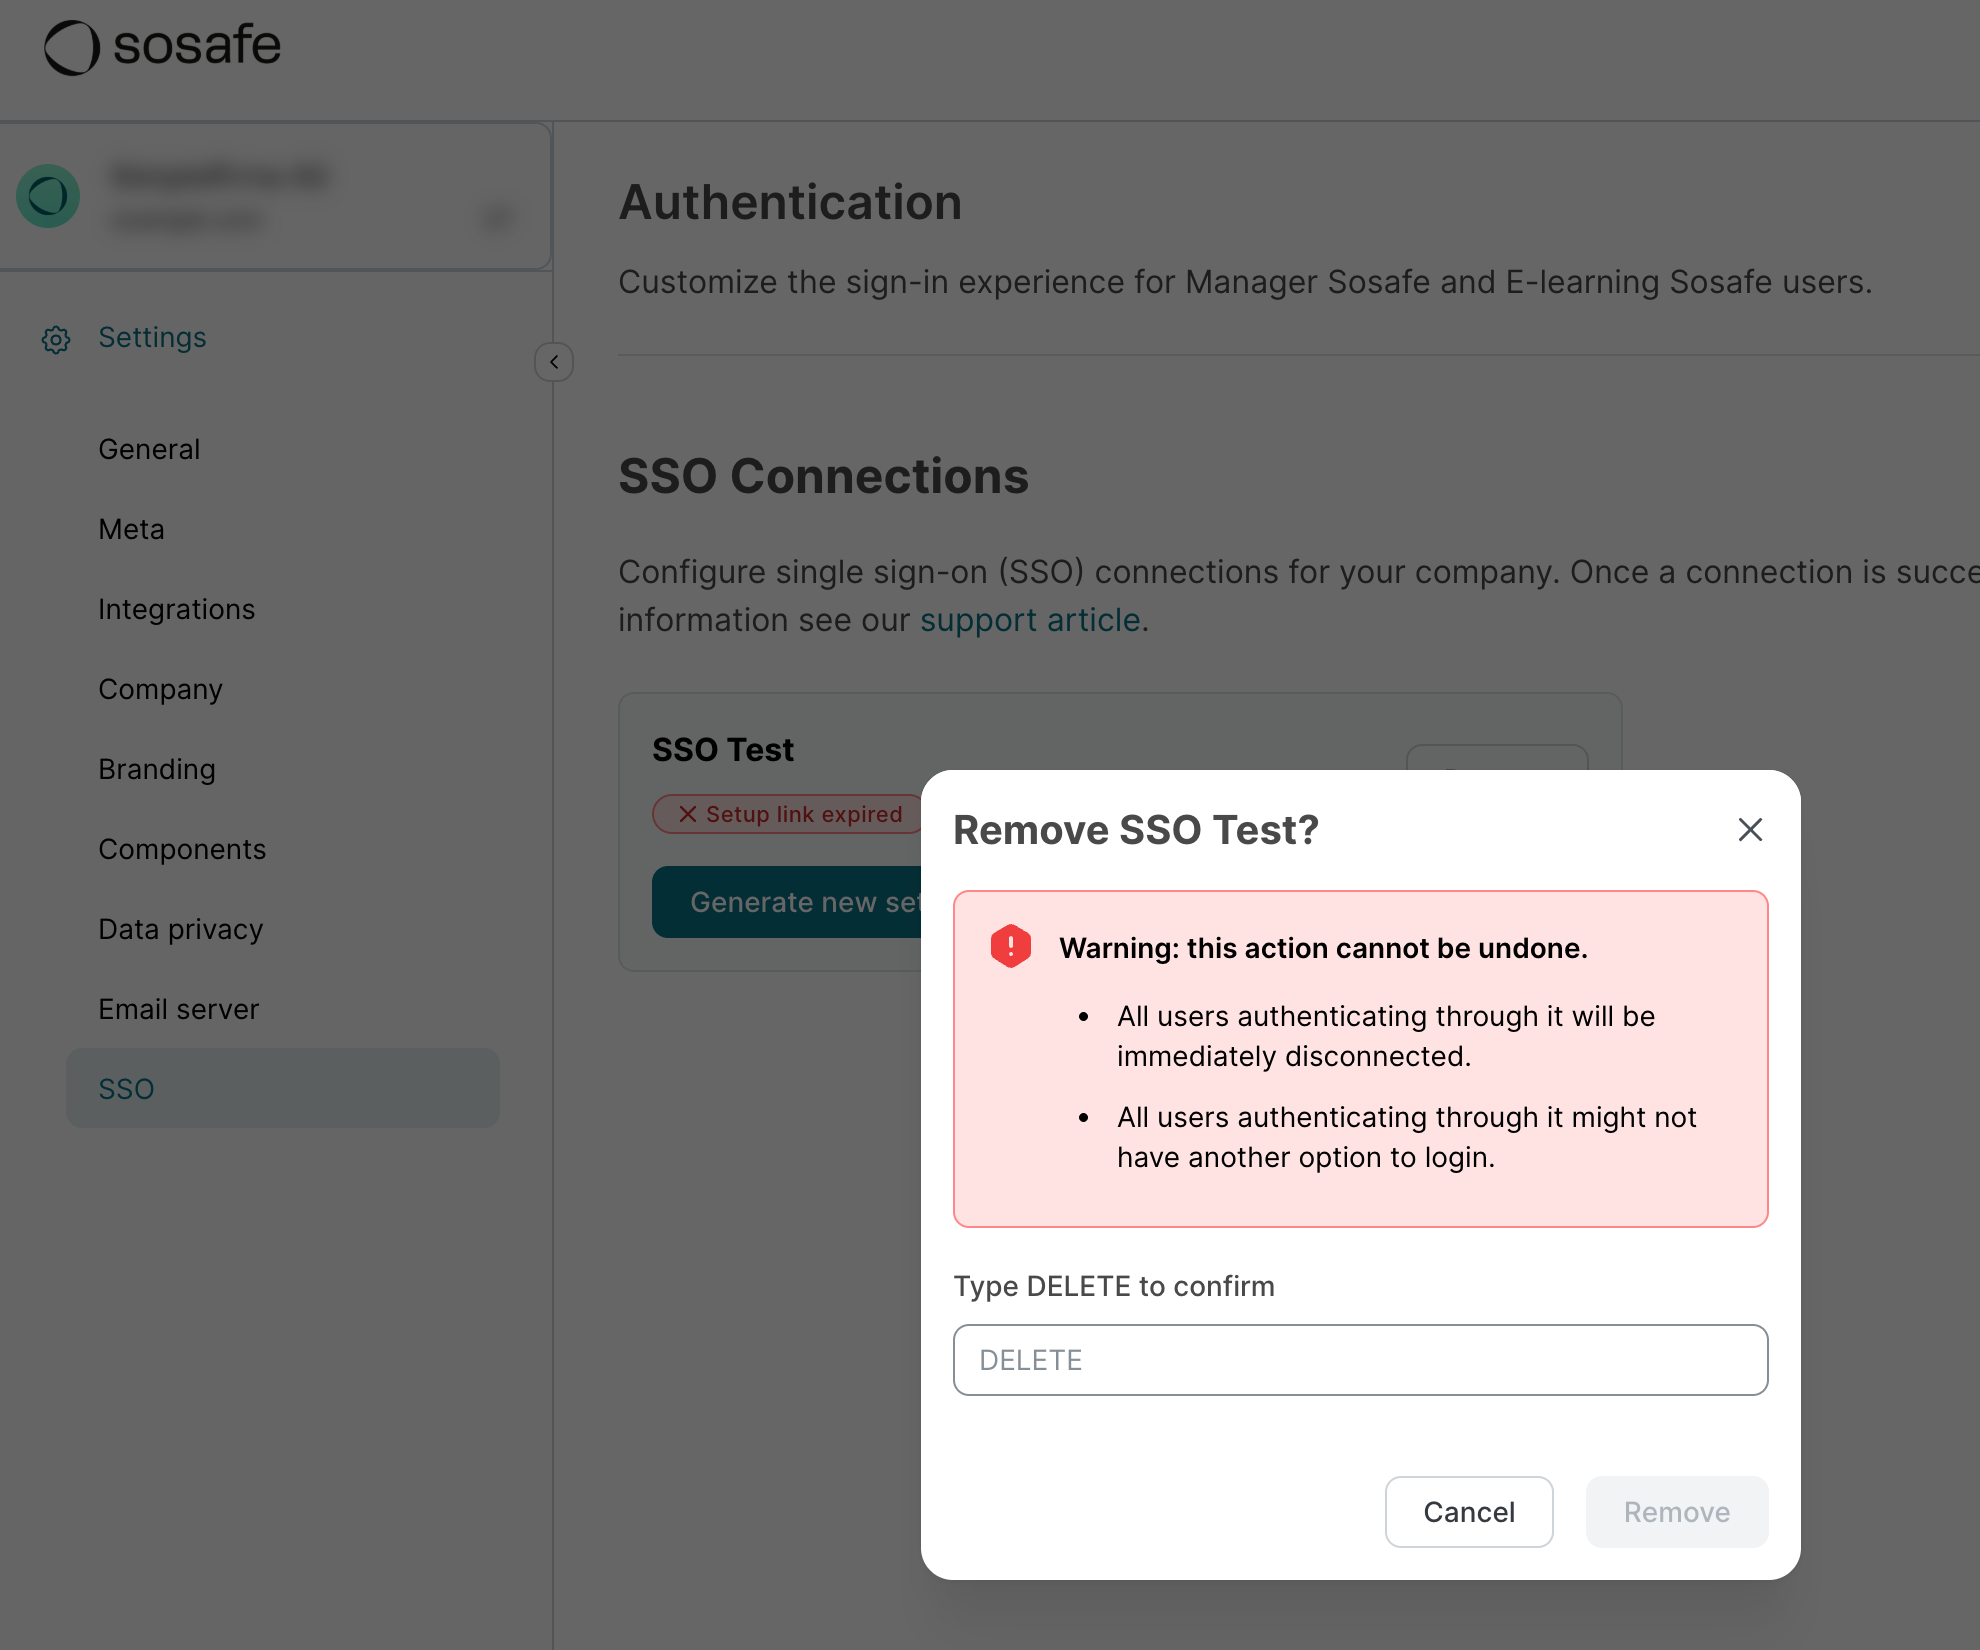
Select Remove next to your SSO connection. A new dialog window will open, asking you to confirm the deletion.
-
Enter DELETE in the text field and select Remove.
-
Your SSO connection has now been removed. All users who were logged in this way will be disconnected immediately. If no alternative login method is enabled, users will no longer have access to any active campaigns.
We recommend also deleting the application that was created within your identity provider during setup as well.
Frequently asked questions
What happens if I skip SSO setup?
If you select "Use email & password," users will log in using standard credentials after they register and create a password. No configuration is required by default.
What are the login options once SSO is active?
You can choose to enforce SSO Login only (recommended) or allow both SSO & Email/Password Login via the SSO settings page.
Can I have multiple SSO connections?
Yes, Auth0 SSO allows you to enable multiple identity providers across your organization if needed.
How do users log in?
Users enter their work email. The system then determines if they are an SSO user. If their authentication is up to date, they will be sent directly to the SoSafe platform. If not, they will be redirected to the identity provider’s login page to confirm their credentials.
Do SSO credentials or certificates expire?
Yes. Customer admins are responsible for monitoring and managing the lifetimes of their own connection secrets and certificates to ensure continuous service:
-
What to watch: All types of SSO connections (Entra ID, Google Workspace, SAML, and OIDC) use secrets or certificates with lifetimes typically defined by your own IT admins. These can range from a few months to several years.
-
If they expire: Users will be unable to log in immediately.
-
Next steps: As a self-serve workaround, admins should re-run the setup wizard via the SSO settings to update the secret or certificate before the expiration date arrives.