Read this article in: German, English
Sofie’s Policy Management helps you roll out policies, prompt employees to read & acknowledge them, and to track the corresponding acknowledgements.
What Policy Management can do
Sofie can send policies directly to your users through Microsoft Teams or Slack. Users can read the policy and then acknowledge it directly with a quick interaction with Sofie. Once users have acknowledged a policy, you can download a complete report from the SoSafe Manager, which is critical for compliance audits.
Prerequisites
You must have the Sofie app connected to your MS Teams or Slack workspace. If you have not connected it yet, please follow the instructions in this article first: Sofie installation and customization
How to manage your policies
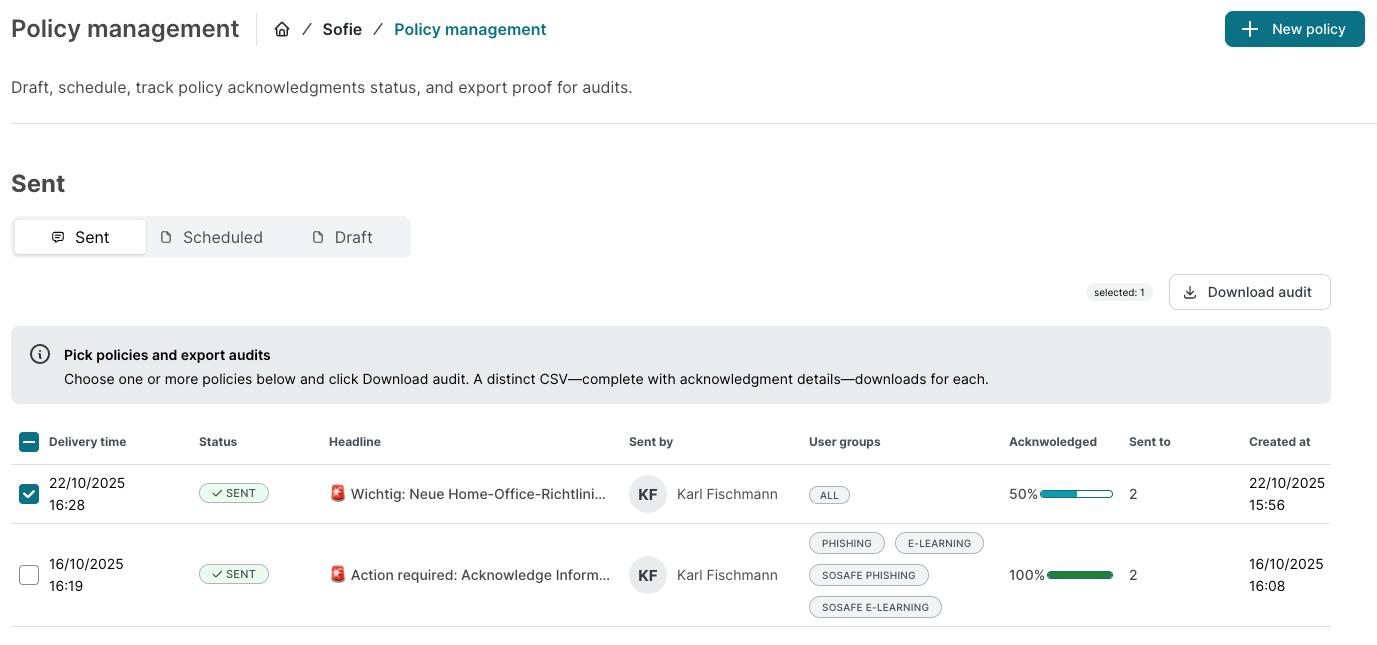
The main dashboard is organized into three tabs to help you manage your policies.
-
Sent tab: Here you can see all policies that have already been sent. You can view the acknowledgement rate, preview the message, or resend the message to users who may not have received it. You can also download an audit report of the acknowledgements:
-
Select the checkbox next to one or more policies in the list.
-
In the upper right of the table, select the Download audit button.
-
A separate CSV file containing the acknowledgement details will be downloaded for each policy you selected.
-
-
Scheduled tab: This tab shows all policies that are scheduled to be sent in the future. You can choose to edit, preview, or delete any scheduled policy.
-
Draft tab: This tab contains all policies that you have saved as a draft. You can choose to edit, preview, or delete any draft.
How to create and send a new policy
This section will guide you through creating, configuring, and sending a new policy to your users.
Step 1: Navigate to Policy Management
-
In the main navigation menu, select Sofie.
-
Select Policy Management from the sub-menu. This will open your main dashboard, showing all previously sent policies.
Step 2: Create your policy message
-
In the top right corner, select New policy. This opens the policy editor.
-
Fill in the required fields to create your message for the users:
-
Headline: Write a clear and concise headline to get your users' attention.
-
Link: Insert the link to the policy document. Ensure that all targeted users have permission to access this link.
-
Message: Write a short message to explain what the policy is about and what you need users to do. You can use the placeholder text as a starting point.
-
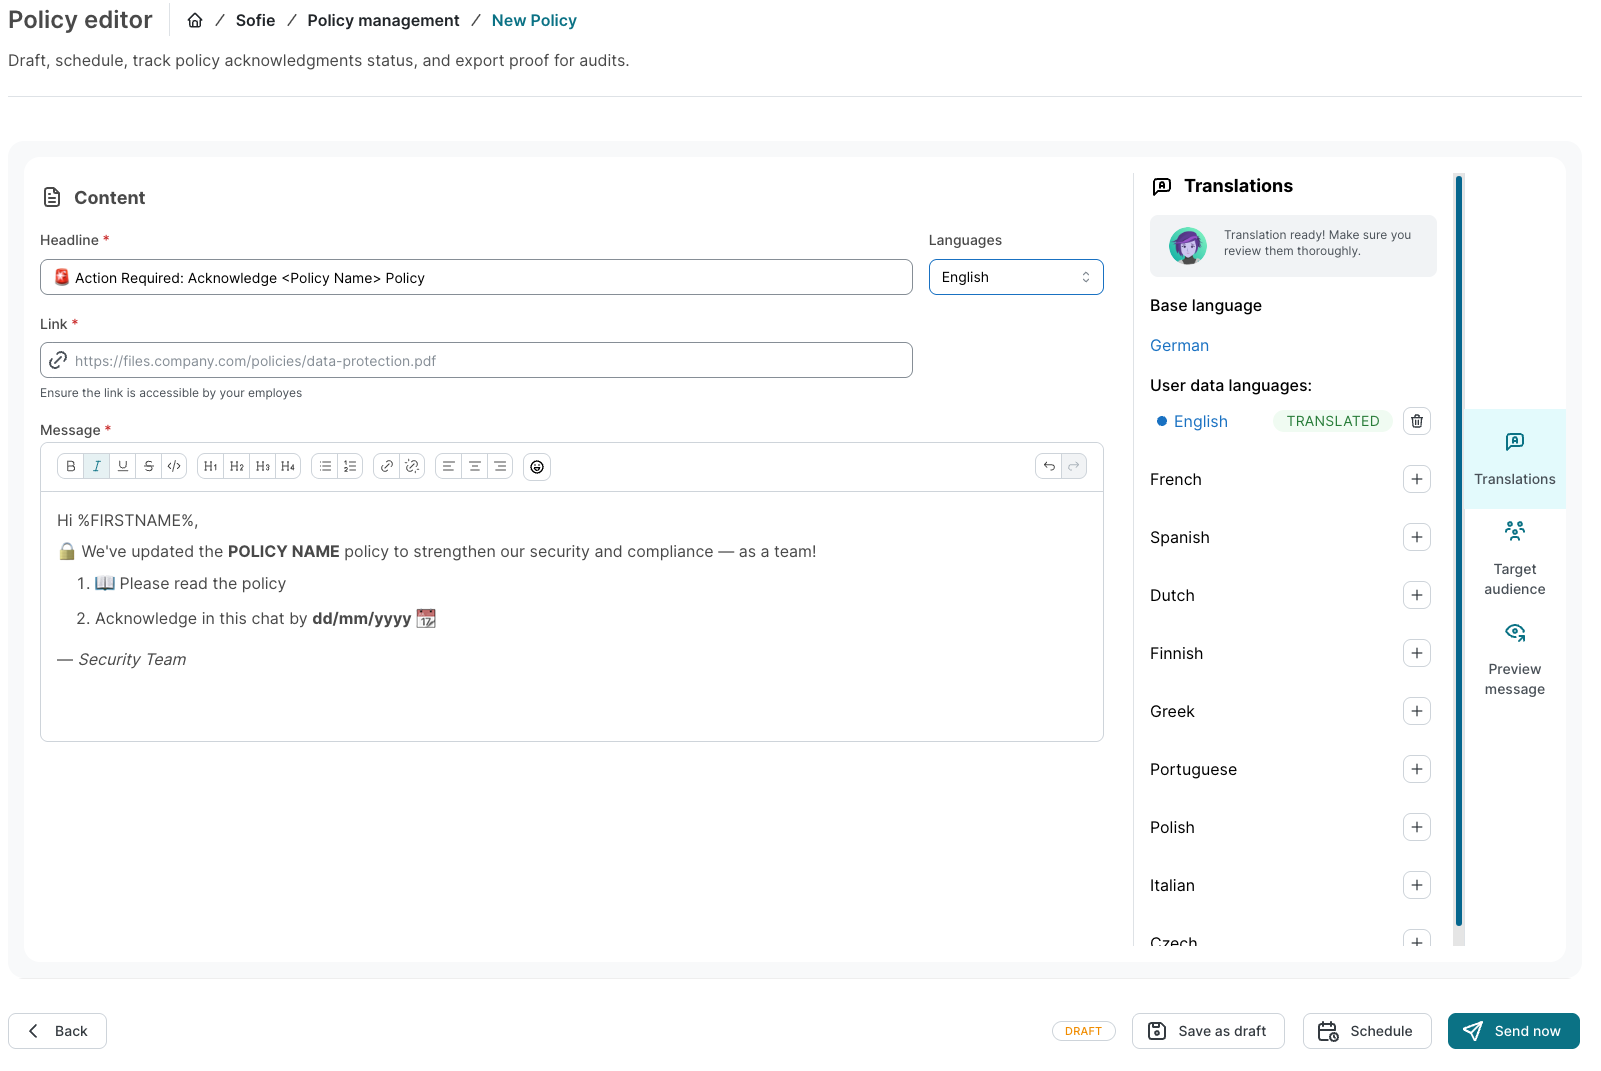
Step 3: Add translations (optional)
If your organization operates in multiple languages, you can provide translations for your policy message.
-
Next to the default language, select the + icon to add a new language.
-
Choose the language you want to add from the list.
-
Use the Languages dropdown menu to switch between translations and edit the text for each language.
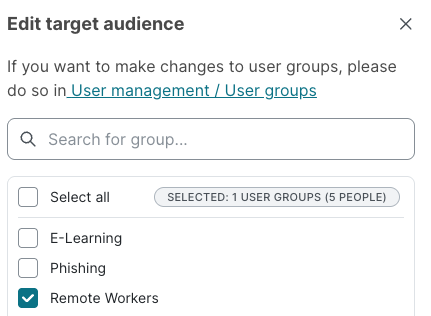
Step 4: Define the target audience
By default, a new policy is sent to all users. You can target it to specific groups.
-
On the right, select the Target audience tab.
-
Select one or more user groups you want to send the policy to.
Step 5: Send or schedule your policy
Once you have configured your message and audience, you have three options at the bottom of the screen:
-
Save as draft: Select this to save your work and return to the dashboard. Your policy will be saved under the Drafts tab for later editing.
-
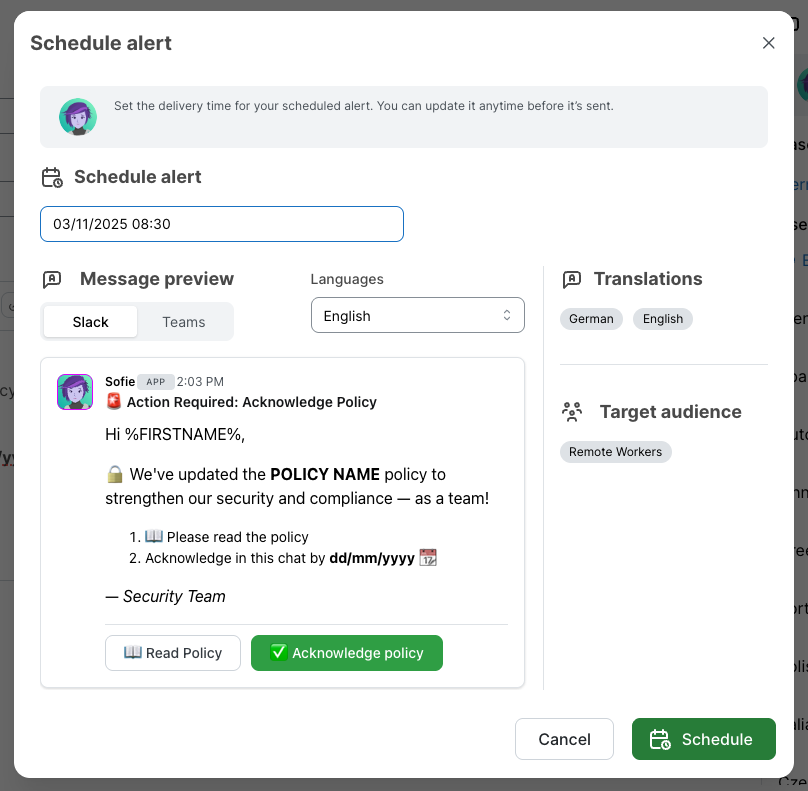
Schedule: Select this to send the policy at a future date and time. A dialog window will appear where you can set the delivery time and confirm your settings.
-
Send now: Select this to send the policy immediately. A confirmation window will appear where you can review your settings before sending.
After sending or scheduling, you will be taken back to the main dashboard.
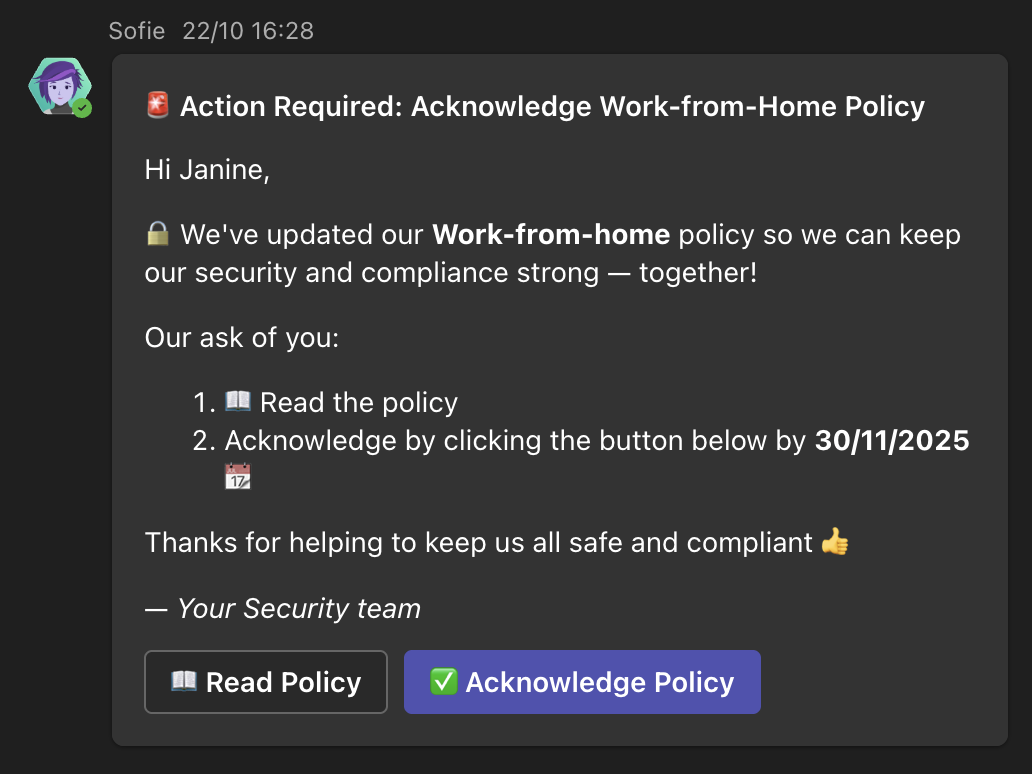
What your users will see
It is helpful to know what your users will experience when they receive a policy.
Users will receive a direct message from Sofie within Microsoft Teams or Slack. This message will display the Headline and Message that you configured earlier. Below the message, they will see two buttons:
-
Read Policy: Selecting this button opens the link to the policy document you provided.
-
Acknowledge Policy: After reading the document, the user can select this button to confirm their acknowledgement. This action is automatically recorded in the SoSafe platform, along with the user's details and a timestamp.