
Read this article in: Deutsch
Enable images in emails (Outlook Trust Center)
Usually, the automated loading of images in emails is disabled in Outlook. To make the simulated phishing emails more convincing, add two SoSafe domains as exceptions in the Outlook Trust Center.

Trust Center is a Windows-only feature of Microsoft Office.
Outlook settings
To configure an individual Outlook client, open the Trust Center:
-
Select File > Options > Trust Center > Trust Center Settings.
-
Select the checkbox Permit downloads from Web sites in this security zone: Trusted Zone and confirm by slecting OK.
-
Add https://public.sosafe.de and https://api.sosafe.de to the list of trusted sites in the Windows Internet Options
-
To do that, open the Internet Options settings in Windows. Select the Security tab at the top, then select Trusted Sites, followed by Sites.
-
Here, enter https://public.sosafe.de and select Add. Afterwards, enter https://api.sosafe.de and select Add again. Select Close to finish the process.
-
-
Reset the Windows Internet Options. Select the Advanced tab and then Reset…. Afterwards, make sure that the checkbox Do not save encrypted pages to disk is not checked.
Rollout in your organization
These settings in Outlook Trust Center and Internet Options must be made on the client side. Depending on the infrastructure setup of the organization, you can distribute this configuration using Windows Server Group Policy:
Under the item Computer Configuration\Administrative Templates\Windows Components\Internet Explorer\Internet Control Panel\Security Page\List of Site to Zone Assignments in the group policies, please set the value 2 for https://*.sosafe.de. This makes SoSafe a trusted site. If Outlook already allows downloading images from trusted sites, you are done.
Otherwise, you also need to set the DWORD key JunkMailImportLists to 1. You can find this in the registry, under the section HKEY_CURRENT_USER\Software\Policies\Microsoft\Office\1x.0\Outlook\Options\Mail
1x.0 stands for the respective version. Office 2010 is 14.0, Office 2013 is 15.0, and Office 2016 & Office 2019 are 16.0.
Setting up Spoof Intelligence to let simulated phishing emails through (Microsoft Defender)
When using Microsoft 365, it is possible that simulated phishing emails cause these warnings to appear:
-
This sender (example@example.com) is from outside your organization
-
We could not verify the identity of the sender. Click here to learn more.
-
The actual sender of this message is different than the normal sender. Click here to learn more
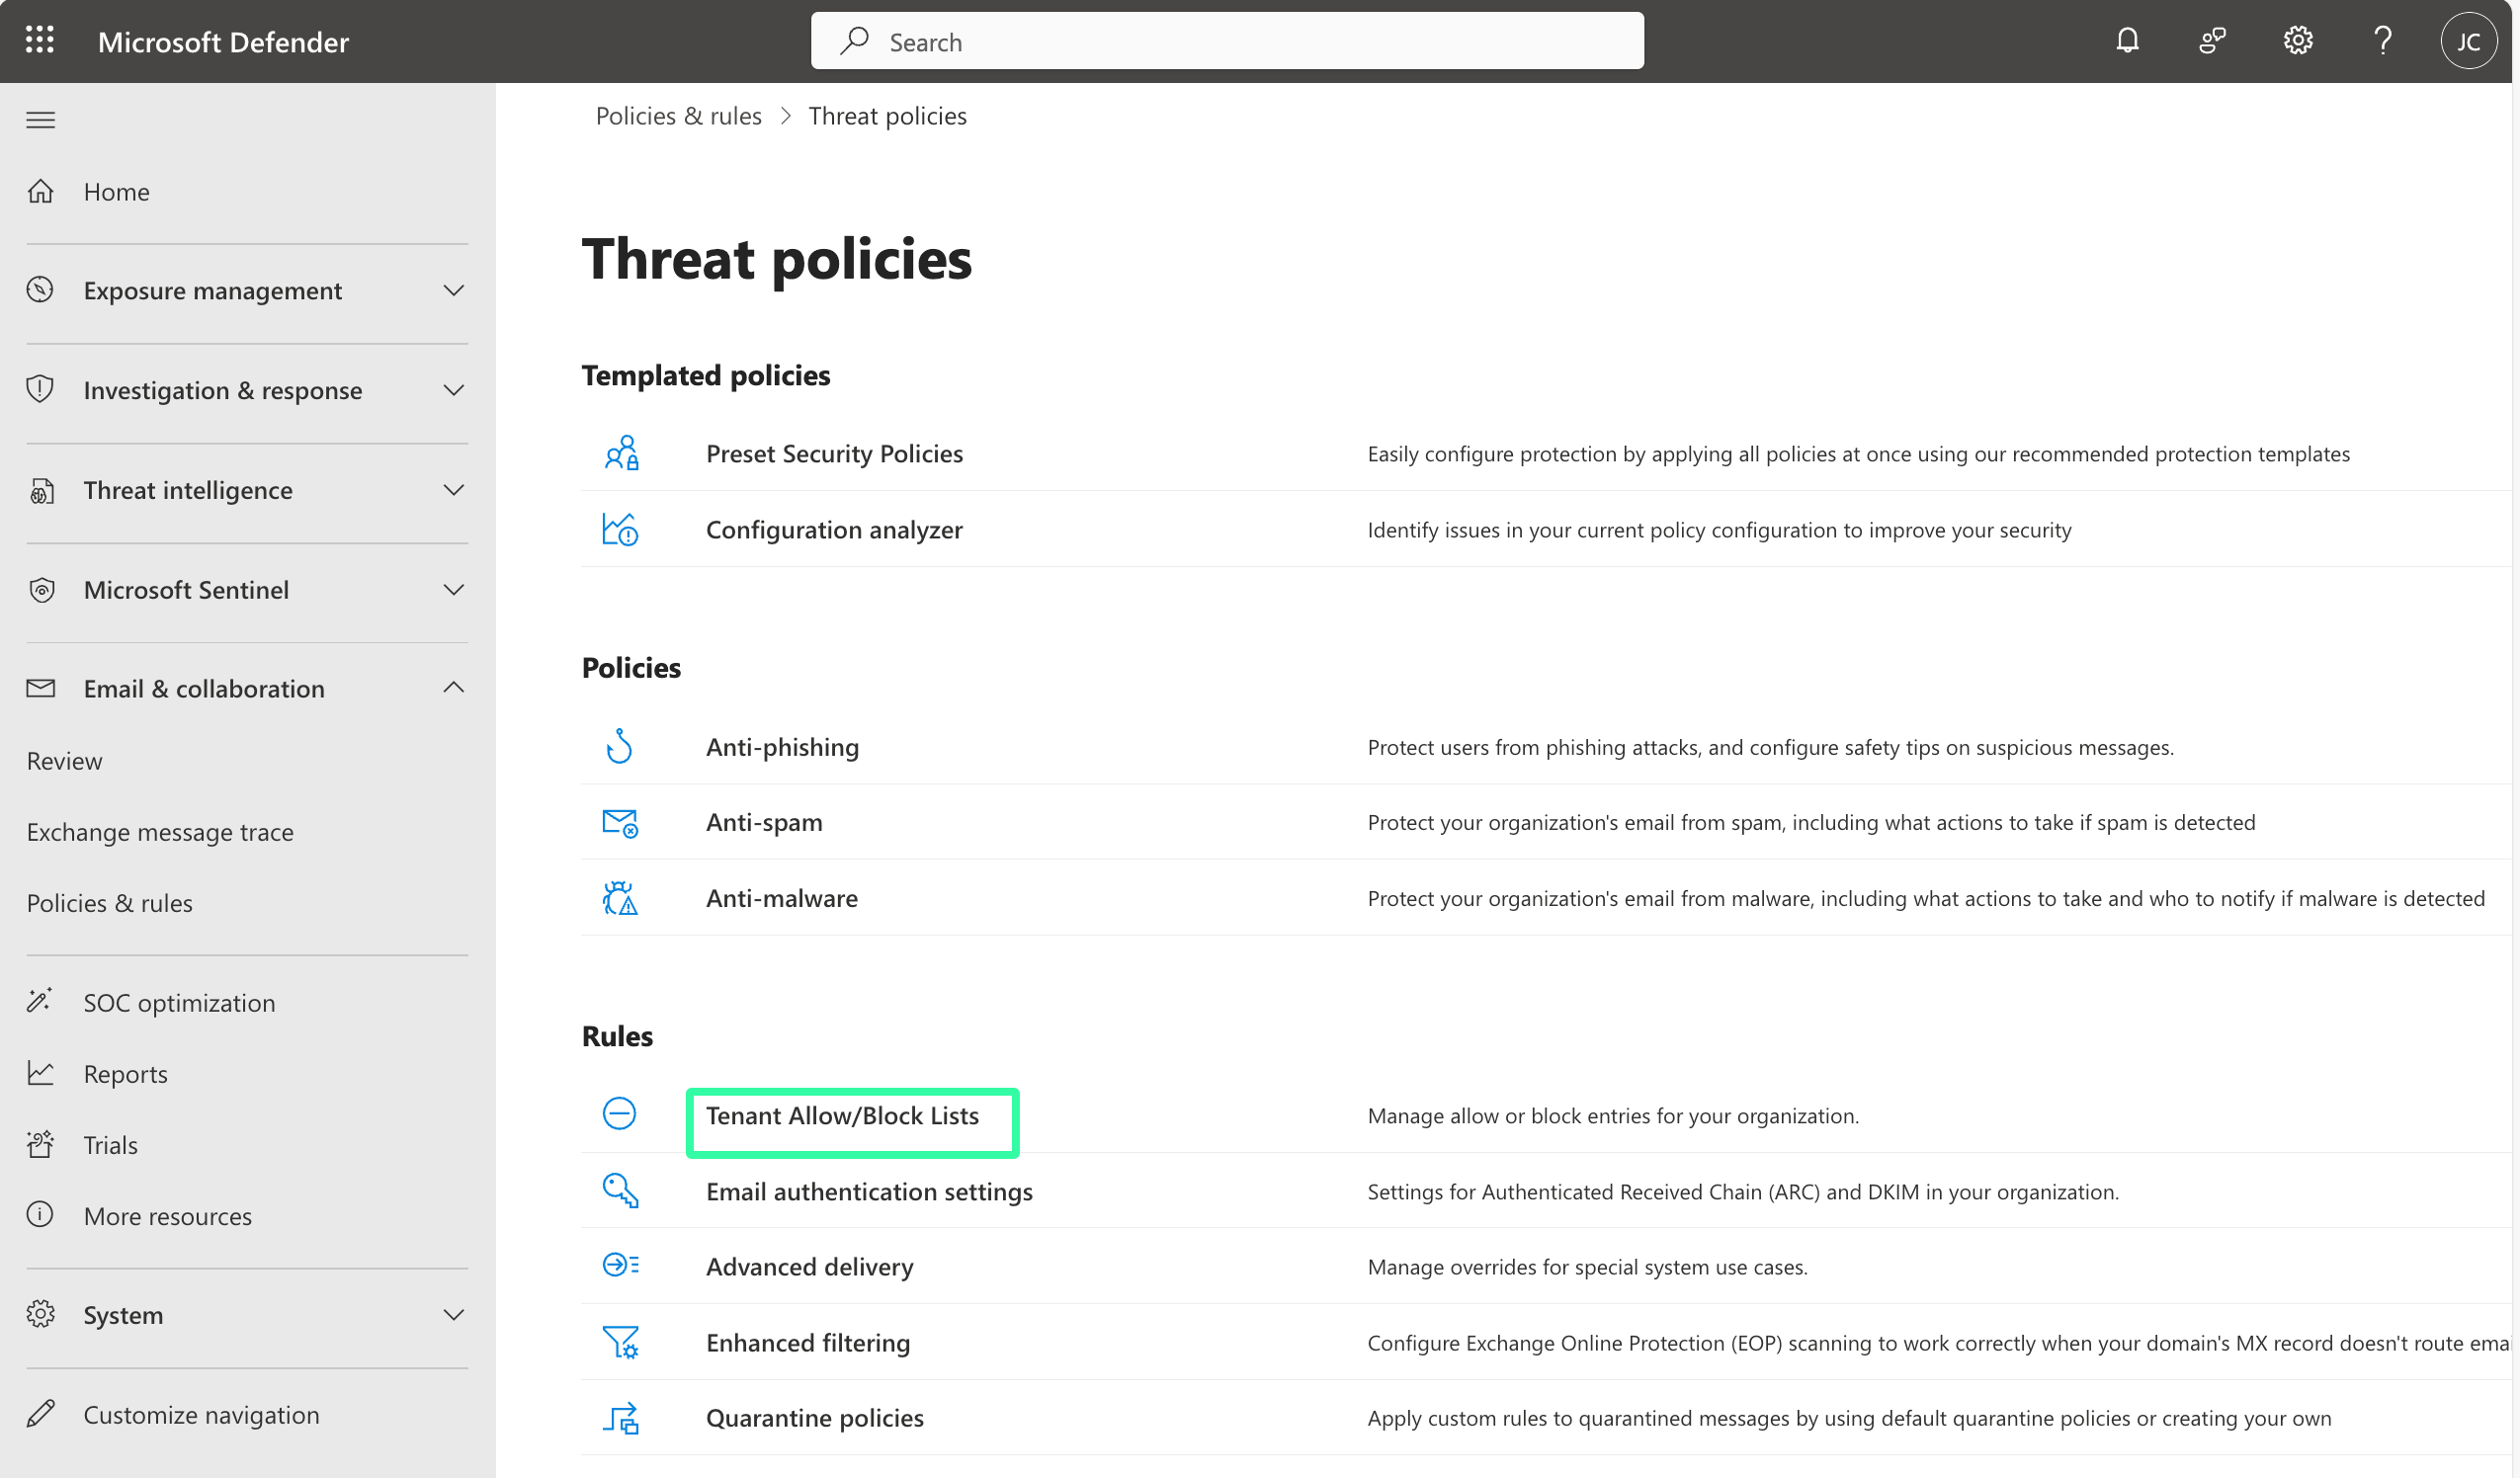
To prevent this warning, you can make use of the Tenant Allow/Block Lists feature in Microsoft 365. Doing so only takes a few minutes, and we have prepared a step-by-step guide to make things easy for you.
-
Under Email & collaboration, select Policies & rules, and then Threat policies
-
Under Threat policies, go to the Rules group and select Tenant Allow/Block Lists
-
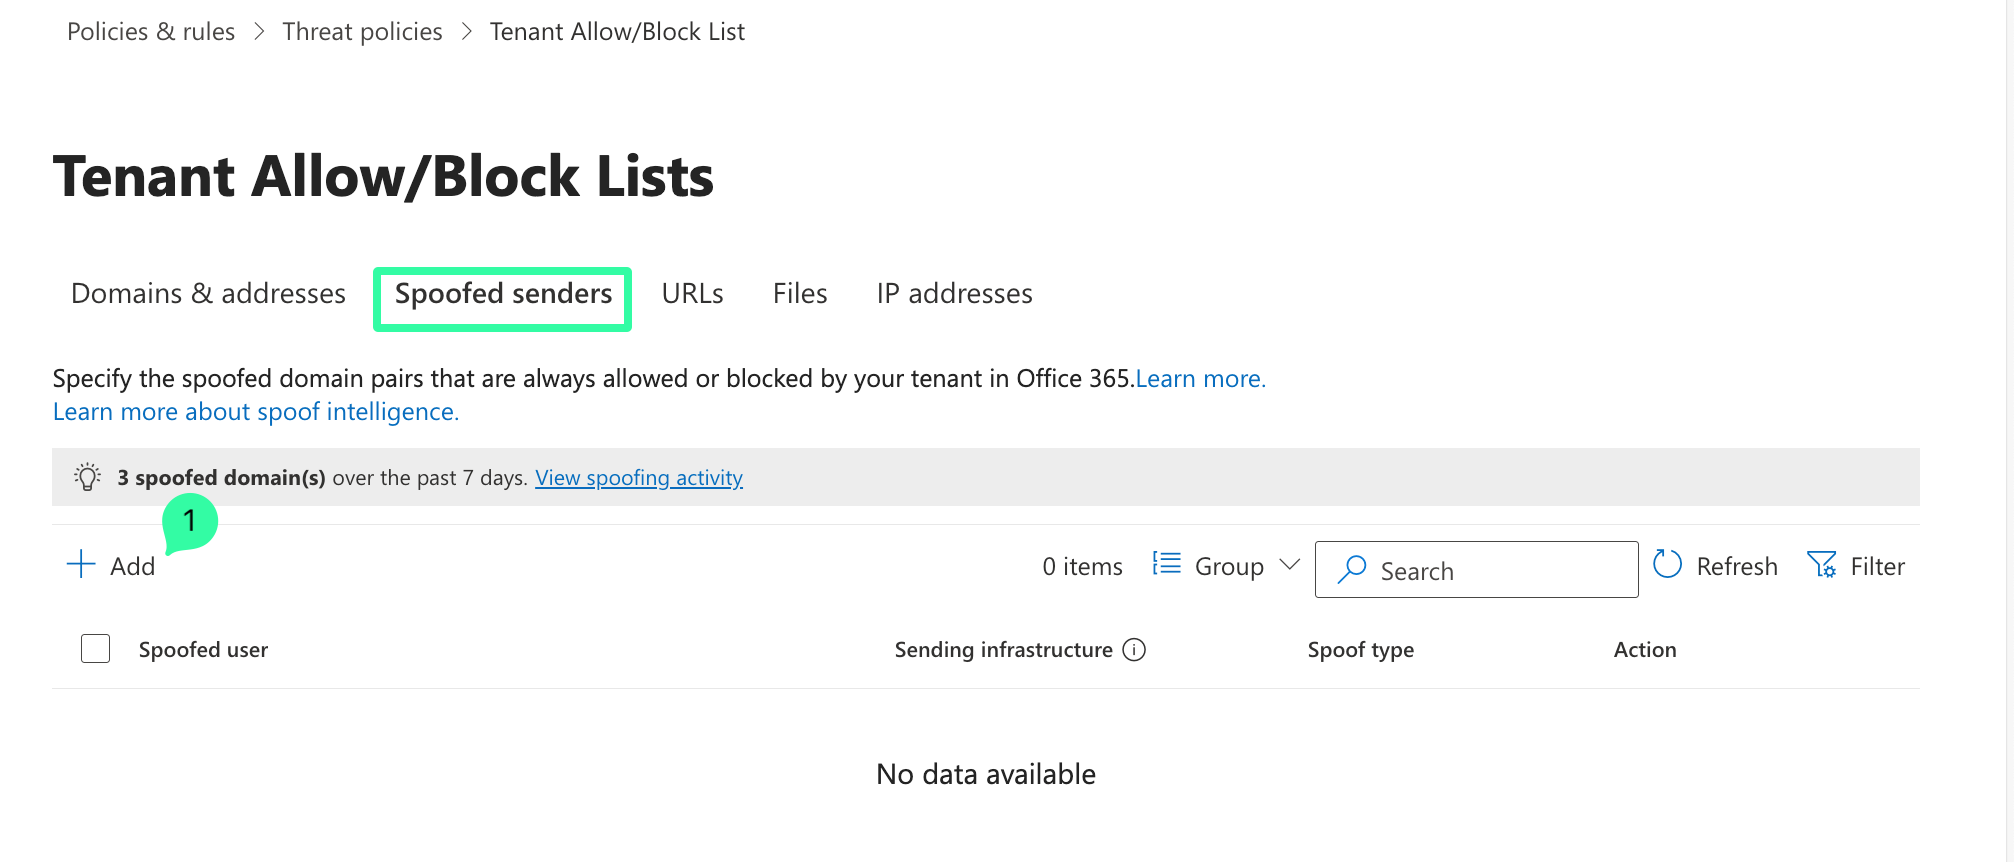
Select the Spoofed senders tab and then select Add (1)
-
Add the entries in the lists (First domain pair and Second domain pair) provided below.
Note that you can only add 20 entries at a time. You must therefore split up the list into two Add/Save procedures.
-
Copy and paste the list under First domain pair, select Internal as Spoof type, and Allow as Action. Click Add to save the configuration.
What to read next and related articles