SCIM: Implementing the Microsoft Entra ID connection
We have implemented an interface according to SCIM2 standard to connect Active Directories. Users and groups can be synchronized between Microsoft Entra ID and SoSafe. For this purpose, Microsoft compares the stored data with your SoSafe user data base and sends updates to our interface. Which users, groups and data are shared can be configured in Microsoft Entra ID and our SoSafe Manager.
You can set up our interface using the Azure "Enterprise Applications".
We are listed as an enterprise application in the Microsoft Entra ID Gallery.
Supported functions are:
Creating users and groups in SoSafe
Removing users from SoSafe groups
Synchronizing users and groups in SoSafe
Provisioning of groups and group membership of SoSafe
Listing in the Microsoft App Gallery
Functions not currently supported
Nested groups
Requirements
An Microsoft Entra ID client
A user account in Microsoft Entra ID with permission to configure staging
An administrator account for SoSafe
We are working on providing you with the client URL and access token directly in the SoSafe manager, at the moment these are still created manually
Preparation
Please tell your Implementation Manager your Tenant ID.
Please tell your Implementation Manager, whether you want to group your users through Azure Groups or through attributes.
Set-up instructions
Step 1: Create your own application
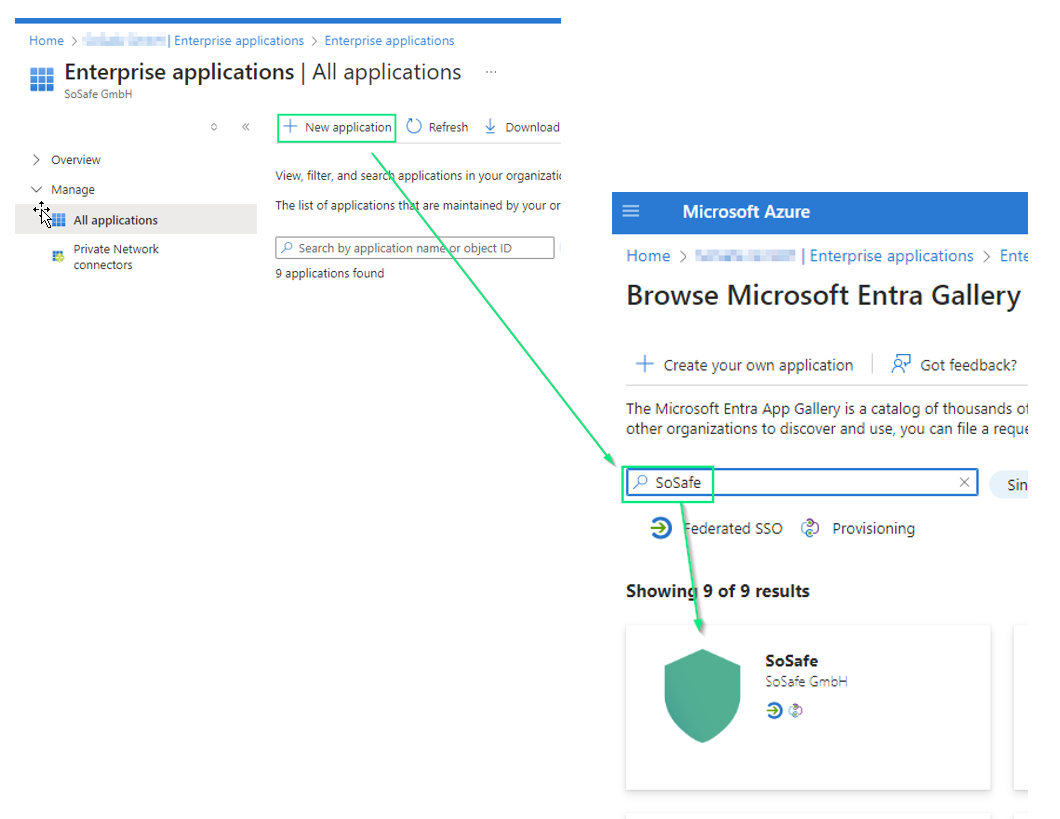
Log in to the Azure portal. Select "Enterprise applications" and then "All applications" and click on "New application". Now you can select "SoSafe" application from the Gallery.
Step 2: Deploying users and groups
Add users and groups you want to synchronize to the application
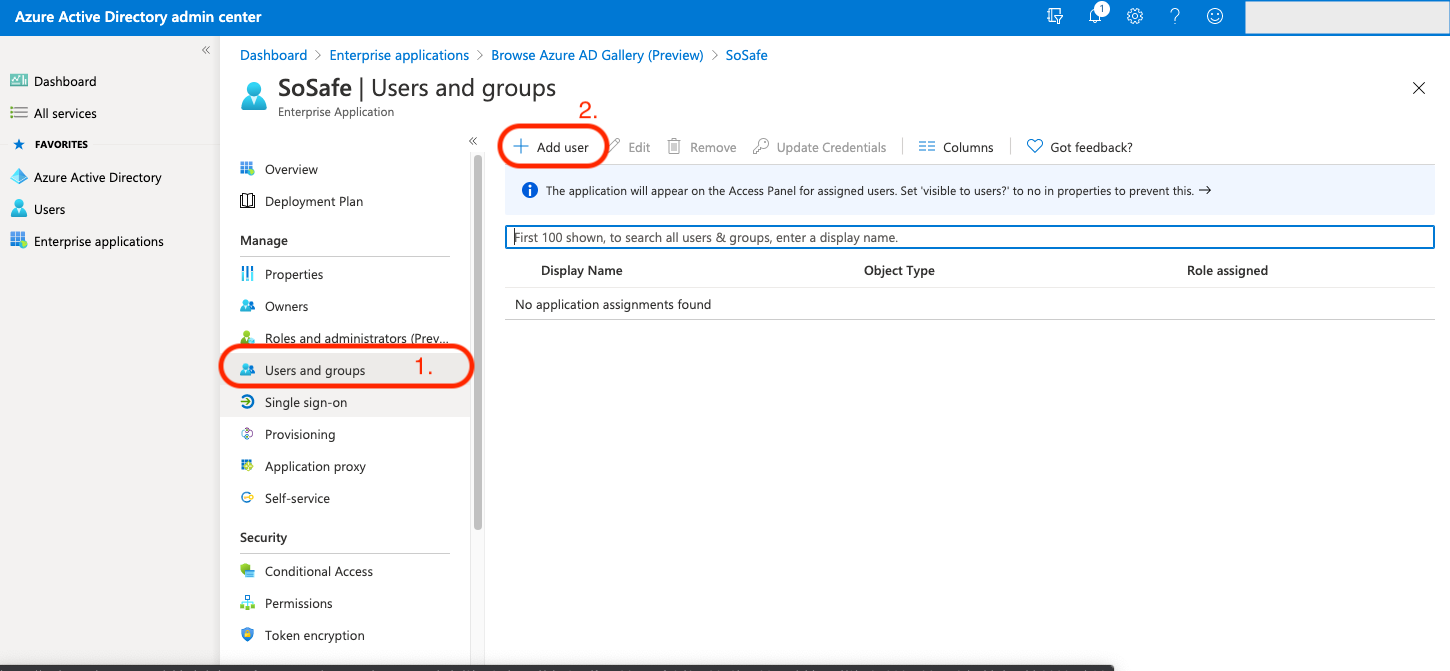
We recommend starting small. Test your deployment with a small group of users and groups before you share it with everyone. If the staging area is set to assigned users and groups, you can control this by assigning one or two users or groups to the app. If the scope is set to all users and groups, you can specify an attribute-based scope filter.
Step 3: Setting up user provisioning
Go to the Provisioning tab to open the relevant section. Then click on New Configuration to begin setup.
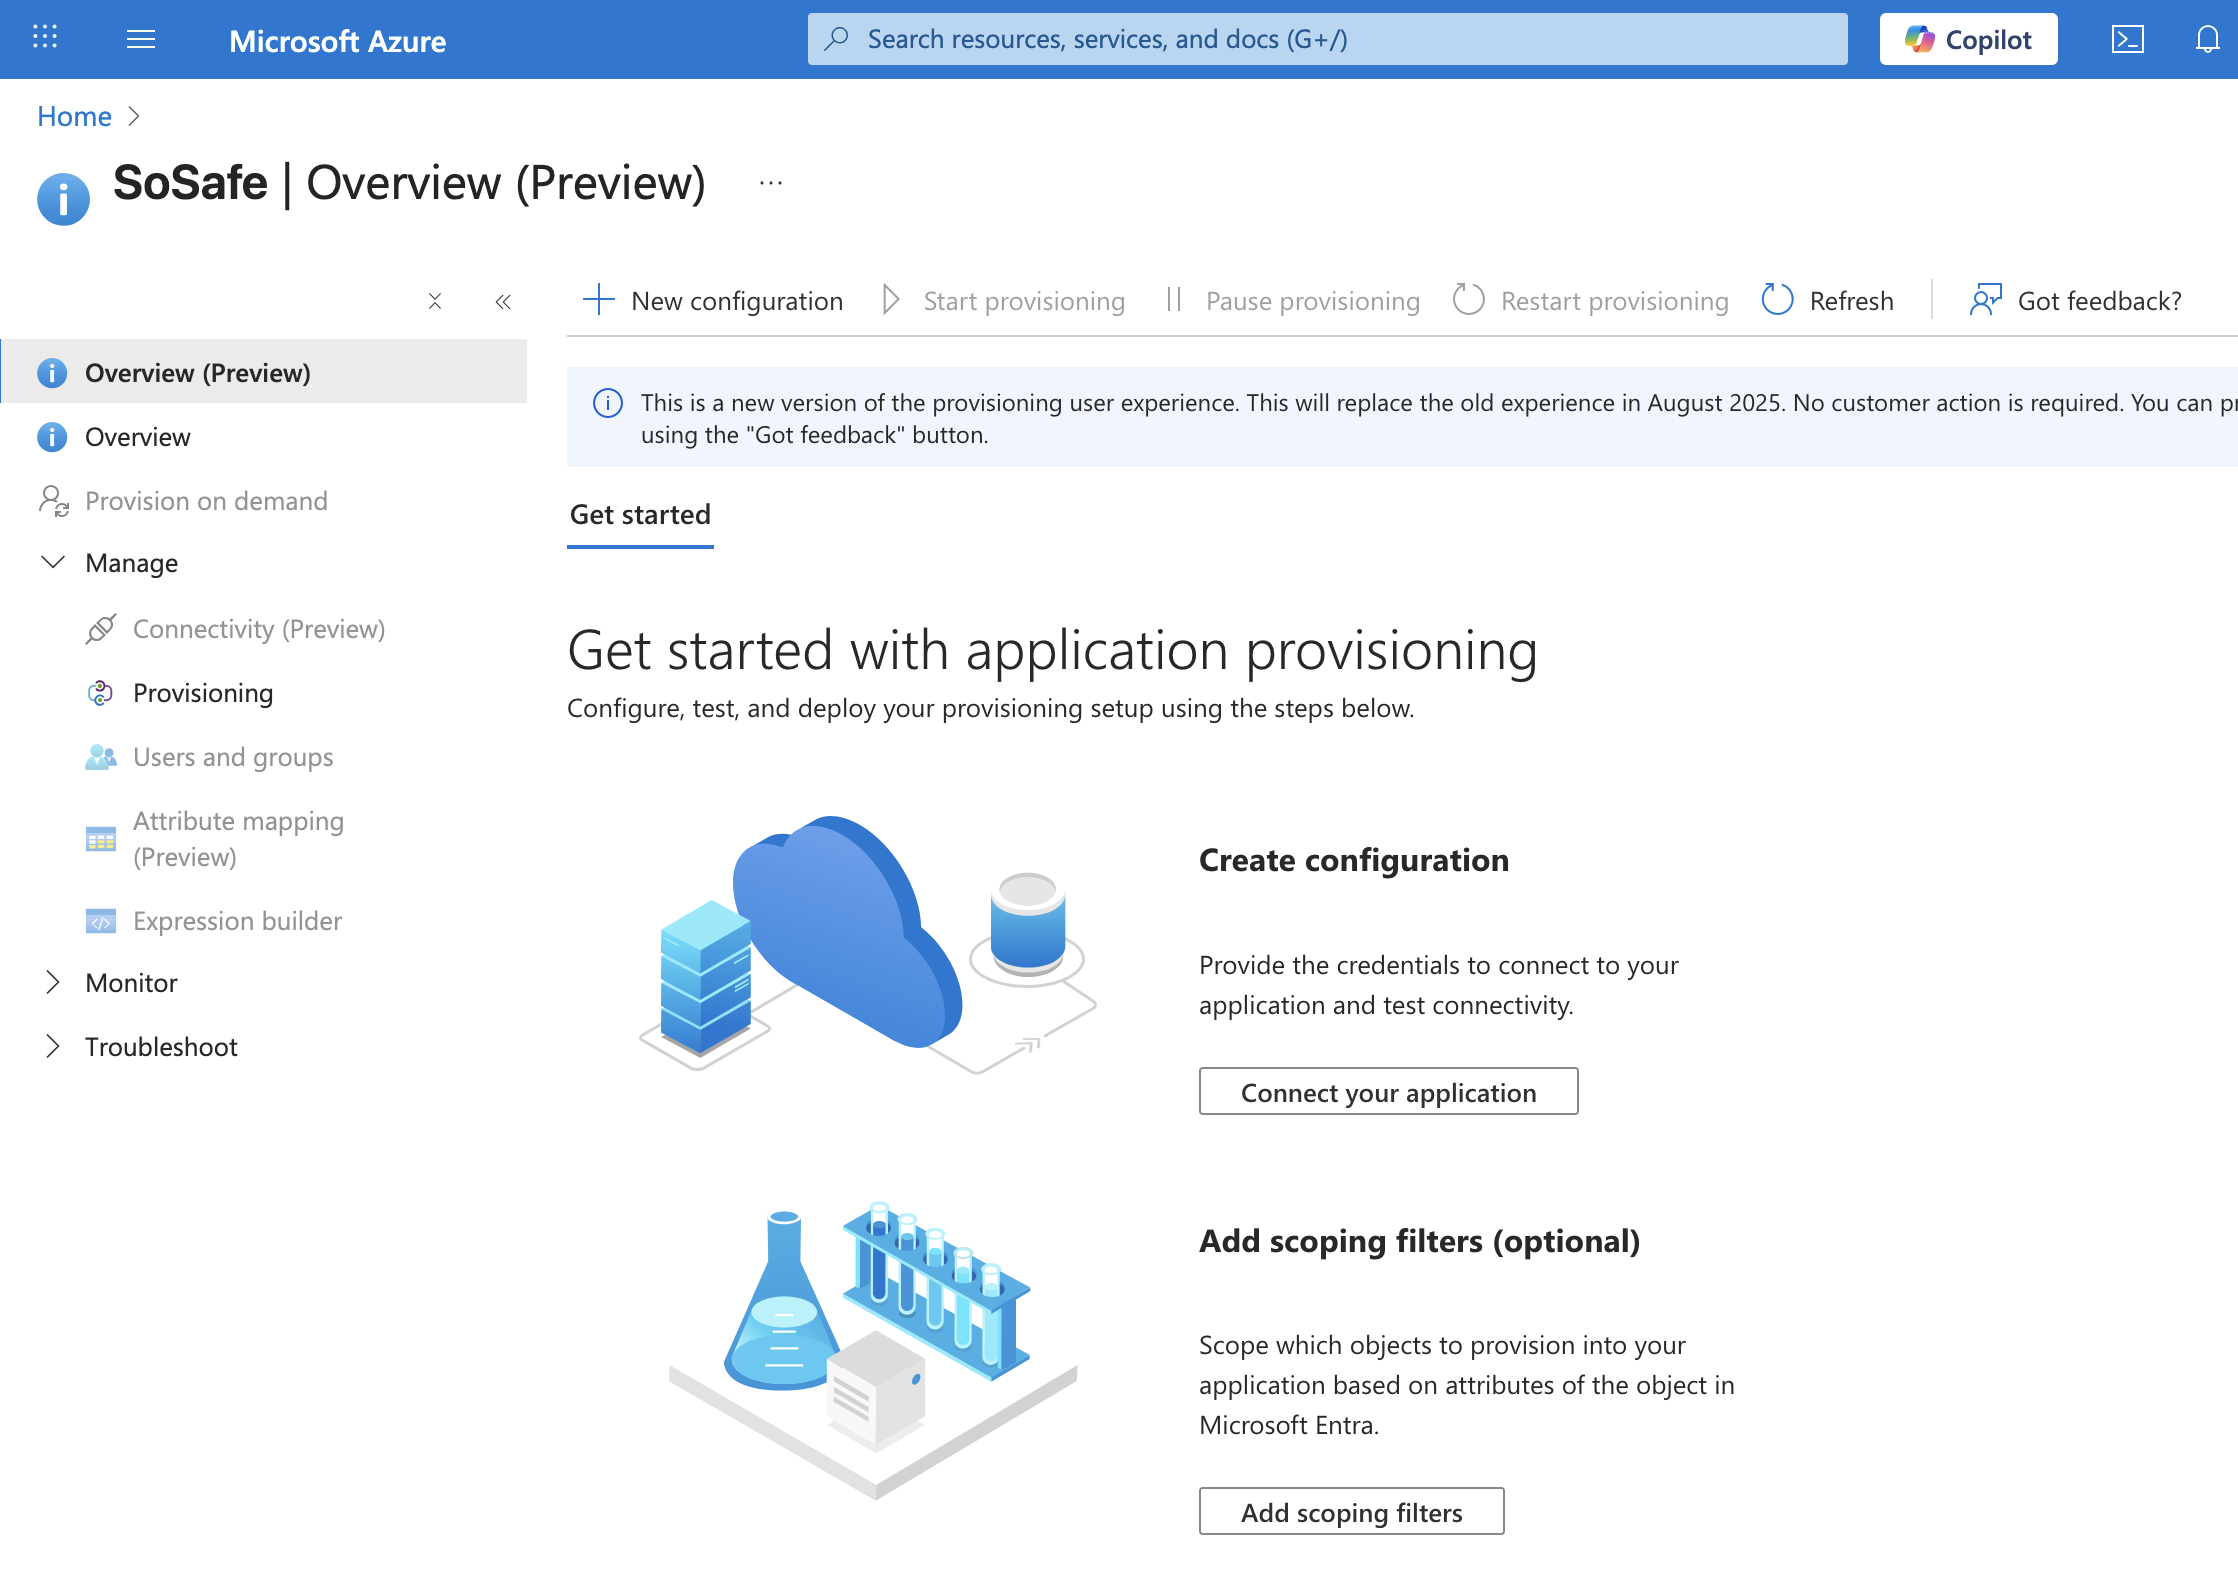
You will receive the tenant URL and the secret token from you SoSafe Implementation Manager.
Insert the tenant URL and the secret token.
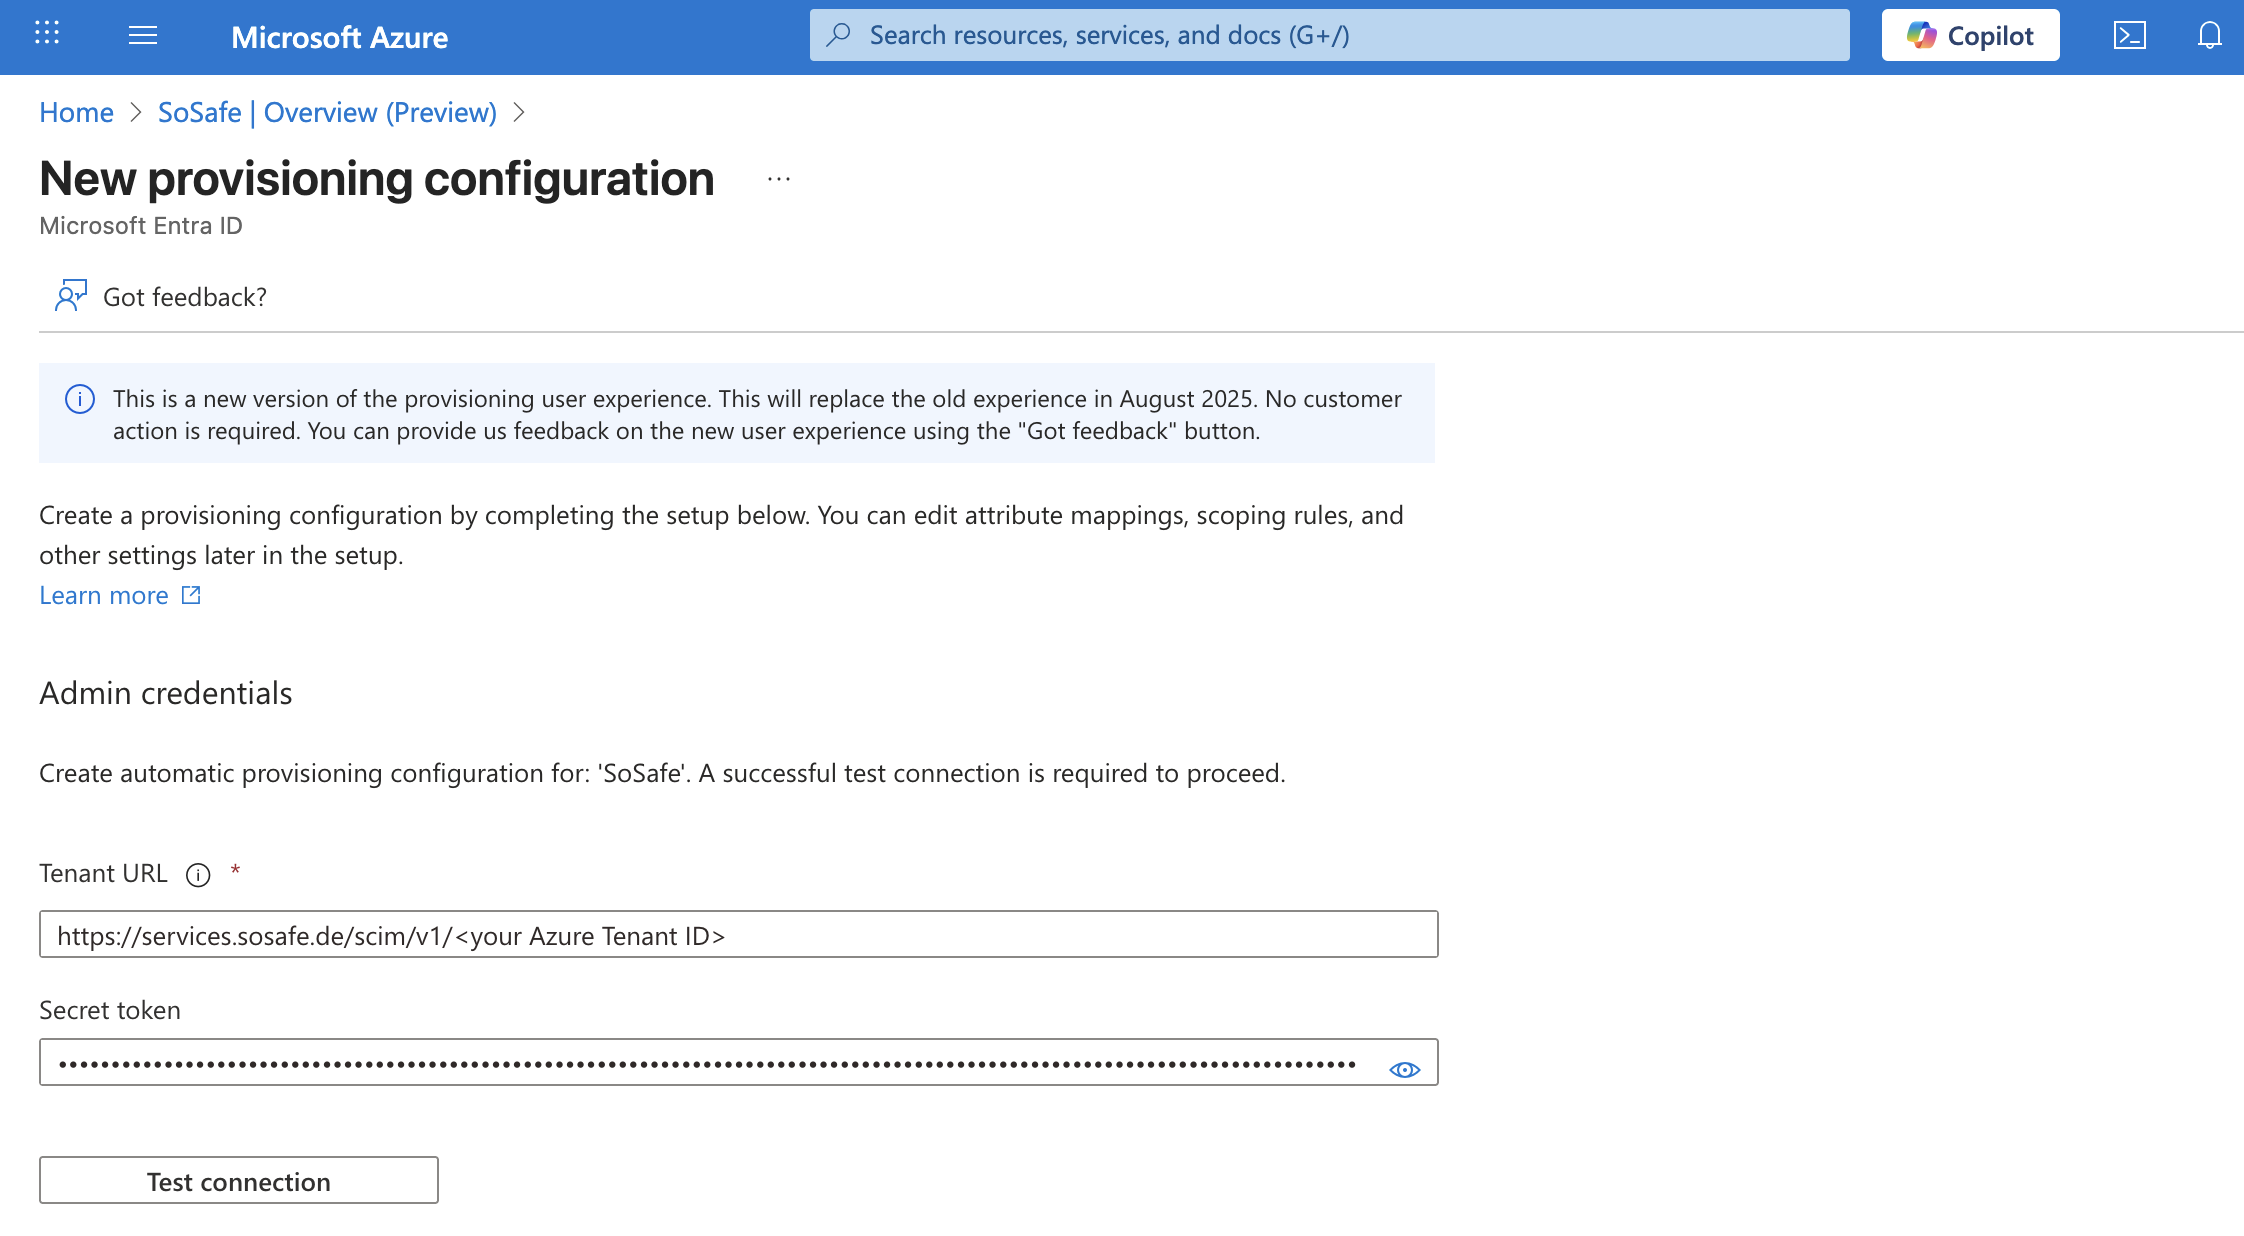
Click Test connection. After the connection has been successfully verified and the confirmation message is displayed, click Create to continue.
Step 4: Checking the attribute assignment
Check the attribute assignment of users.
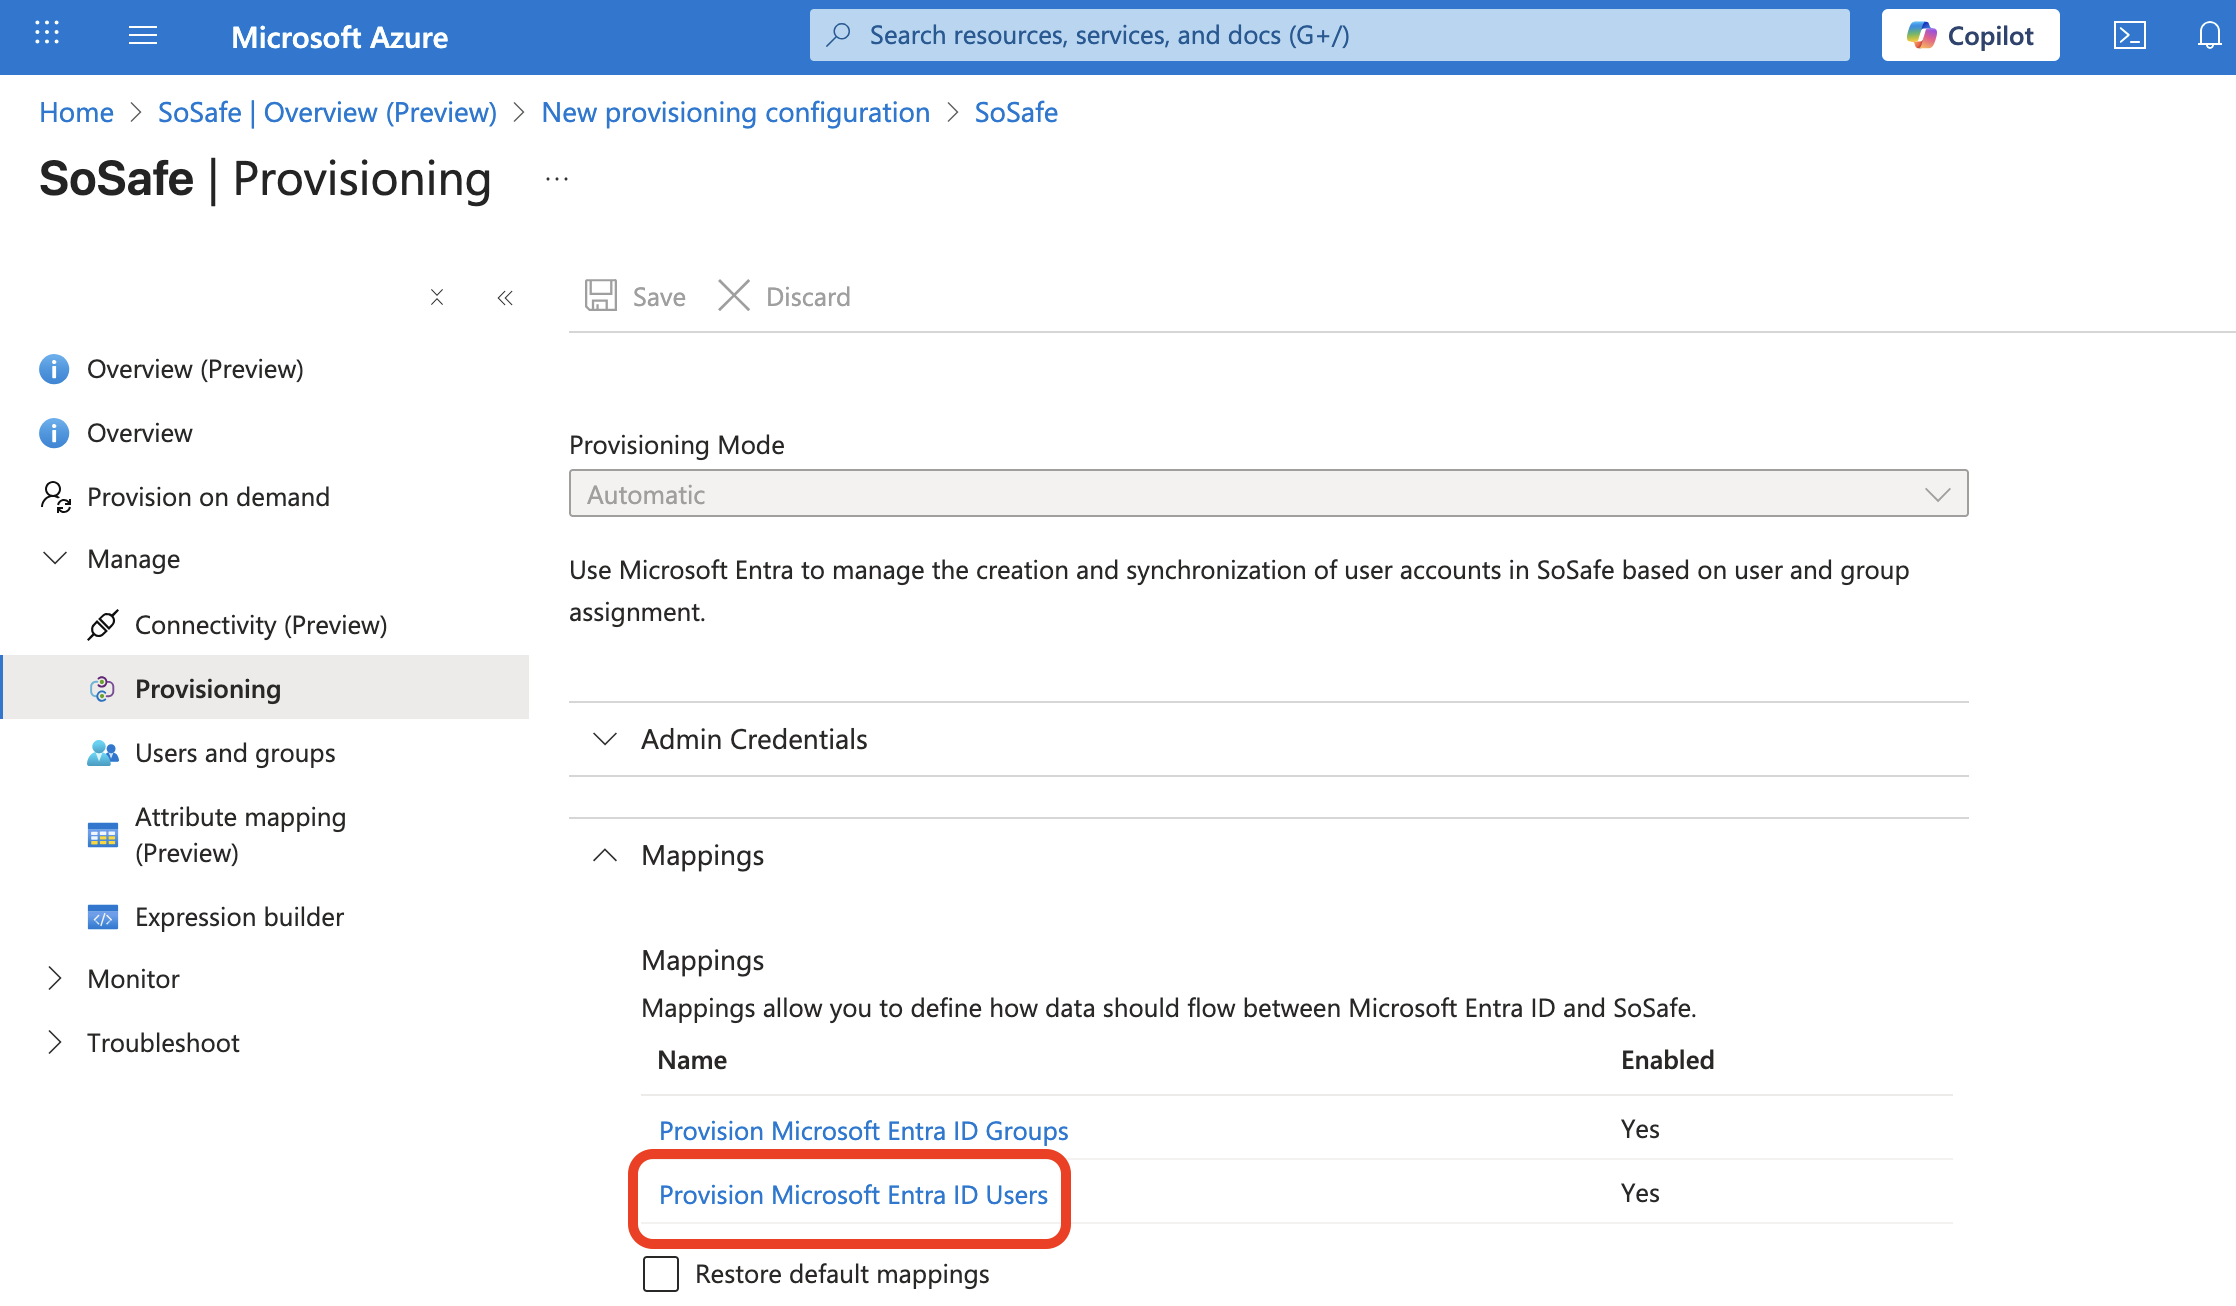
You can remove all but the assignments shown here.
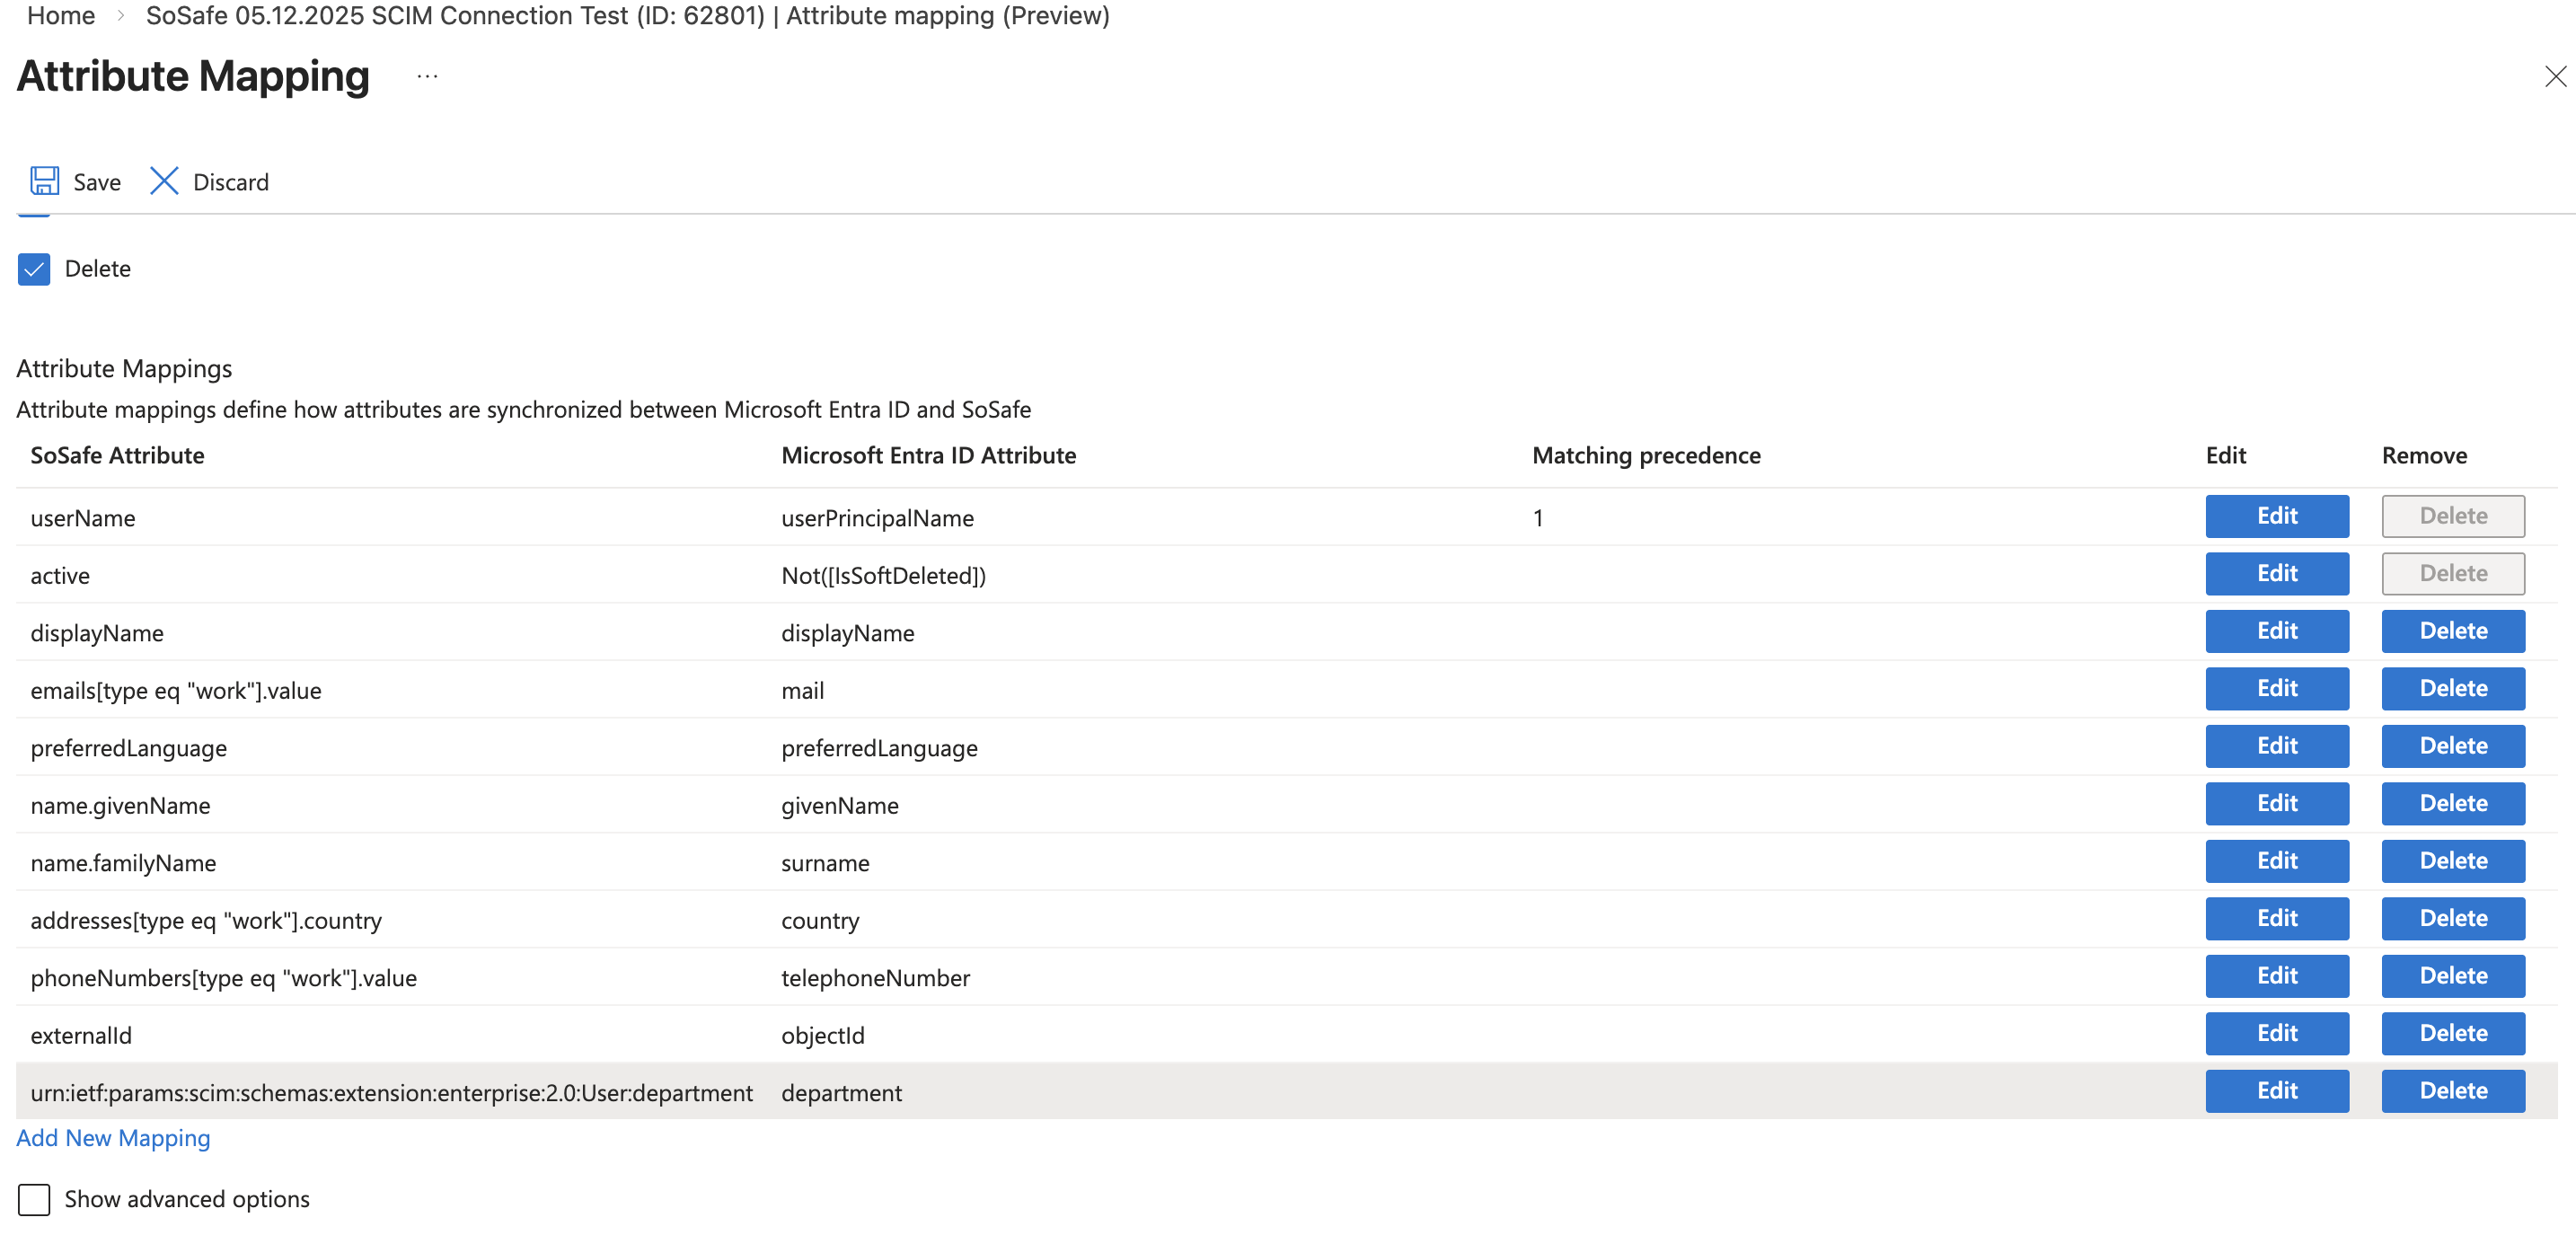
(instead of Switch, there is a possibility that your Azure Version shows Not([IsSoftDeleted]))
We support the exchange of all attributes of the standard assignment as well as user-defined assignments. These must be entered accordingly in SoSafe Manager.
However, we actively use only the fields shown here plus academic title and salutation/gender, which can be transferred via user-defined fields.
Please leave the Target Object Actors (Create, Update, Delete) activated, so you can change Attributes in the SoSafe Manager.
Step 5: Start provisioning
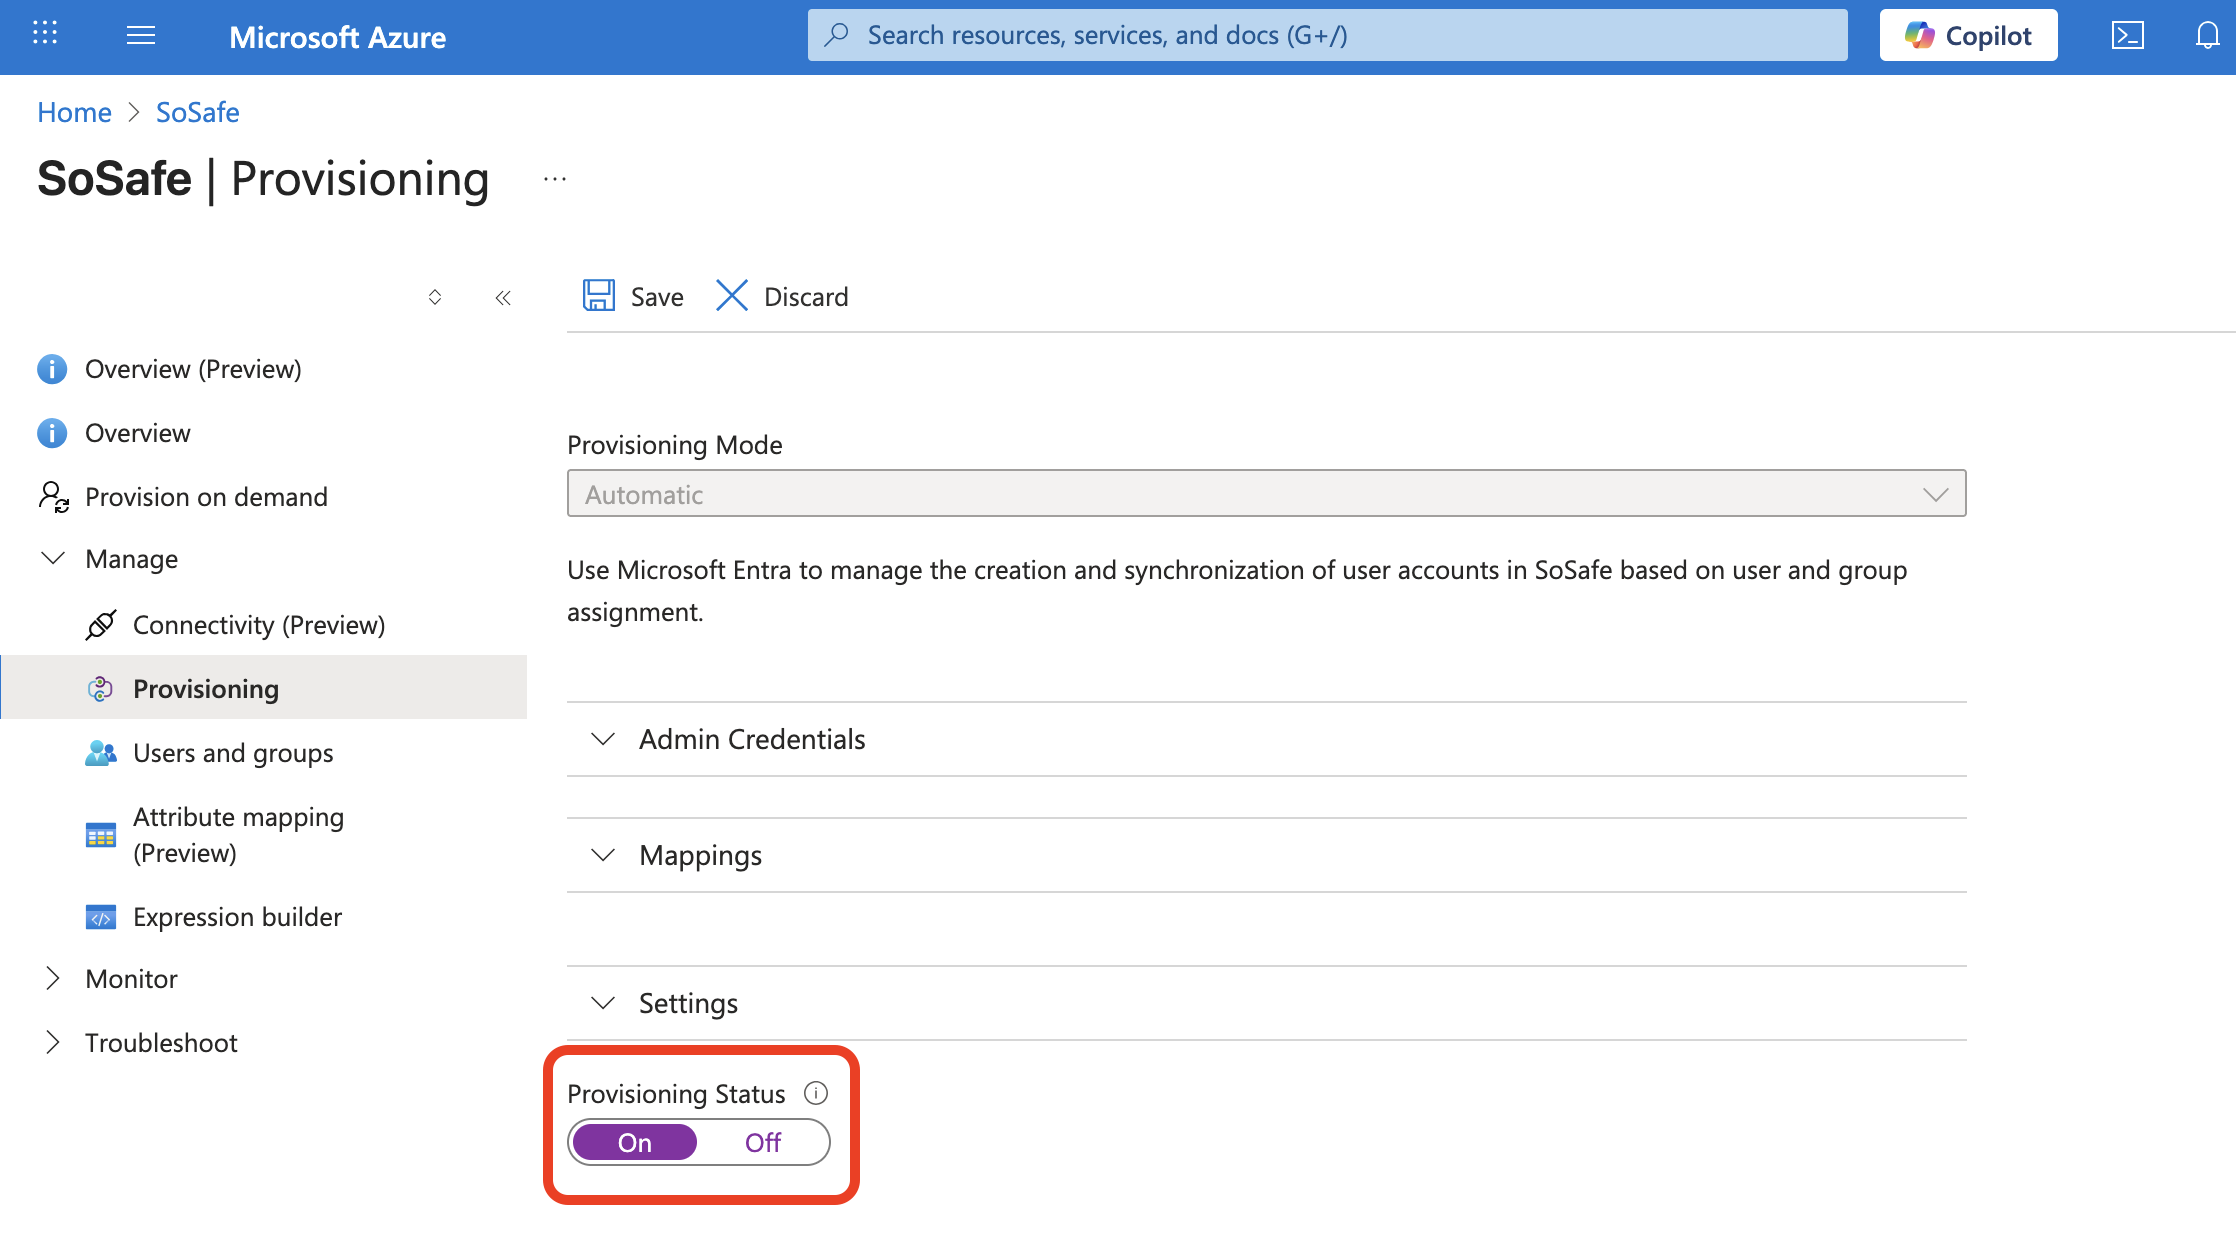
Once you start the provisioning, you can check the synchronization in the manager.
