If you have an active SSO connection already, your configuration will continue to work as expected. There is no need to take any action right now.
We will be providing a way to migrate your existing SSO setup to our new Auth0-based solution in the future.
Prerequisites
-
No legacy SSO use: You must either be new to SSO at SoSafe or disconnect your existing SSO setup.
-
Supported enterprise identity provider: You must be using an identity provider supported by Auth0. All major identity providers, including Azure AD/Entra, Google Workspace, OIDC and SAML, are supported. For more details, refer to the Auth0 support pages.
Limitations
Currently, Auth0 SSO is only available for the SoSafe E-Learning platform. Support for the SoSafe manager will follow soon.
Setup instructions
-
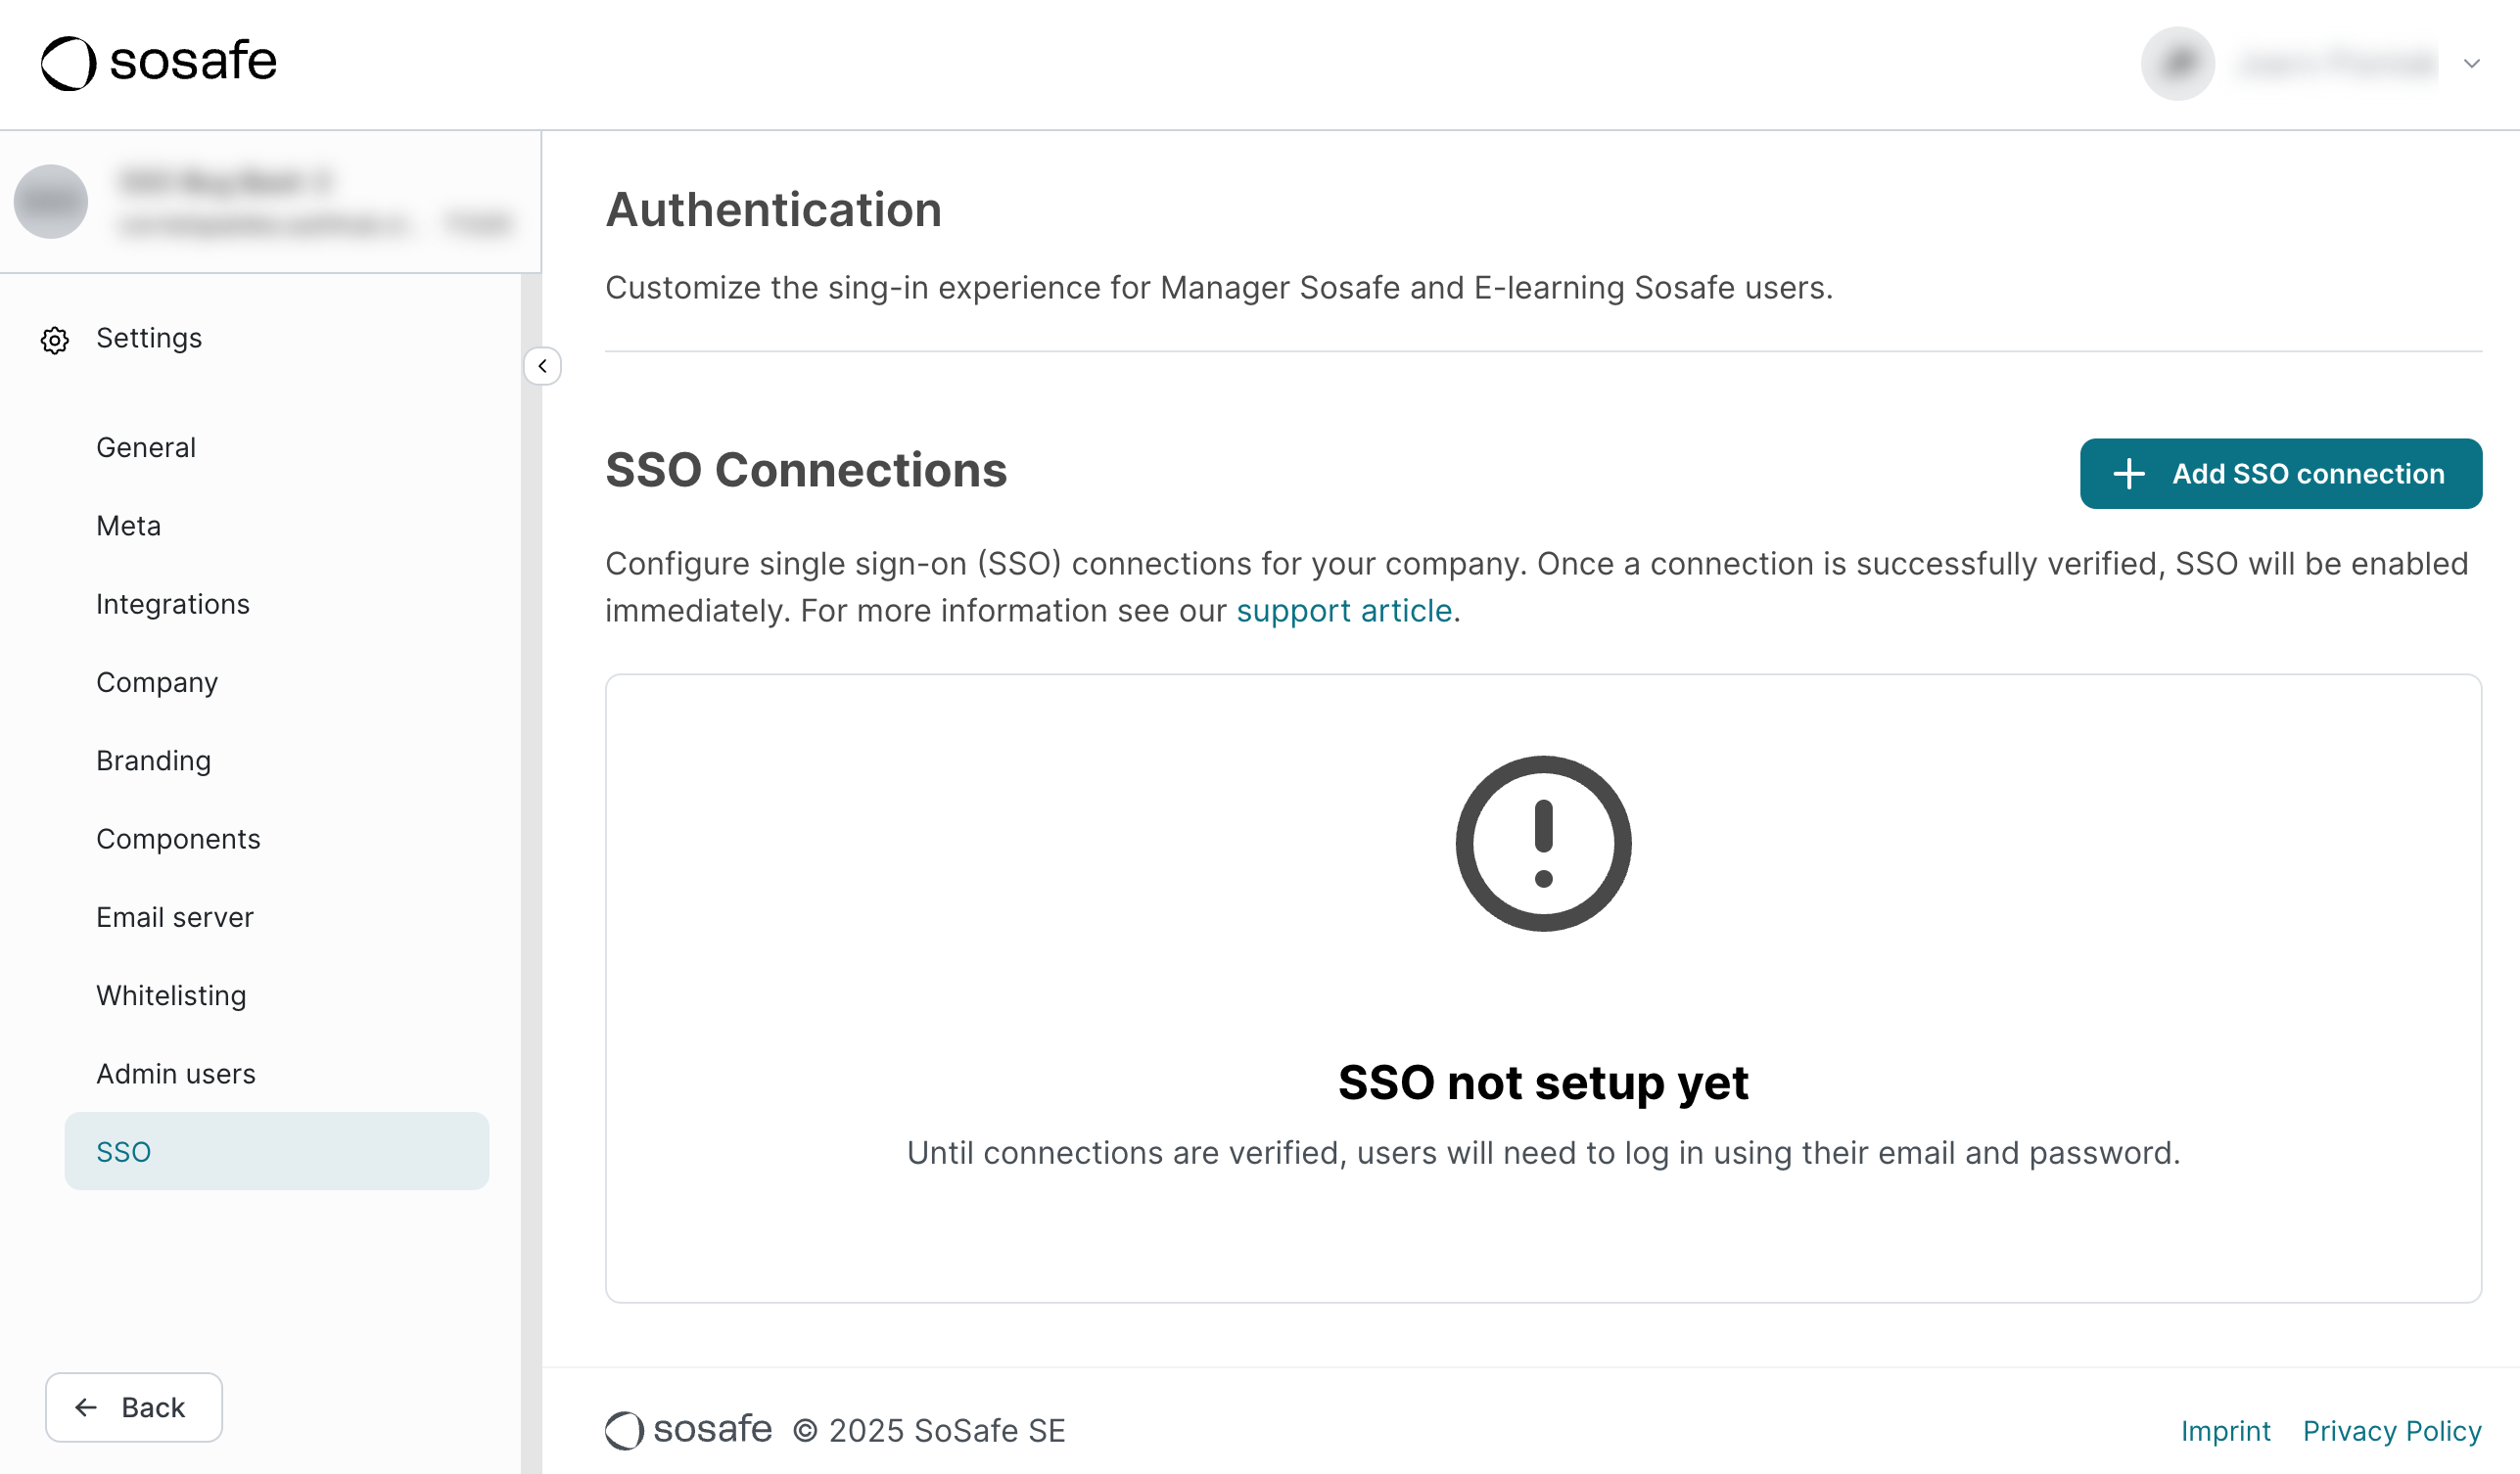
Navigate to Settings / SSO. If SSO is missing, reach out to your Customer Success Manager so it can be enabled for your account.
-
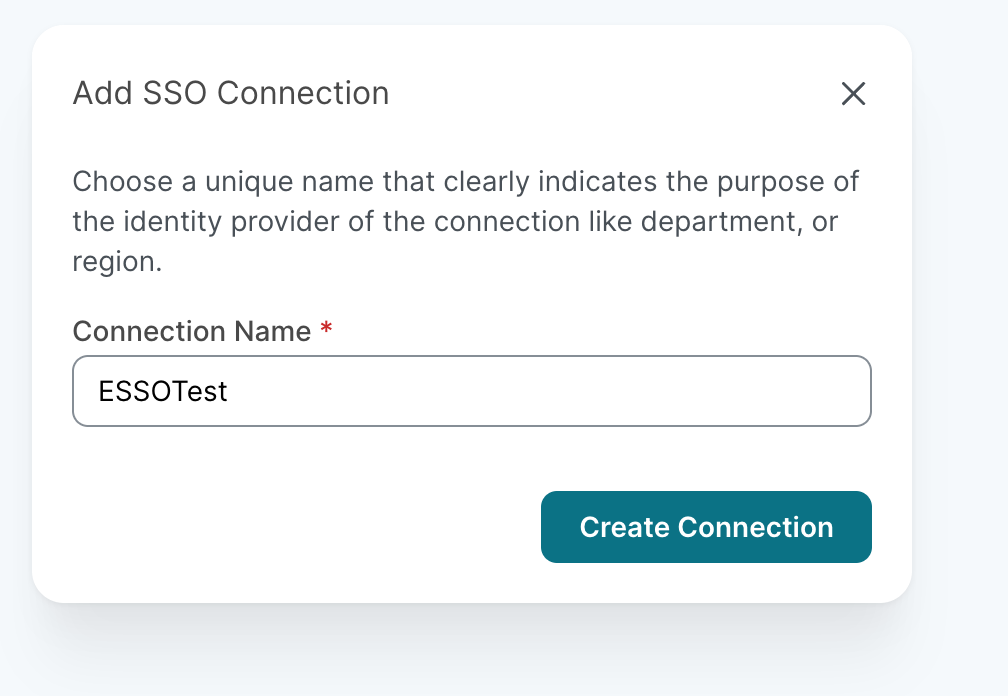
Select + Add SSO connection. A new dialog window will open. Give your connection a name and select Create Connection.
-
You’re now given a link that will take you through the setup in a guided way. Most of the work now will happen on the identity provider side and all required information will be provided through this guide. If you have admin rights for your identity provider, you can proceed directly by selection Open setup. If you don’t have admin rights, you can select Copy link and send this URL to an admin. You can also send them a link to this article to give them more context.
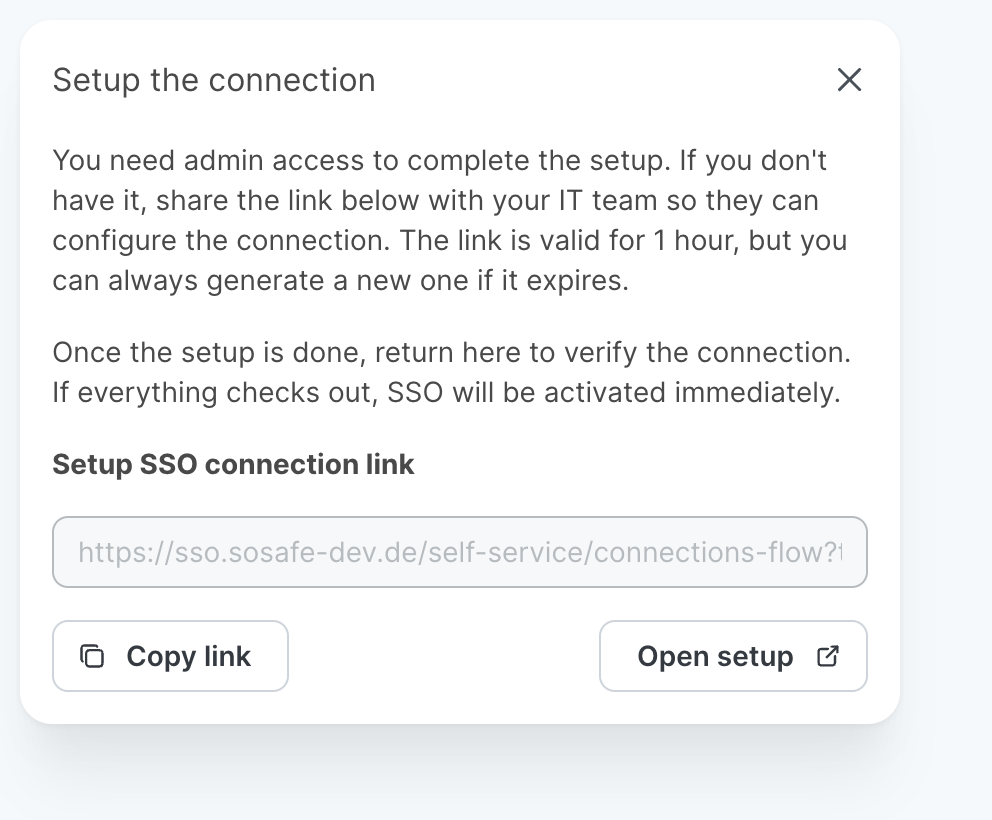
This link is only valid for 1 hour and has a limited number of uses for better security. You can always generate a new one if necessary. To do so, select Regenerate setup link for the SSO connection entry on the Settings / SSO page in the Manager.
-
Follow the setup wizard. Note that at some points, you will be asked to note down certain bits of technical information that you will need again later on. We provide detailed instructions for Entra ID and Google Workspace. For custom SAML or OIDC connections, we still provide all required technical information but the specific steps in your identity provider are outside the scope of our wizard.
For Google Workspace users only:
In the wizard, step 3 (“Assign Access”) starts with the creation of a new organizational unit. In our experience, this is not usually required. Instead, proceed with the step “Go to Security > Access and data control > API controls in the left-hand navigation and click Manage Third-Party App Access.” and when you’re asked to set the scope, you can select “All in <your organization> (all users)”. Only users who have been provisioned will be able to log in using SSO. This way, you do not need to modify your existing organization unit setup.
-
Before testing your connection at the end of the setup wizard, make sure you granted access either your test user (e.g. your own account) or all users you want to have access via SSO. Select Test Connection.
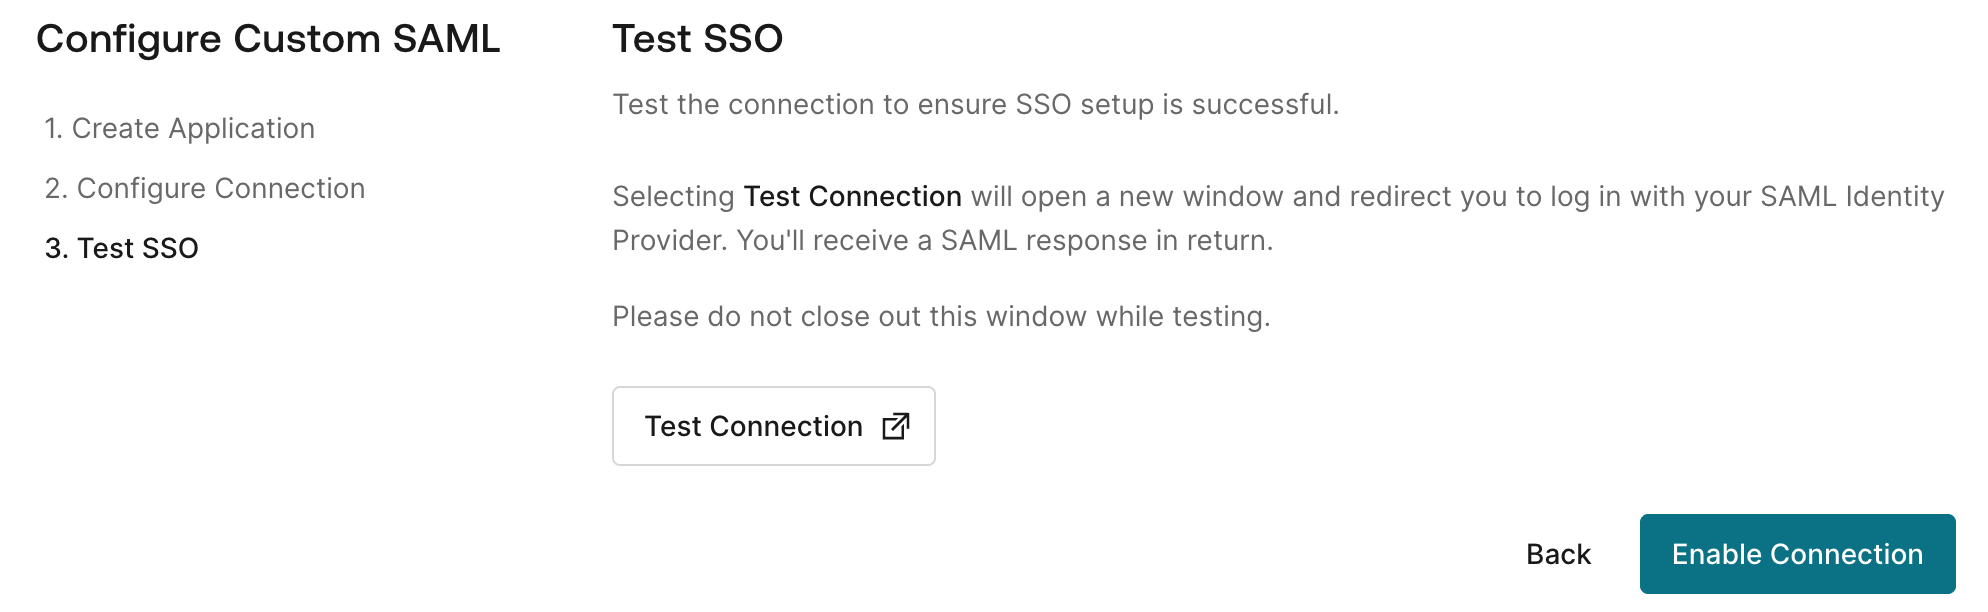
-
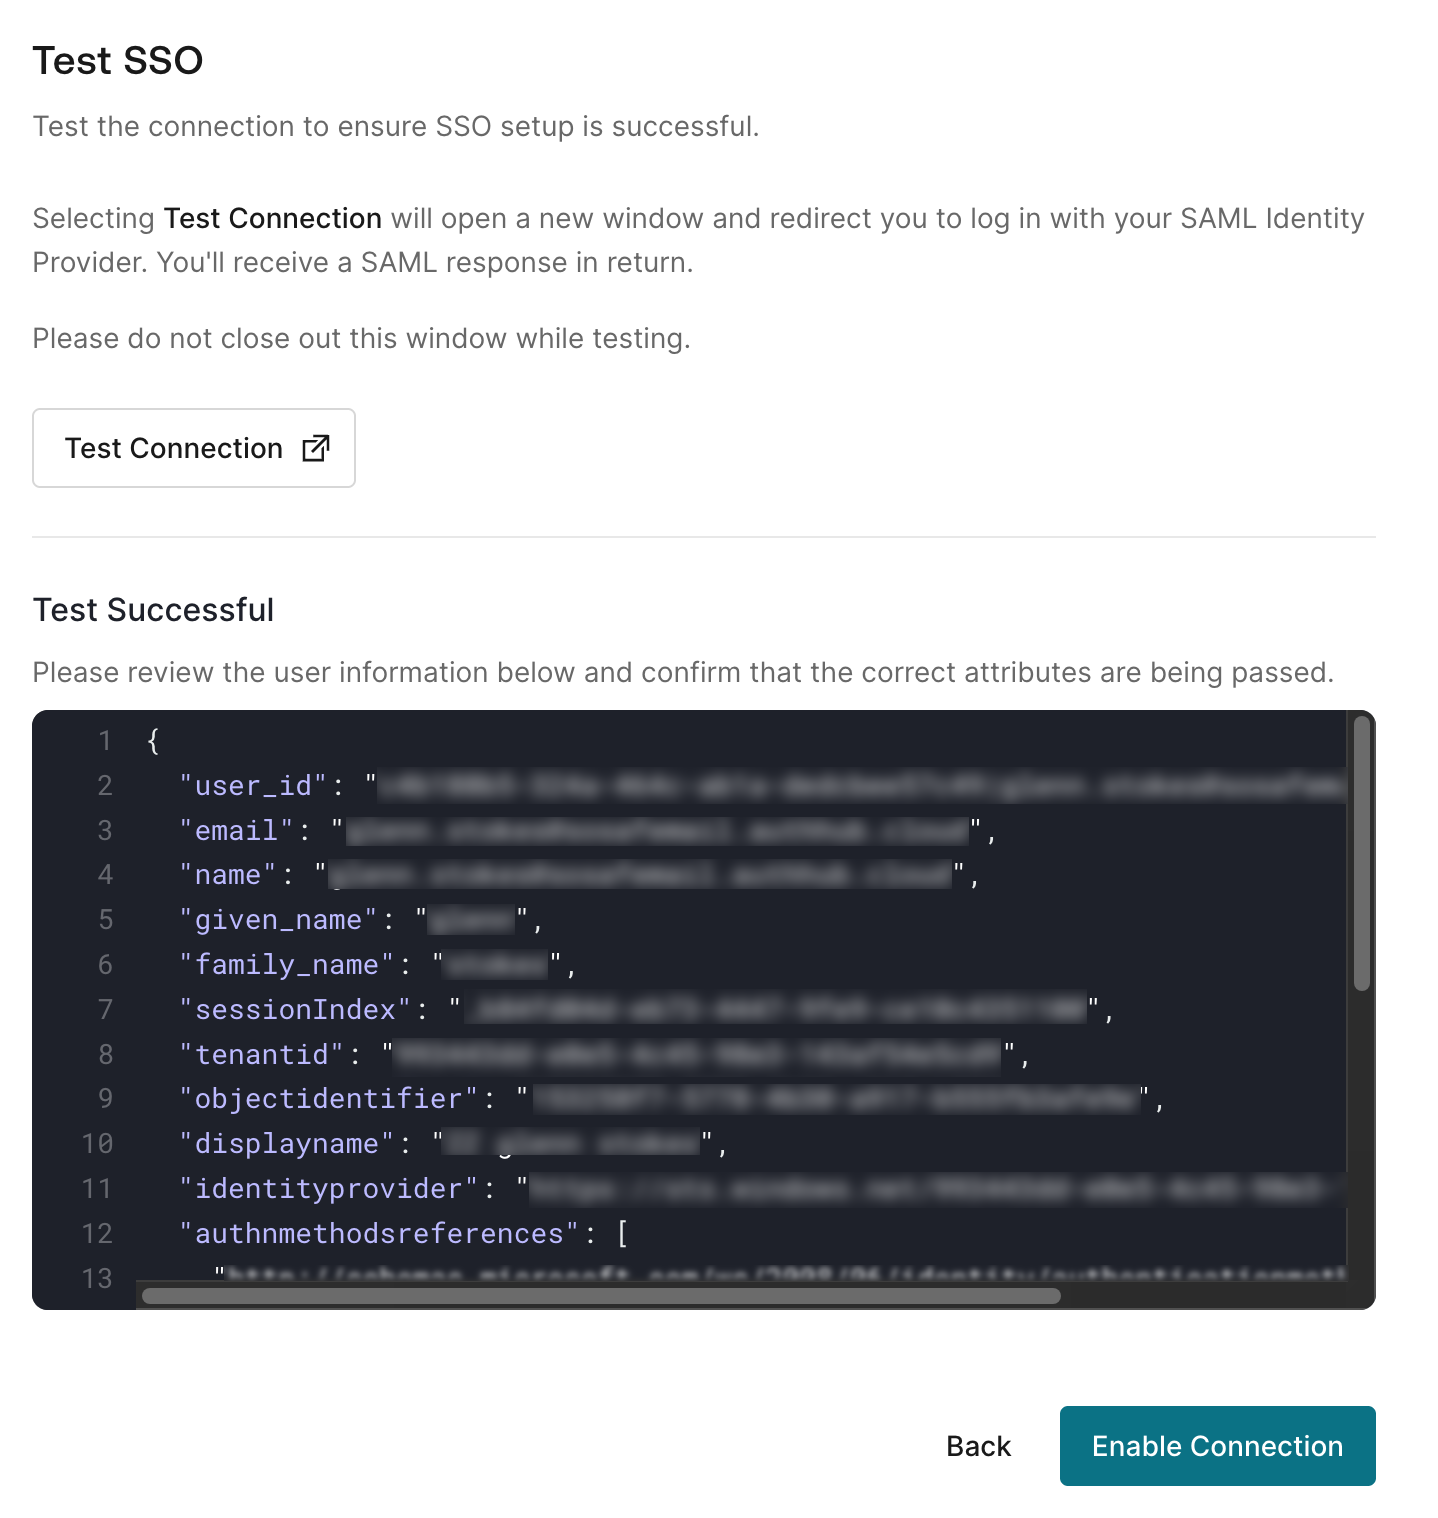
A new tab will open and you might be prompted to enter your company account credentials. If the test was successful, you can close the tab and you will get a preview of the user information that was submitted.
-
Select Enable Connection. Your SSO should now be active and working. Check to see if it shows as “✅ verified” on Settings / SSO in the Manager.
Note that it can take up to 10 minutes before all data has been synchronized.
Disabling and deleting Auth0 SSO
-
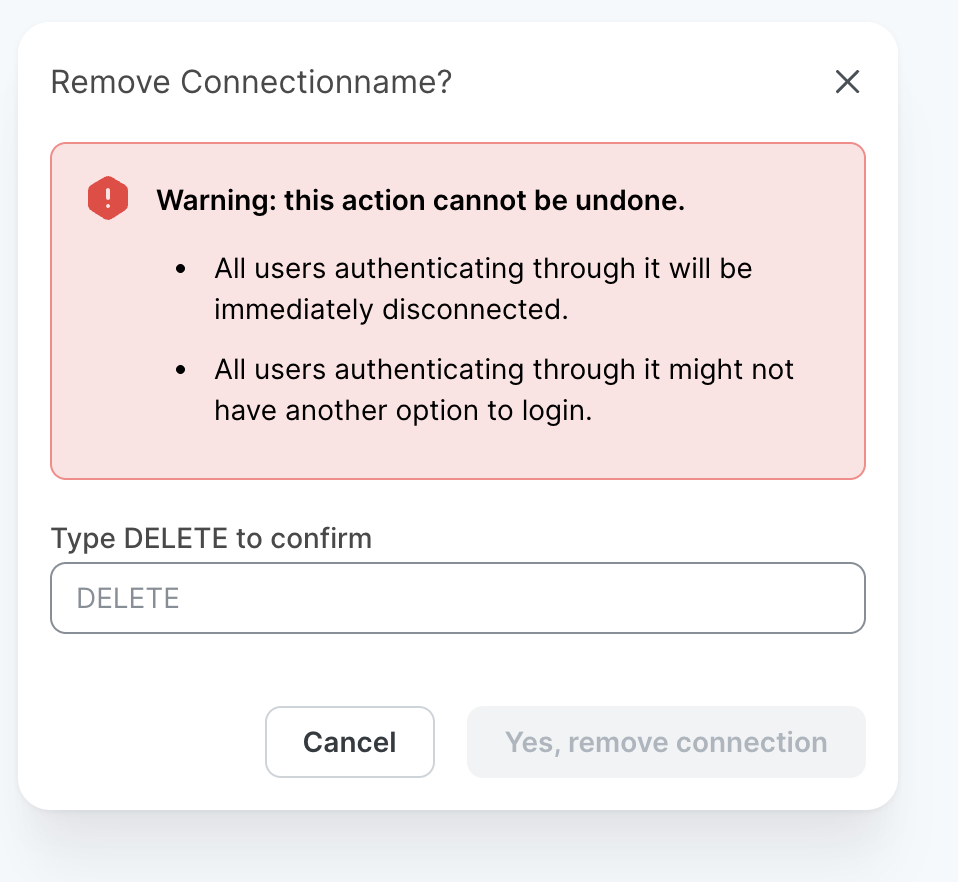
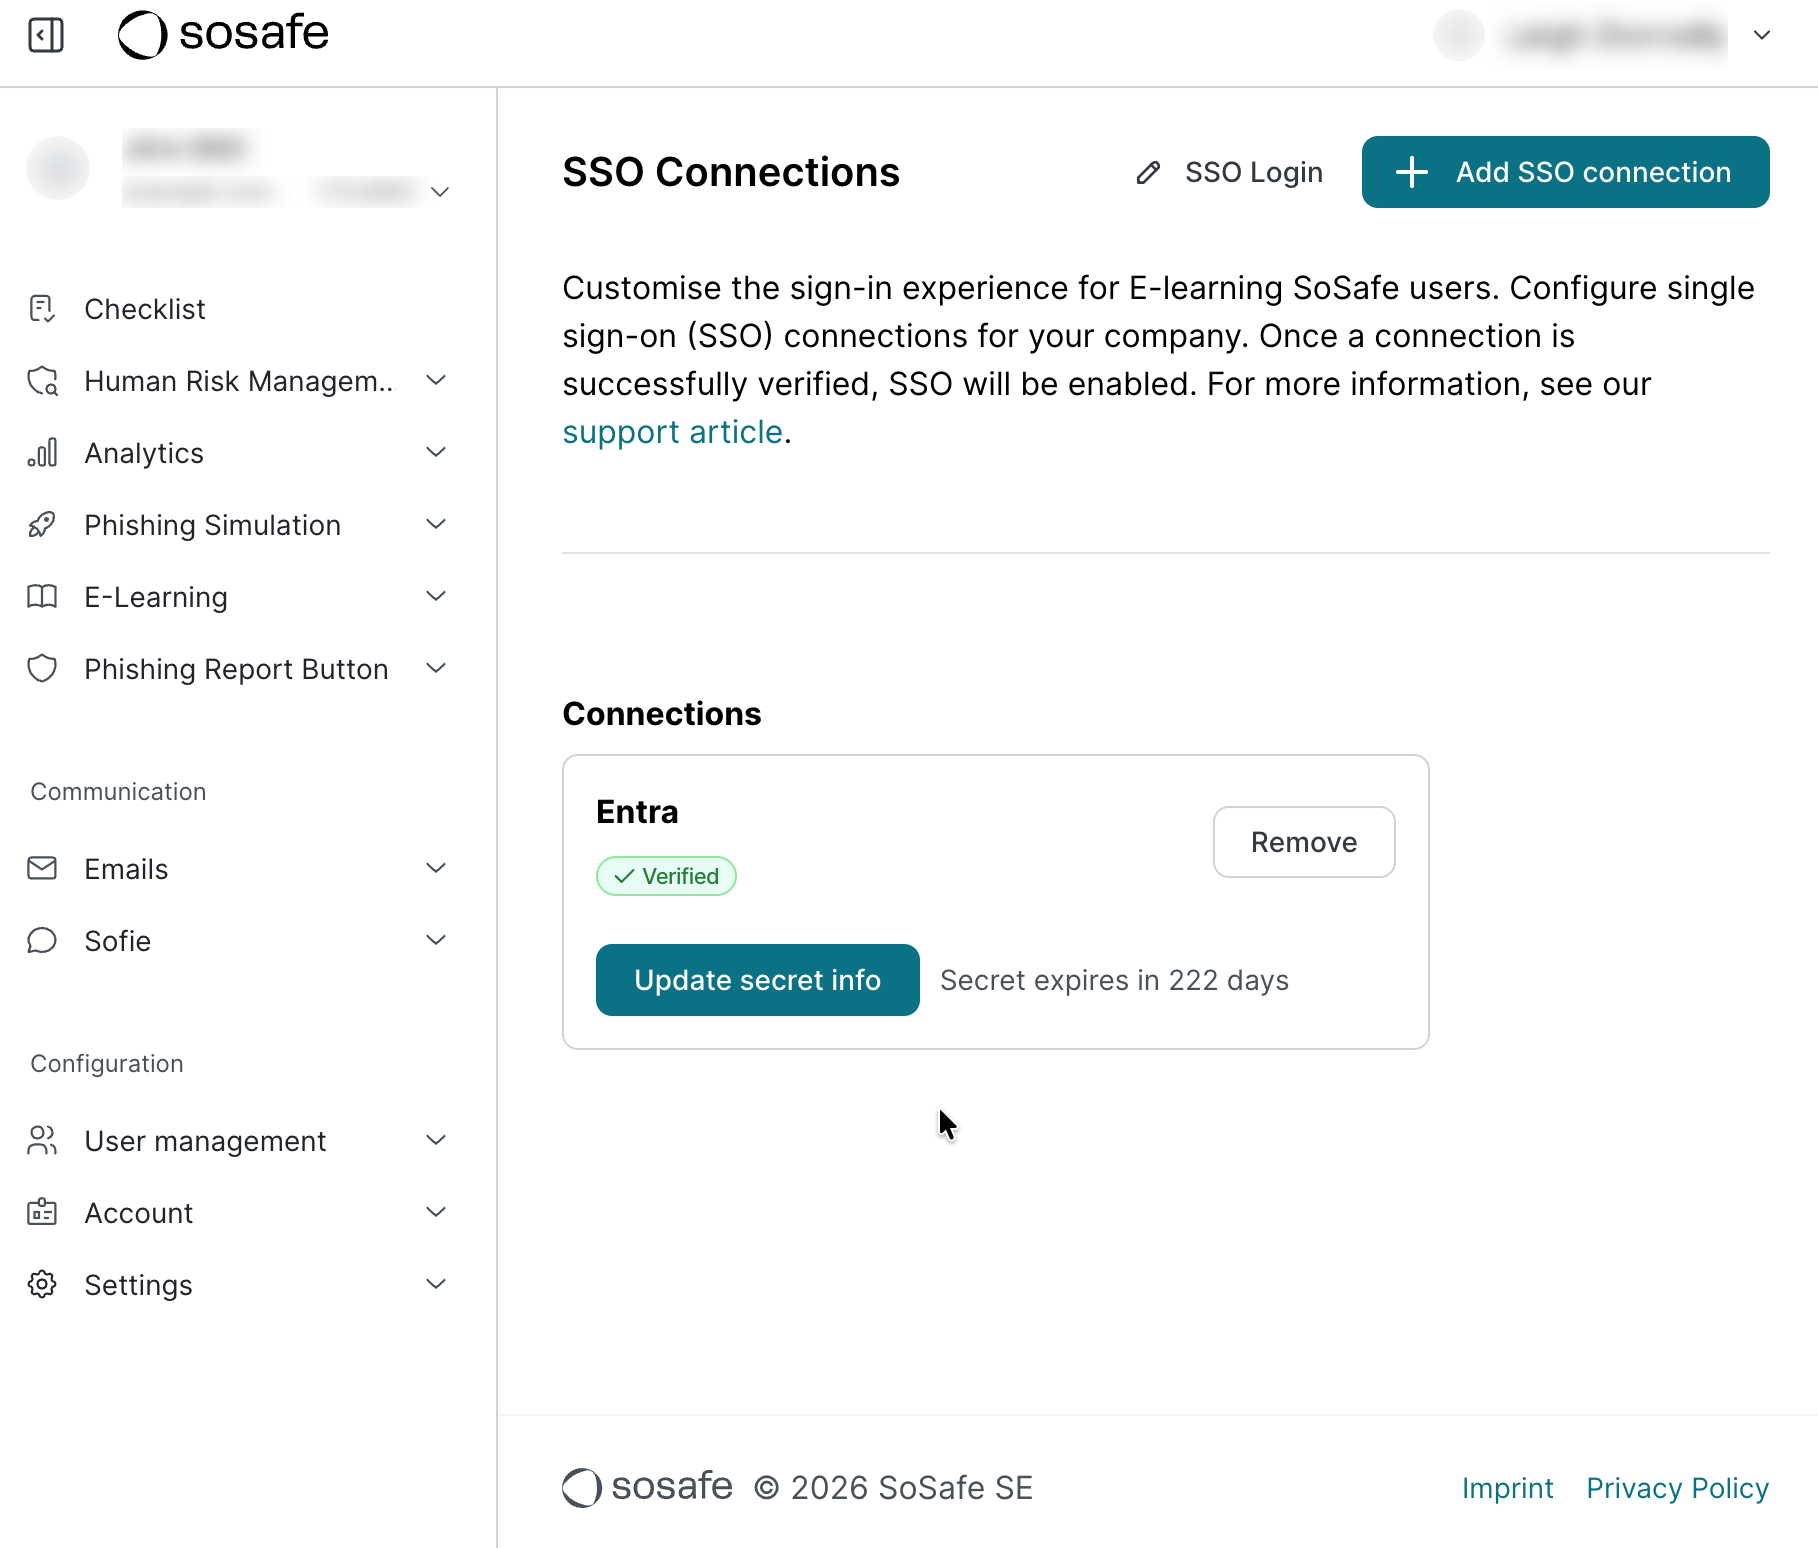
Go to Settings / SSO in the Manager and select Remove. You will be asked to confirm the deletion.
-
Recommended: In your identity provider, delete the application you created during the setup process.
Managing secret expirations
Auth0 SSO connections rely on a shared secret that you create and provide to SoSafe during the connection setup. For security reasons, these usually have expiration dates. This means that eventually, you will have to refresh the secret to keep the connection working. We recommend keeping track of the secret expiry date. To make this easier, you can save the expiry date for the connection in the Manager so that you will know when you have to update it.
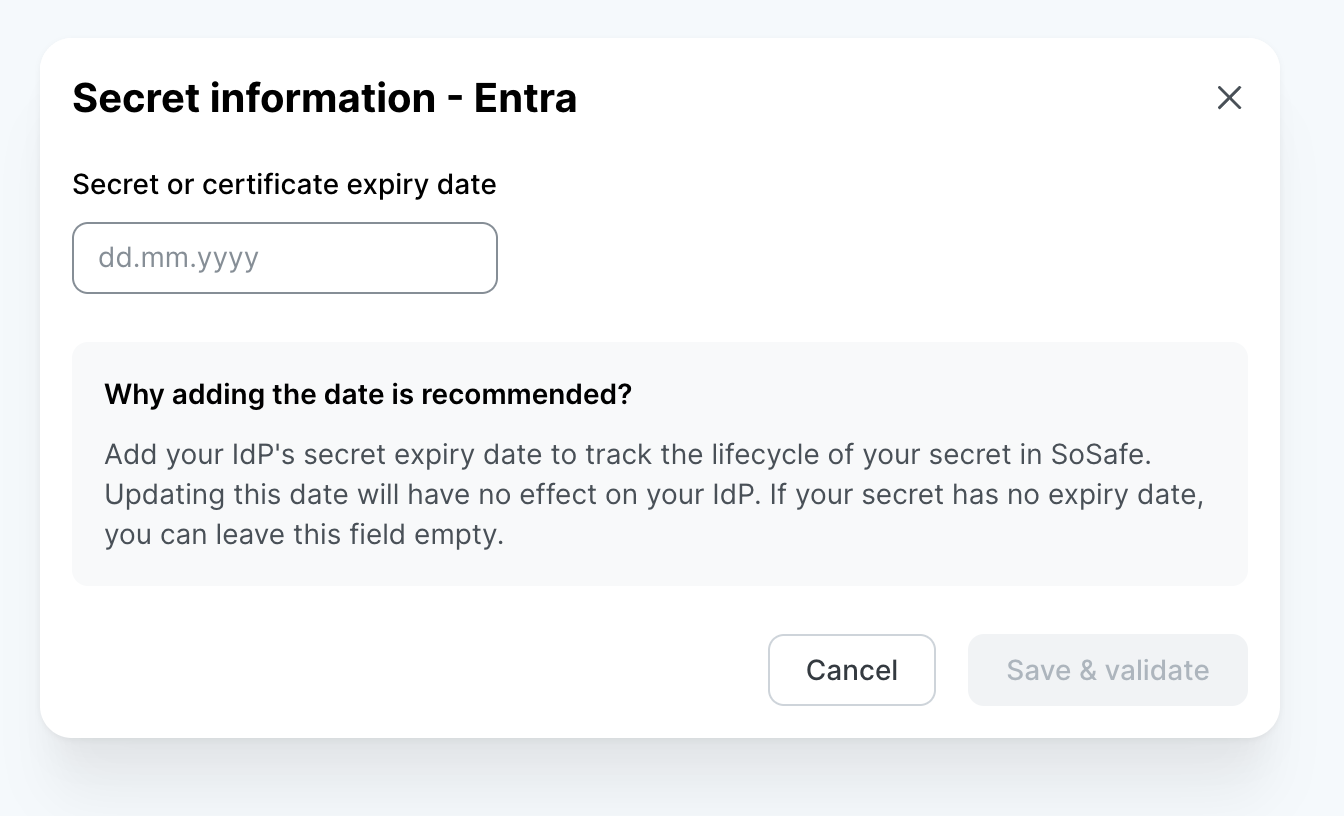
Adding an expiry date
-
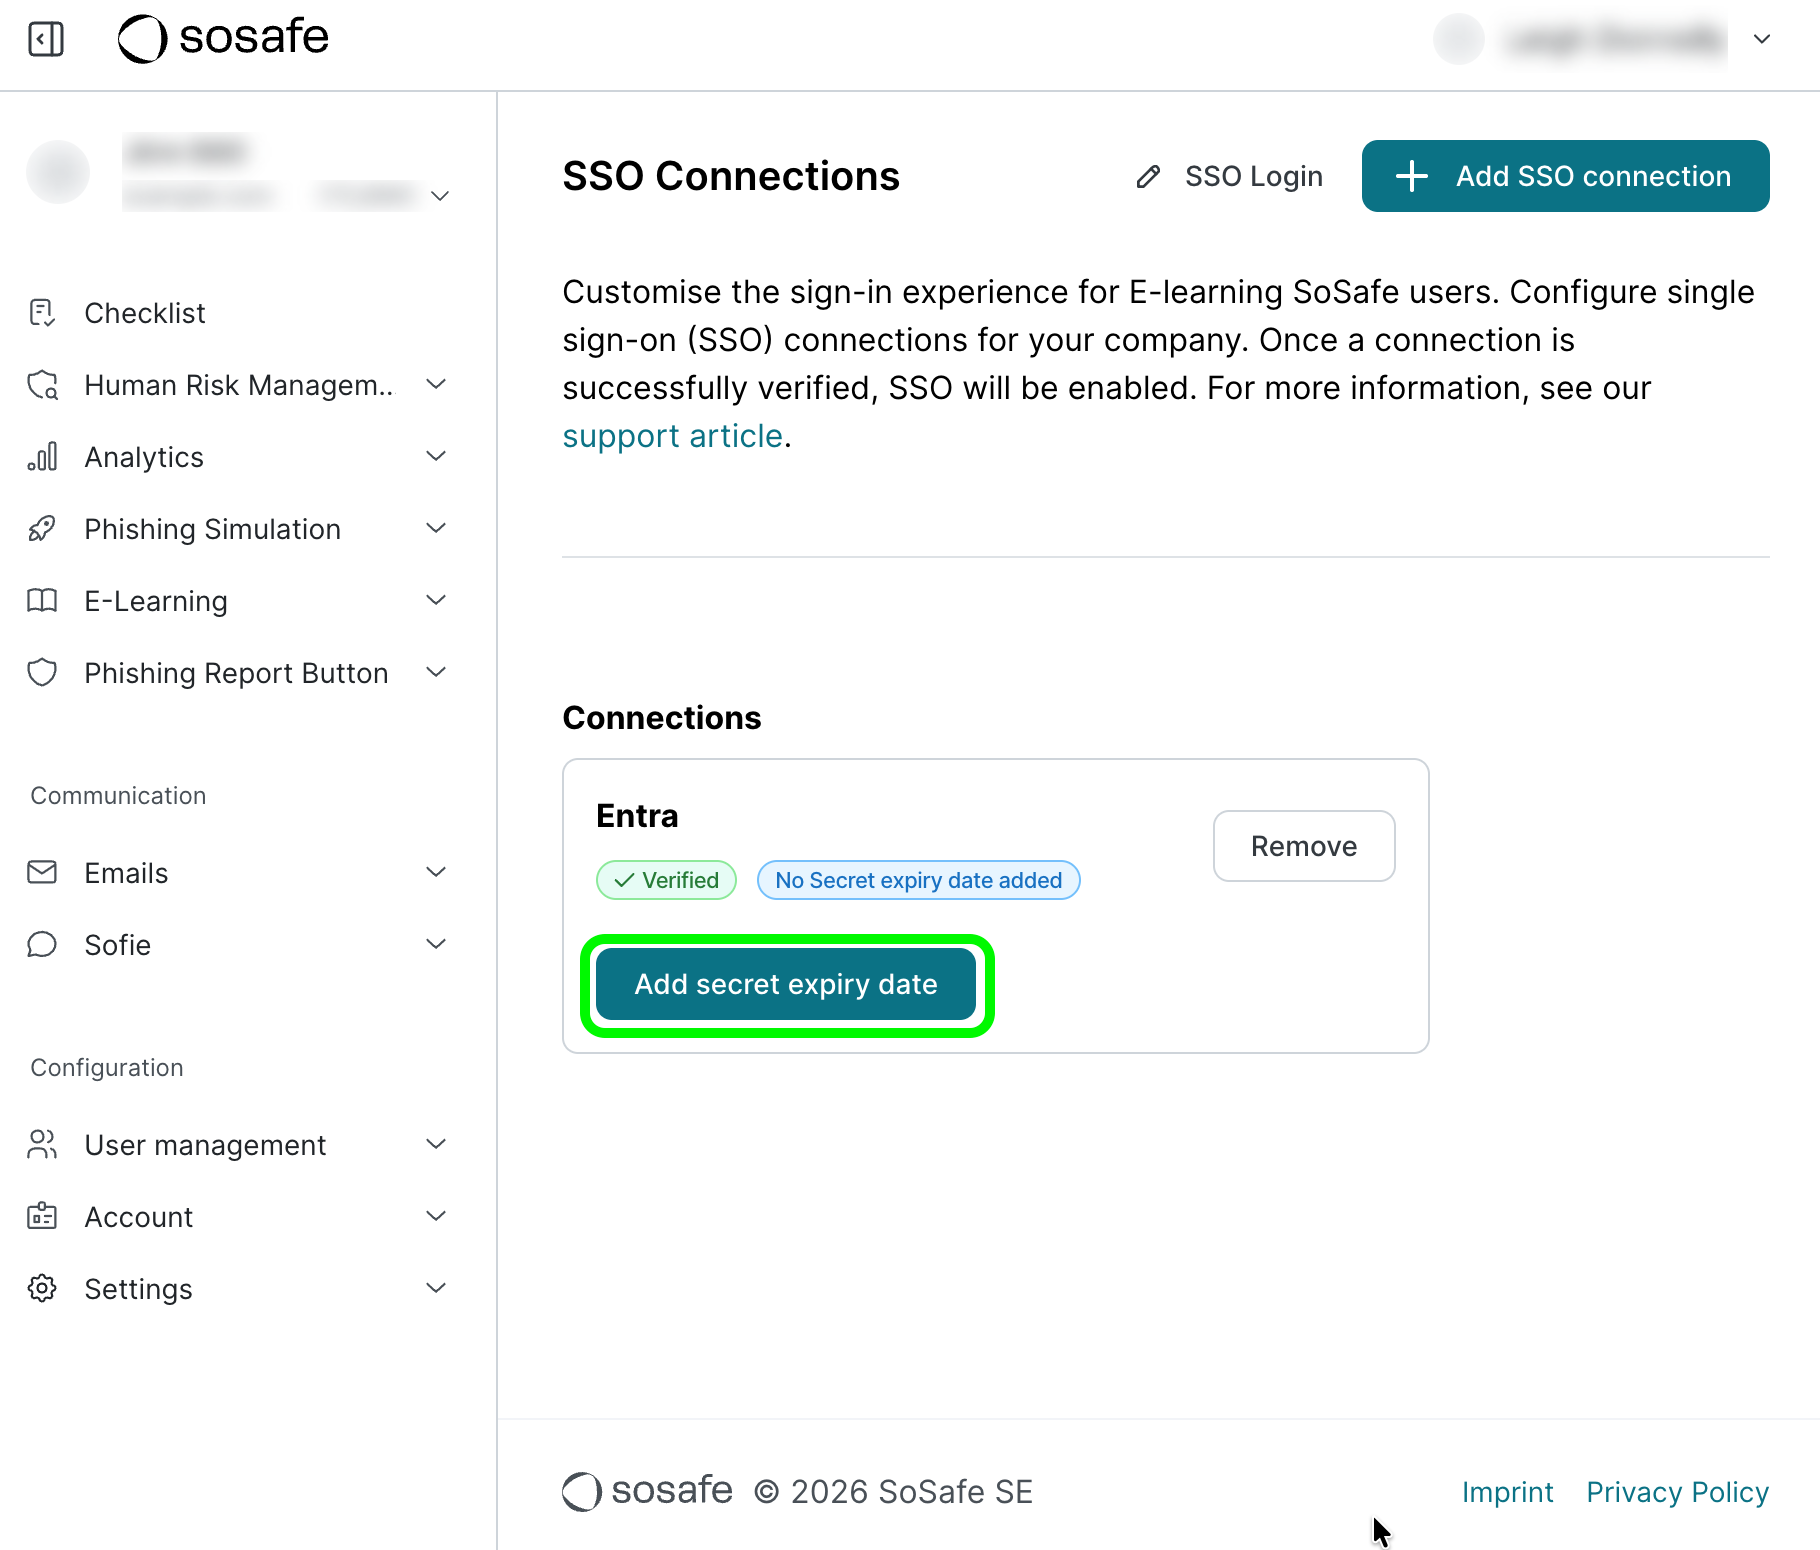
In the Manager, navigate to Settings / SSO. Find your SSO connection and select Add secret expiry date. A new dialog window will open.
-
Here, add the expiry date by selecting the date picker. Afterwards, select Save & validate.
Updating your secret
-
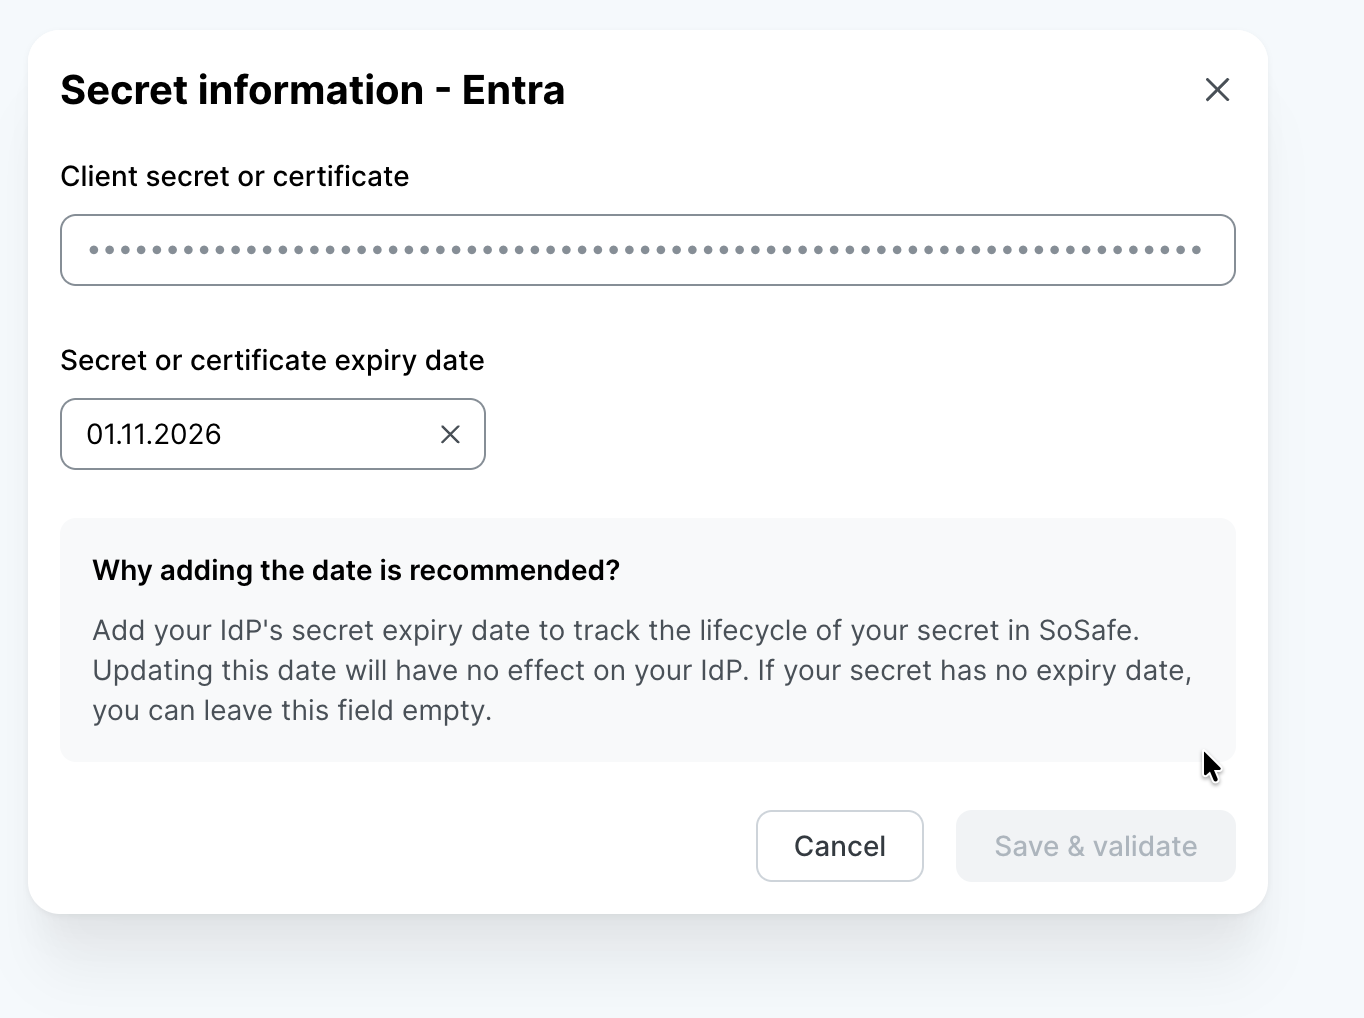
In the Manager, navigate to Settings / SSO. Find your SSO connection and select Update secret info. A new dialog window will open.
-
Paste the updated secret information in the first text field. Next, use the date picker to update your expiry date. Afterwards, select Save & validate.
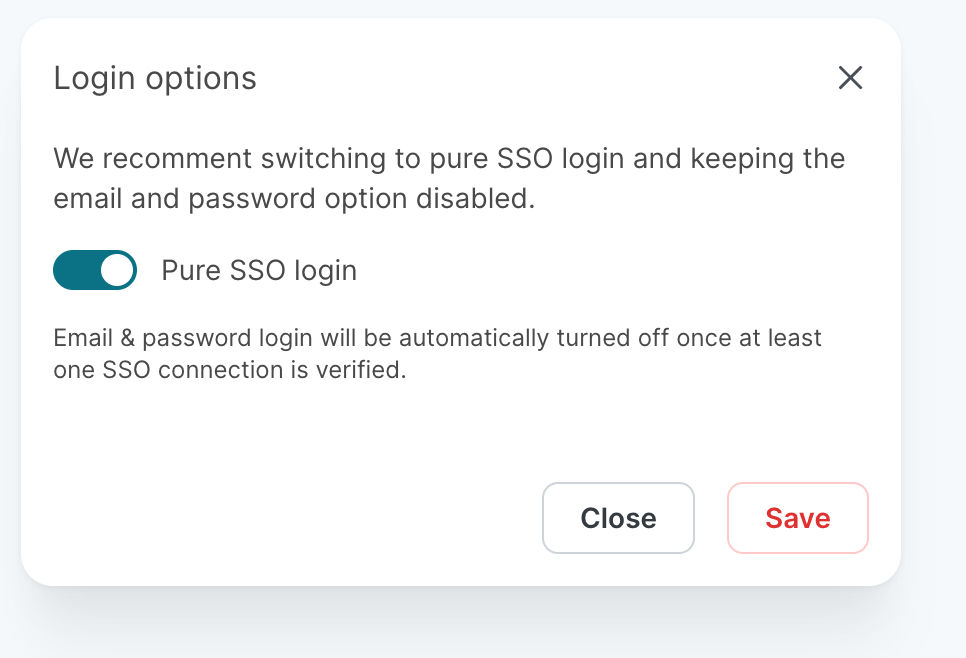
Login options
There are two available options to control how users can log in after you have activated Auth0 SSO:
-
Pure SSO login: When this option is activated, all users can only log in via SSO if at least one SSO connection is verified. This is our recommendation.
-
Hybrid login: When this option is activated, users can log in with their email/password credentials or via an SSO connection.
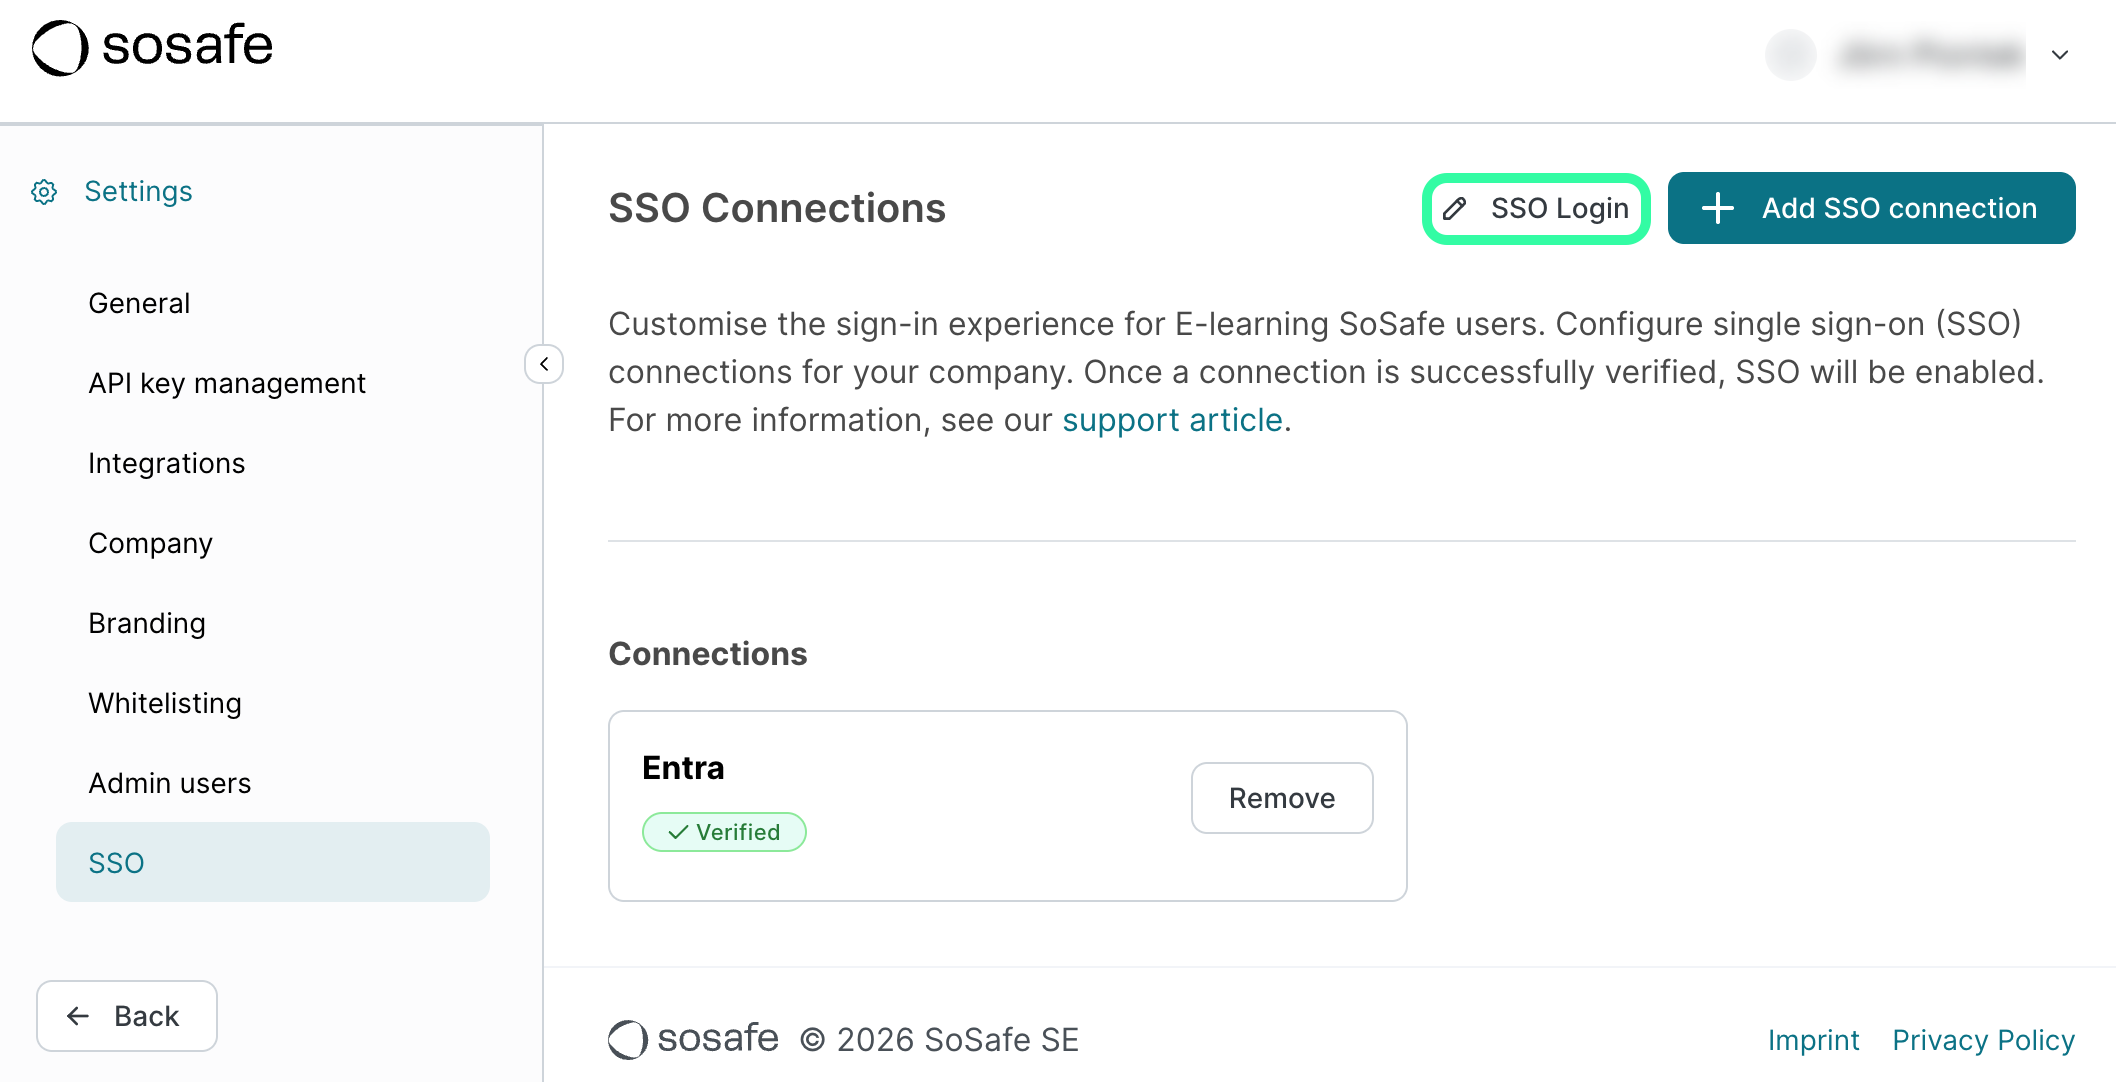
To change this setting, select the text to the left of + Add SSO connection (see above). This text will also show the current setting. A new dialog window will open, allowing you to change this setting: